
Sometime it is nice to put a signature on a picture, may be a photo that you want to publish in you site or to expose in an exhibition.
There are several ways to do that, but in the following I’ll show the one I found easier and more flexible: it implies the definition of a custom brush.
Here the step by step instructions when you are using Photoshop Elements 13:
- Create a new canvas (File –> New). The default size of 7 inches by 5 inches (more or less 18 x 13 cm) at 72 ppi can already be fine.
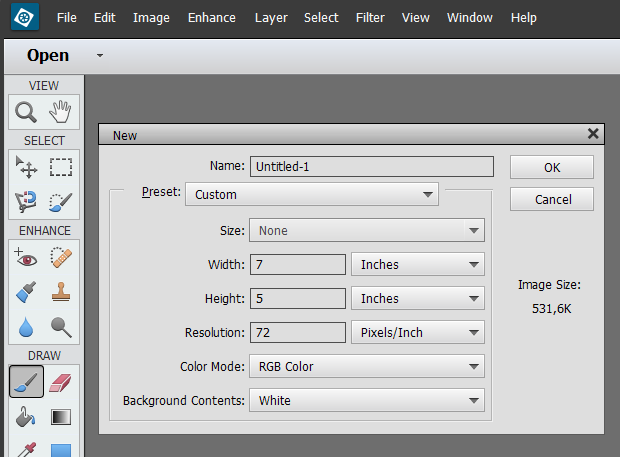
- Ensure that your foreground color is set to black or trasparent: you will be able so set the color of your signature afterwards, every time you will want, changing the color of the brush you are going to create.
P.S: if you set the Background to White the brush will not be transparent all around the signature. - Select in the left tool bar the Horizontal Type Tool (T) and spend some time choosing the font you want to use in your signature and write your name. I suggest you to choose a font that simulates the handwriting (so named with the term “script” or “handwriting“) like Bickham Script Pro Regular (bold and italic), Brush Script Std Medium (bold and italic), Bickham, Vladimir Script Regular (bold), Rage Italic Regular (bold), Brush Script, Brush Script MT Italic, Bickham Script Pro Regular, Caflisch Script Pro Regular, Segoe Script Bold, Script MT Bold Regular, Rage Italic Regular, Kunstler Script Regular, Palace Script MT Regular, Vladimir Script Regular, Lucida Handwriting Italic, Edwardian Script ITC Regular, Rage Italic Regular or also some others like Mistral Regular, Giddyup Std Regular, Curlz MT Regular, MT Italic Bell MT Italic, Adobe Garamond Pro Italic, Magneto Bold, Garamond Italic, Gigi Regular, Freestyle Script Regular, French Script MT Regular, Parchment Regular. The choice, anyway, is a matter of taste.
Possibly try also to apply the bold and/or italic style … - Select the Rectangle Marquee Tool and draw a box around the name you written, trying to get your marquee selection as close as you can to the text.

- Once you’ve got your selection made, go to the Edit menu and choose Define Brush from Selection (or Define Brush Preset). When the name box pops up, you can name it appropriately like “My Signature” in order to then easily find it in the brush combo selection box.

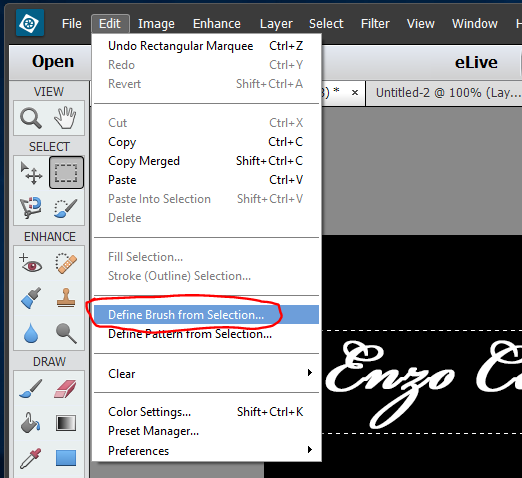
Define Brush From Selection
From now on, you will have listed your new brush among others ones and you can choose it every time you want to add your signature to a picture. Note that every time you can select its size, color and opacity as you like …

Your My Signature brush is available
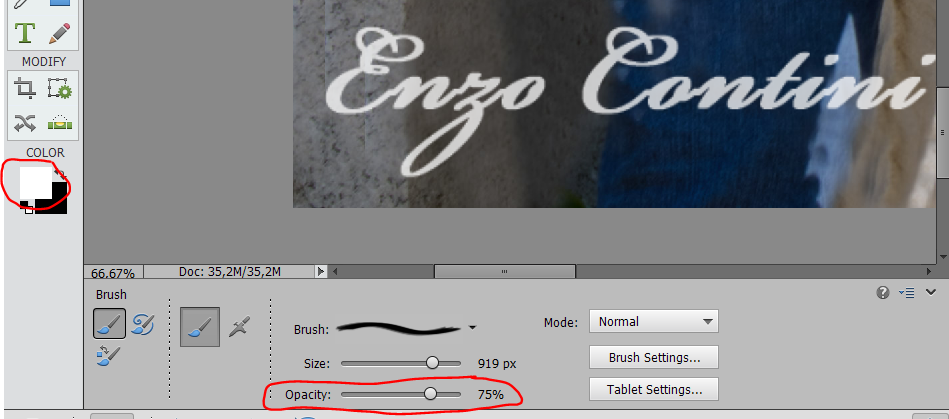
You can change color brush, may be picking it from the picture itself:

Change the brush color
Very often it is convenient to set the opacity less than 100% in order to not be too much evident in the picture …
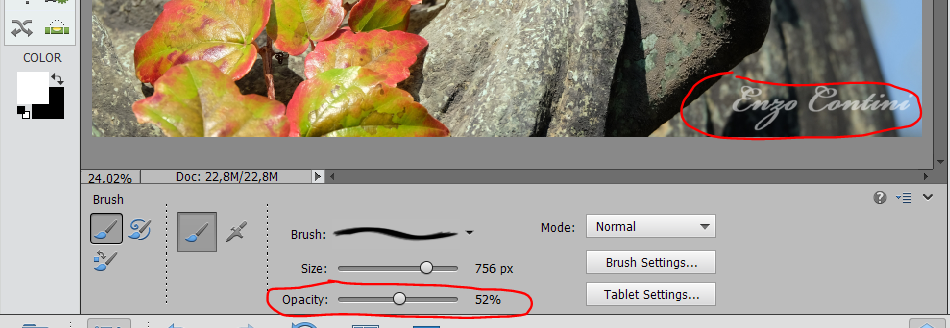
Change the brush opacity
======================
NOTE
If you want to have your real signature, and not using a predefined font, you can do that following this tutorial: Create a Digital Signature in Adobe Photoshop: Colour Range Tool & Minimum Tool


