
I really do not know why, but there is someone that do not want to have the latest update of Windows 10 to be installed, at least automatically, even leaving you to choose the time when you prefer to start the update procedure. I think however that it is reasonable that an administrator of a platform can have the right to decide if, when and how to make an update on his device … but only for updates that are not related to security or bug fix, in my opinion.
… may be this could be for him a reason why someone is hesitant to update to Windows 10.
Personally I do not recommend to use any method to disable updates of the SO unless you have very special needs (e.g. server alone that must do only do few specific thinks): possibly you may only need to postpone the installation of new features after some months when they are completely tested all over the world, and the user interface already allows it with the defer option. It is mandatory to make security updates …
Anyway, I list in the following some suggestions and some useful link for whom want to have more control or even stops updates.
First of all, in Windows 10 Home edition (the consumer version equivalent to basic Windows 8 / 8.1, Windows 7 Home Basic and Home Premium) it is not possible to make changes to how the Windows Update works – it is automatic and you cannot choose which updates will be downloaded and installed: however it is possible to postpone the restart of the system, but after some time the system will restart on its own.
Defer upgrades
Business Windows 10 editions (e.g. Professional, Enterprise, Education) let you defer upgrades to your PC: only security updates will be installed. When you defer upgrades, new Windows features won’t be downloaded or installed for several months. Deferring upgrades doesn’t affect security updates. Note that deferring upgrades will prevent you from getting the latest Windows features as soon as they’re available. You can set this option going to Settings -> Update & Security – Advanced options

Defer upgrades
Let me choose if update drivers software
In the Device Installation Setting section of the Advanced system settings, you can decide to make automatic or not that kind of update.
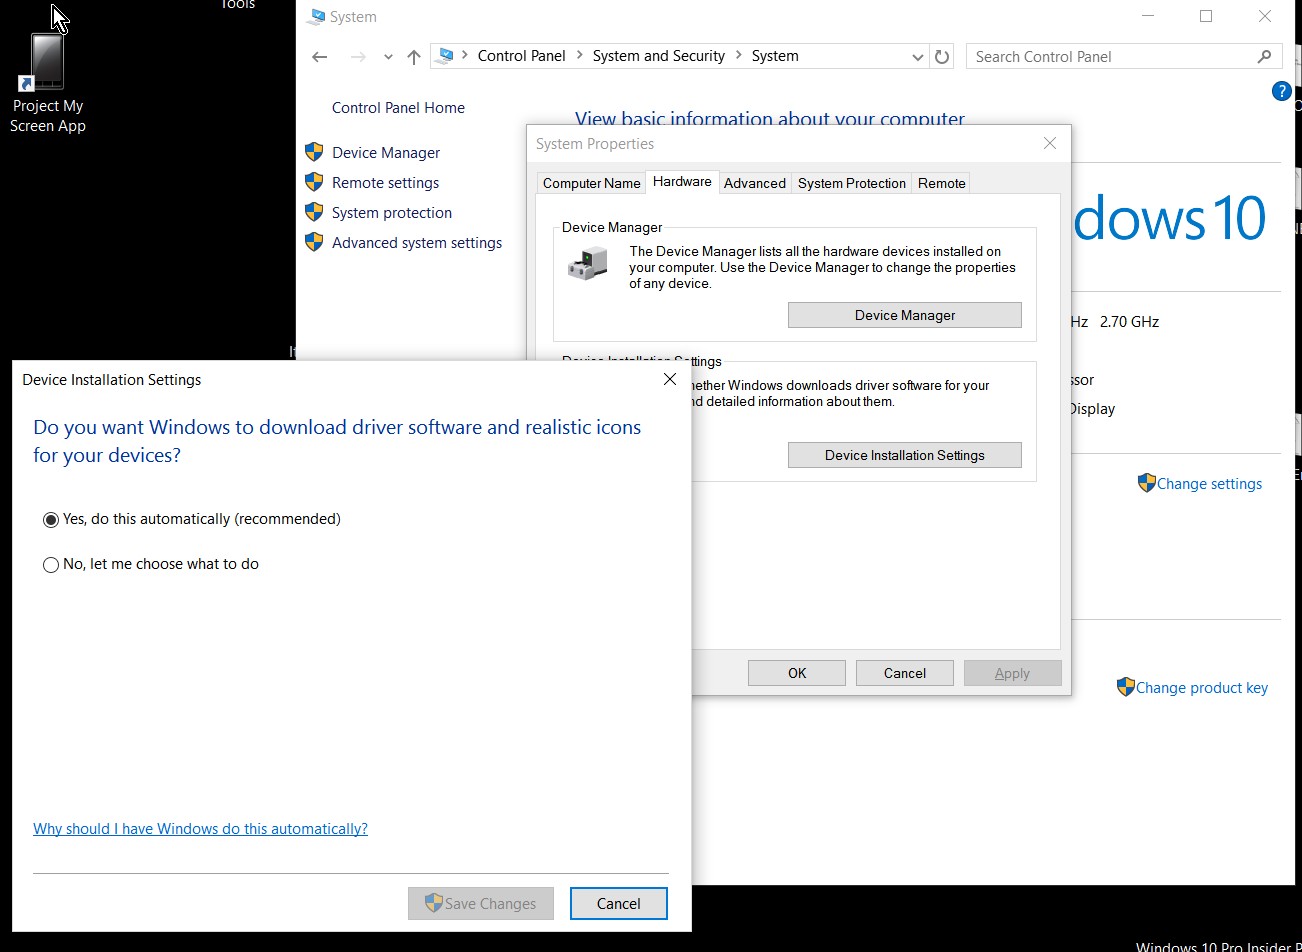
Device Installation Settings
Stop Windows Update service
Go to Control Panel -> System & Security – Administrative Tools -> Services (or right click on Windows Start icon, select Computer Management and then Services and Applications -> Services): stop the Windows Update service.

Stop Windows Update service
Modify the Group Policy
If your version of Windows 10 has Group Policy, you can also change some settings using the Group Policy Editor. Run (Windows button + r) gpedit.exe and navigate to the following policy setting: Computer Configuration -> Administrative Templates ->Windows Components -> Windows Update
On the right-side, double-click on Configure Automatic Updates (and may be some other attributes) and change its settings to suit your requirements. You can, for example, make Windows 10 notify you before downloading Updates (double-click on Configure Automatic Updates to open its configuration box; select Enabled and then, from the available Options, from the drop-down menu, select Notify for download and notify for install; click on Apply and exit; restart the PC): for more details see here.

Local Group Policy
Metered connection option
Settings app, select Network & Internet, scroll down, and select “Advanced options” below the list of Wi-Fi networks. Enable the “Set as metered connection” option. This option only affects the Wi-Fi network you’re currently connected to, but Windows will remember this setting for each individual Wi-Fi network. You can see here and here for more details.

Metered connection
Modify registry keys for Automatic Update configuration options
The registry entries for Automatic Update configuration options are located in the following subkey: HKEY_LOCAL_MACHINE\Software\Policies\Microsoft\Windows\WindowsUpdate\AU and the Registry Keys can be modified as you like (e.g. NoAutoUpdate
NoAutoRebootWithLoggedOnUsers).
Use Update Freezer
First of all I did not try it … I only read about it: it can be downloaded here and you can find a nice post that describe it here.

Update Freezer
“Show or hide updates” troubleshooter
I did not use this tool too but you can find some info here

Show or Hide Updates tools
=============
In the Microsoft Community forum, you can find also the post “Disable Windows 10 upgrade prompt” that suggests the following possible procedures if you want to stop this kind of notification.
Method 1 – Uninstall the Windows Update as follow:
Uninstall KB 3035583 as documented here and reboot.
Then run Windows Update, Check for updates immediately after rebooting. It will find KB 3035583 and want to re-install it.
Uncheck it and then right click, Hide it. That will prevent it from being re-installed the next time Windows Update runs.
If the issue persists, follow method 2.
Method 2 – Rename the GWXUXWorker.exe
Terminate the GWX.exe process using Task Manager. Moreover rename the GWXUXWorker.exe and GWX.exe to .old as suffix from directory location:-
Windows\System32\GWX, if getting any issues while renaming then give the system permission’s to respective files and then try to rename it again. OR you can delete the entire directory folder.
If the issue persists, follow method 3.
Method 3 – Registry key to stop the notification :-
- Press Windows key + R on your keyboard to open the run dialog box.
- In the Open field, type regedit.
- Click OK.
- Click Yes on the User Account Control (if prompted).
- Navigate to HKEY_LOCAL_MACHINE\SOFTWARE\Policies\Microsoft\Windows\CurrentVersion\Gwx
- Right click.
- Click Modify.
- In the Value data: field, dword:00000001.
- Click OK.
- Exit Registry Editor.
Important this method contains steps that tell you how to modify the registry. However, serious problems might occur if you modify the registry incorrectly. Therefore, make sure that you follow these steps carefully. For added protection, back up the registry before you modify it. Then, you can restore the registry if a problem occurs. For more information about how to back up and restore the registry, click the following article number to view the article in the Microsoft Knowledge Base: How to back up and restore the registry in Windows
=====================================
Finally, you can find in the following some useful link you could want to navigate to 🙂
- Choose how updates are installed
- A workaround to Turn Off Windows Update in Windows 10
- Make Windows 10 notify you before downloading or installing Windows Updates
- Windows Updates – Hide or Show in Windows 10
- Wireless Network Metered Connection
================
Finally if you really do not want to have your PC upgraded to Windows 10 you can follows the instructions available in Upgrade to Windows 10: FAQ


