
I already wrote an old post related to possible tools that can be useful especially in a smart working and collaboration work, speaking of Office 365 for Business that can be used by companies employees like the one I work for.
Every employee can access to Office 365 for Business through a browser from the https://portal.office.com URL, logging with his own Corporate credentials: the offered service allows to have a 1 Tera personal storage area on OneDrive, where it is possible to share also documents with colleagues and collaborators. Moreover it is available also all the other components Office 365 Online suite that allows also the shared editing of a document (in real time). For example, more users can access to the same PowerPoint slide or OneNote item, that can be also used as a shared blackboard to draw what needed and share ideas and schemas: cooperative work can be done with whatever other Office program, like Word Online, allowing to make changes in the text by more editors, in real time.
It allows also the creation of SharePoint sites, possibly each associated to a project and accessible from all the involved colleagues, with the capability to share documents (handling also versioning): all that documents can be easily synchronized with a local directory on the PC of every member defined for the site.
Office 365 services can be accessed from both a PC Windows or Mac (web access to the portal) and a smartphone, installing proper free Microsoft apps available for all platforms (e.g. SharePoint from Windows Store, iTunes or GooglePlay).
===========================================================
In the following, I will describe in detail how to create a SharePoint site to be shared among colleagues, accessible everywhere from Internet, attaching also documents possibly synchronized on your PC on a SharePoint/SiteName folder. SharePoint uses the OneDrive, available in Office365, to store those files so the synchronizing method, with a local copy on the PC, is nearly the same used with the OneDrive associated to every Microsoft account.
The setting procedure is simple, but even more it will be easy to access to the site and all the related data (e.g. stored documents) afterwards the first time, simply accessing to a site from a browser or using an app on your smartphone!! In the following the step by step instructions:
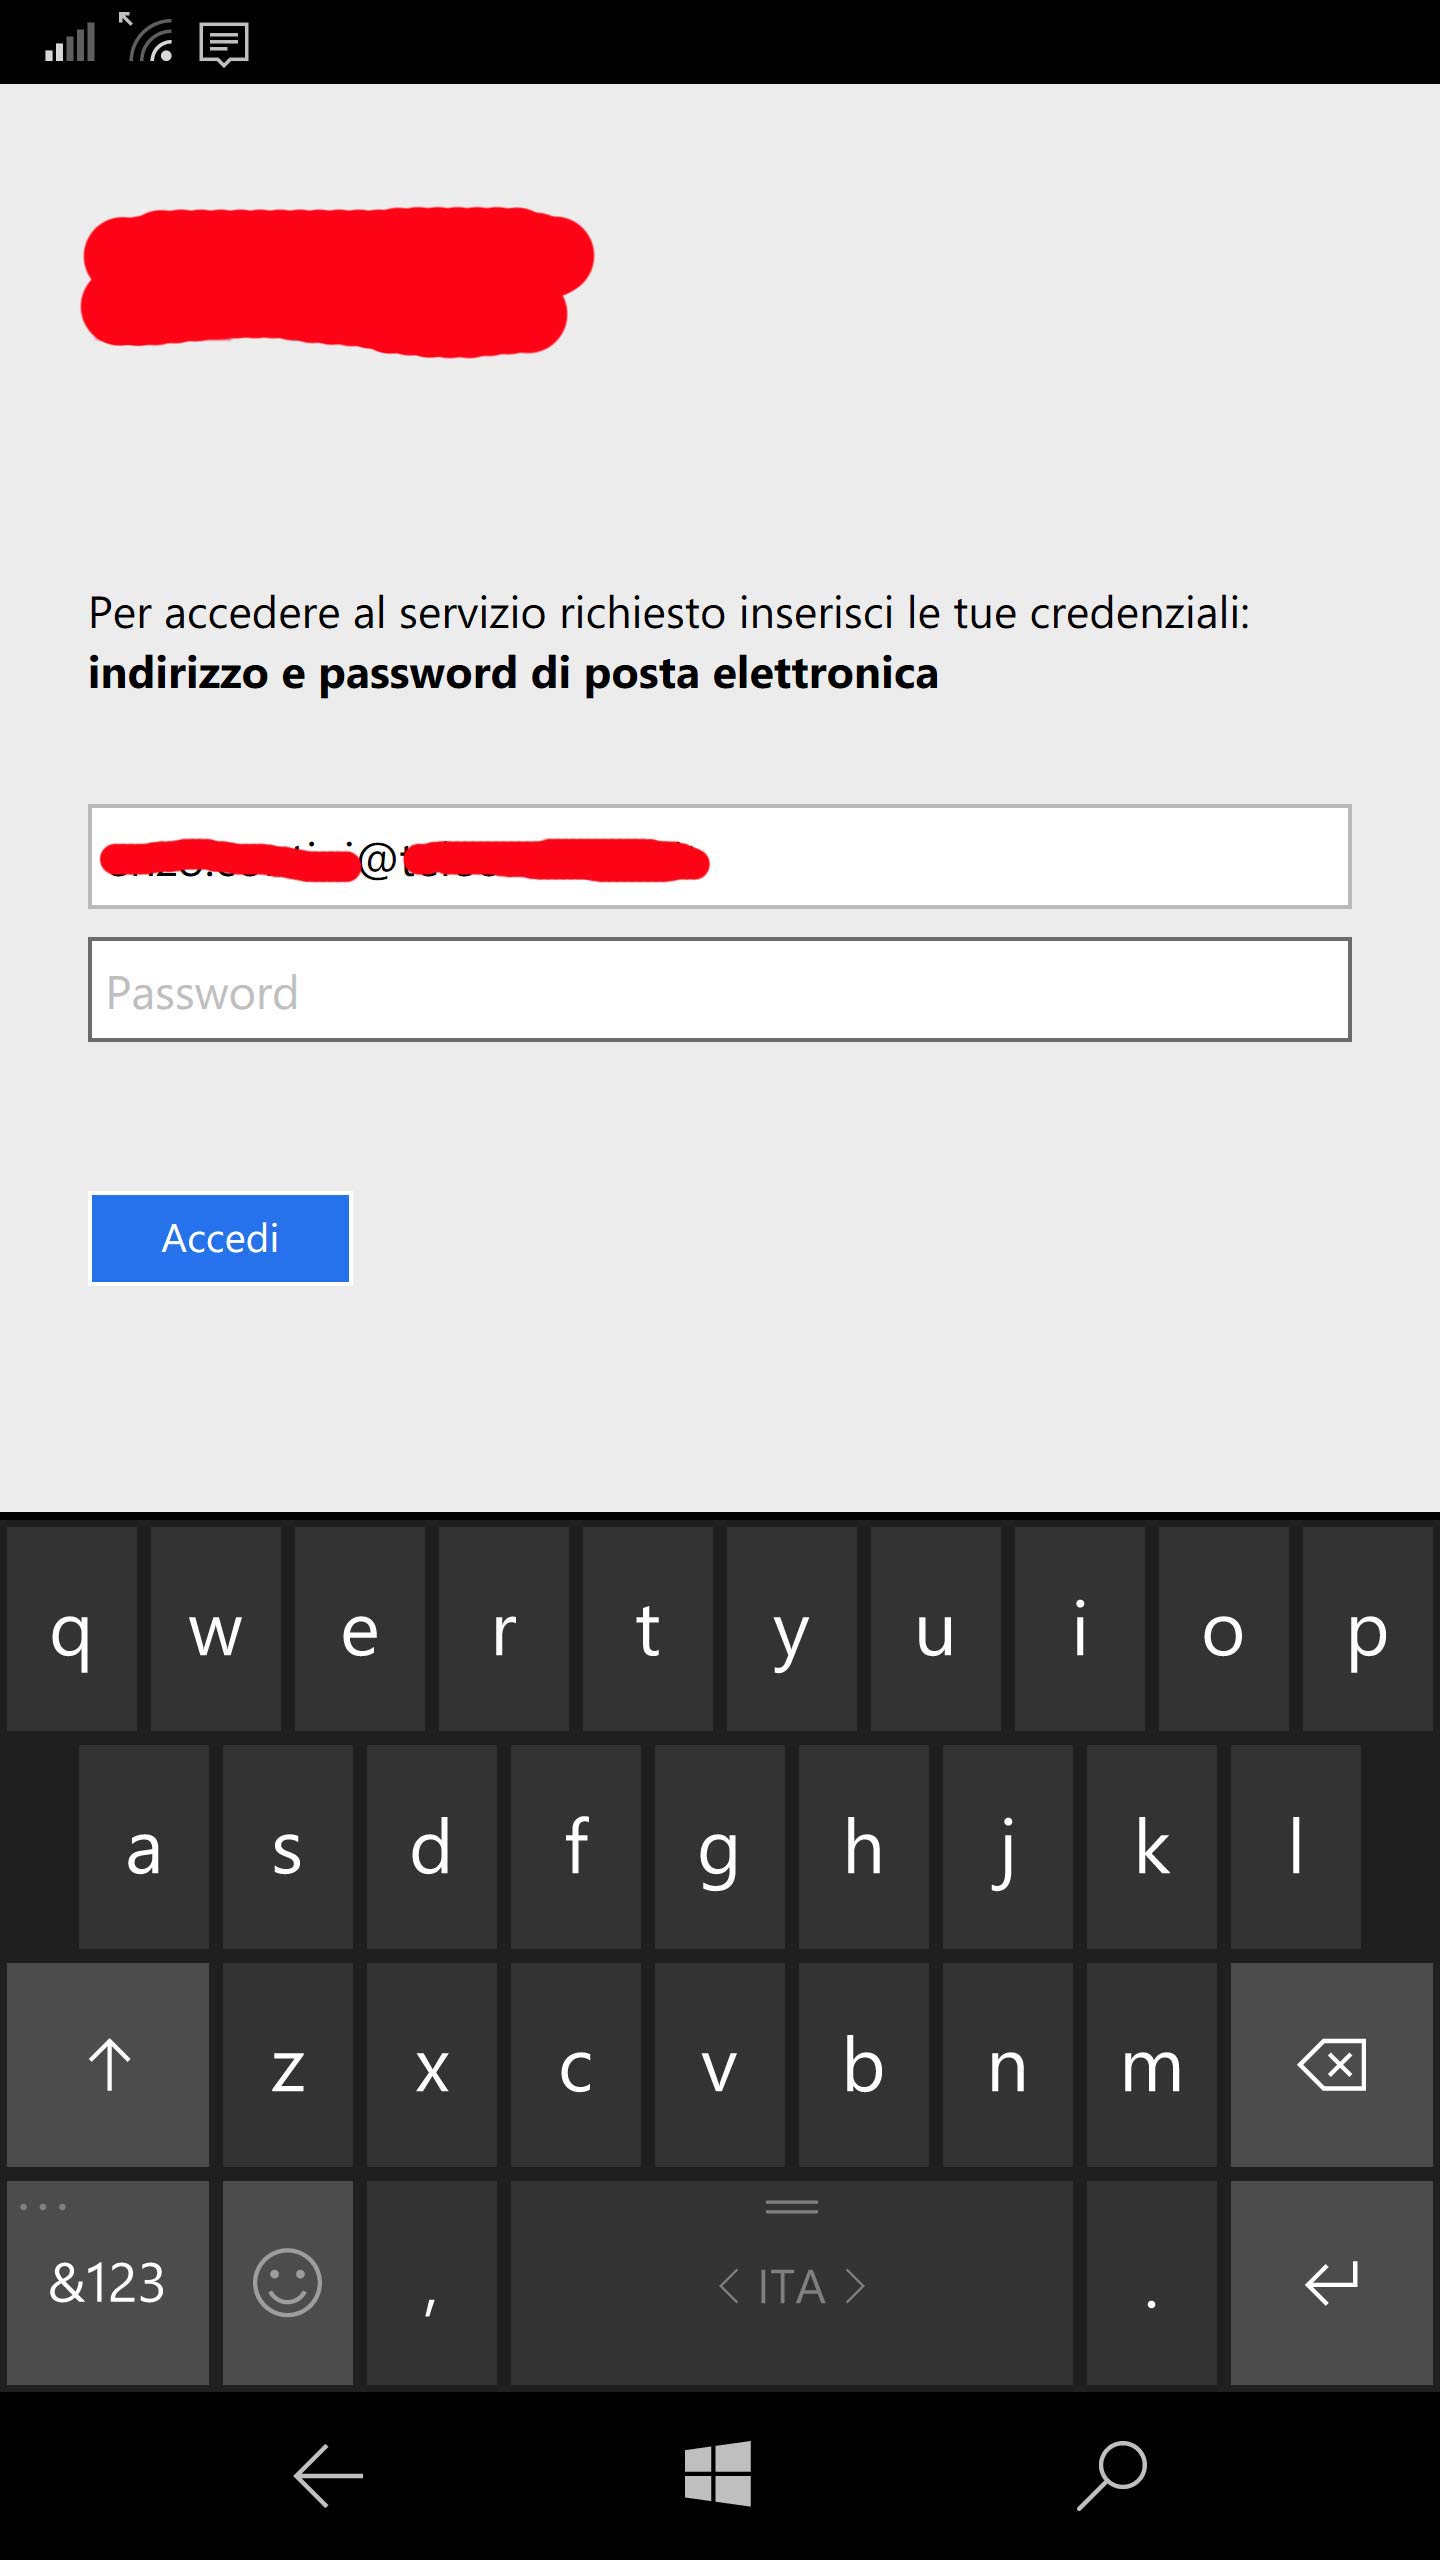
Step 1 – Go to https://portal.office.com: if it is the first access (and possibly you have already a private access to Office 365) you have to select Use another account to login with your business account.
![Login with the account associated to your Company (<em>username</em>: your company email) [not with your private personal <em>Microsoft Account </em>]](https://enzocontini.blog/wp-content/uploads/2017/06/office1.png?w=450&h=351)
Login with the account associated to your Company (username: your company email) [not with your private personal Microsoft Account ]

Type your company email as username
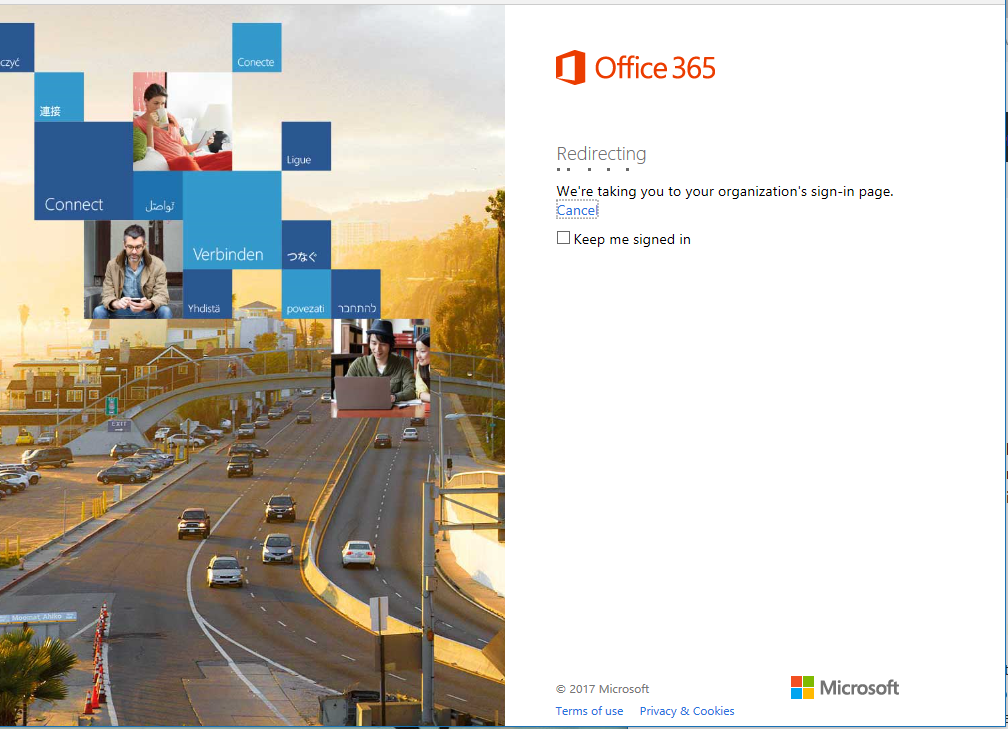
Redirection to your Company authentication server (associated to the inserted email)
Step 3 – Insert your email and your company password (no username input is required)

Insert your email and your company password
Step 4 – You then access to the Office 365 Dashboard: note that the next time you browse into portal.office.com you will access directly this Dashboard page. From here you can access to all the offered services: for example if you want to access to your 1 TByte OneDrive business storage, you have to click on the OneDrive tile.
Because in the following we want to deal with the SharePoint features, the SharePoint tile is the one of our interest.

Office 365 Dashboard
Step 5 – The SharePoint section shows the sites you already follows and possibly suggest some other ones. Note that there is also on the bottom right a Get the mobile app link that allows to download the proper app also from your smartphone. Have a look at the end of the post if you are interested in details on how to use the mobile app.

SharePoint section
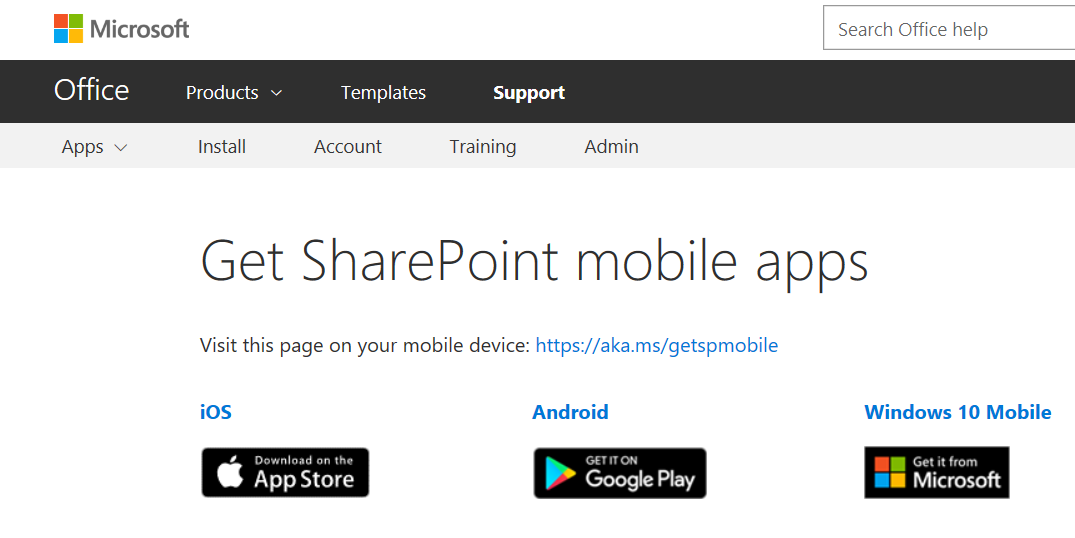
SharePoint mobile apps download
Step 6 – If you want to create a new site, you have to click on + Create site link on the upper menu (see this link for more detailed instructions). The name of the Team site should be unique within your Company, because the site address includes that name. You can set the privacy of the site in order that everyone in your organization can see it or define only some members of it. You can then chose additional owners of the site and, set members that can have full access to it: starting to write the surname of each you colleague, allows you to choose him from a proper combo that shows the filtering results from your Company directory. As stated in the form. “Members will receive group conversations and events in their inbox. They can unsubscribe themselves at any time by selecting the unsubscribe link in group emails“.
Note that if you want to make the site private (neither reading access to other colleagues not includes as members of the group) you have to click afterwards on the Setting icon on the top right (the Microsoft wheel icon) and then select Site information: the same if you want to modify its name or change other site options.

Creation of a new SharePoint site

Definition of the owners and members of the group site
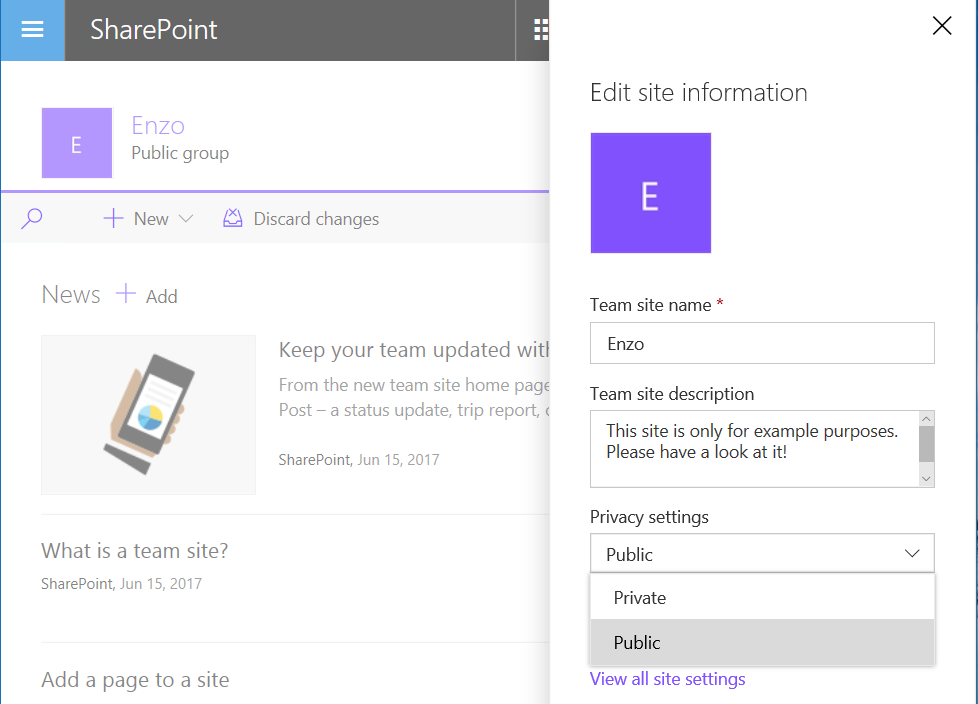
Possibly change site settings (e.g. privacy)
Step 7 – Every user, set as member of the group, will receive a Welcome email with the link to check out the team site. Clicking on the Check out the team site link will open that site on the predefined browser: possibly the user can save that link in the favorites.
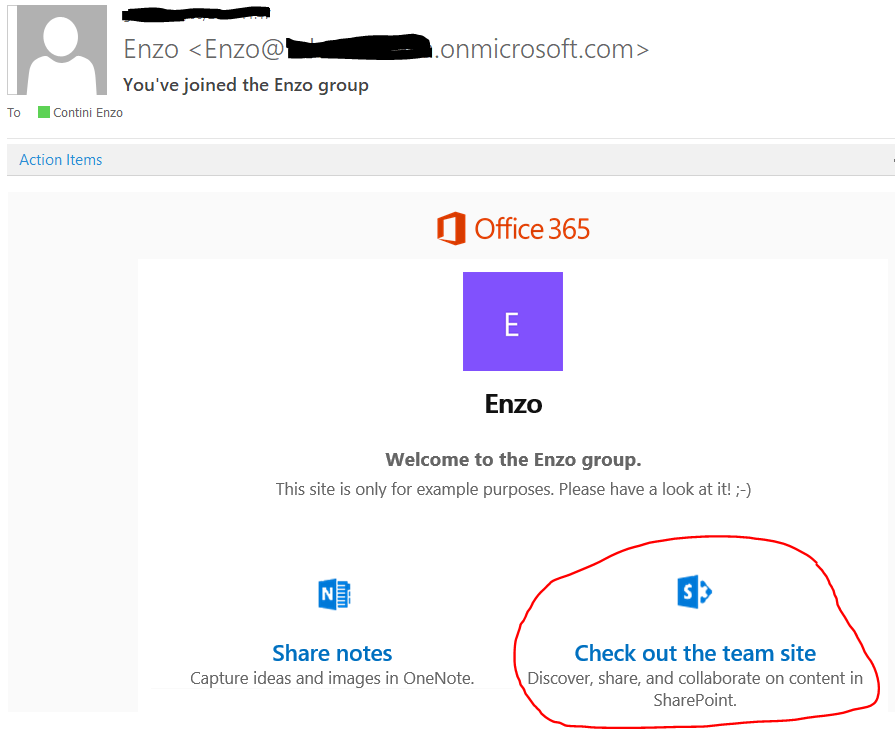
Email received by all inserted members
Step 7 – Once accessed the site, if the Follows link is selected, that site will appears in the SharePoint main page (and so it can be easily always accessed from portal.office.com selecting the SharePoint tile).
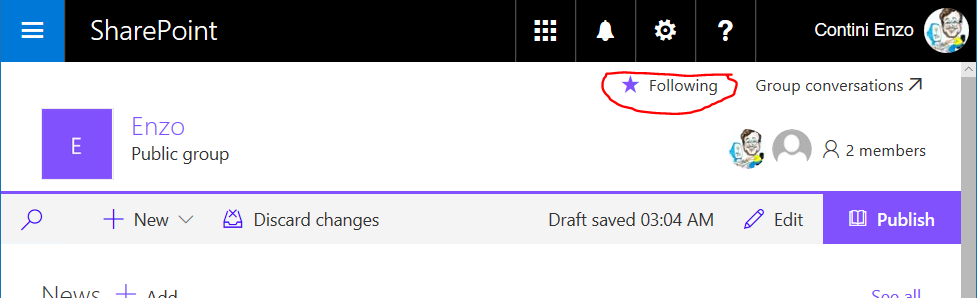
Click the star icon to follow that site and have it listed in your SharePoint homepage

The new site is available also from the SharePoint homepage among the followed sites
Step 7 – To add and share whatever documents in the Documents section of the site (select Documents item from the left menù), all members of the group can use two possible way:
- Drag & drop the file in the Document section (see next screenshot)
- Insert the file in the folder SharePoint/NameOfSite – Document (e.g. if the site is called Enzo, the folder will be SharePoint/Enzo – Documents, as shown in last screenshot od next step 8).
Note that it may be required to force a refresh of the page in the browser to have an updated view of some possible new available files.

Drag & drop files in the Documents section of the site and possibly synchronize with a directory on your PC
Step 7 – Please READ THE IMPORTANT NOTE at the end of this step.
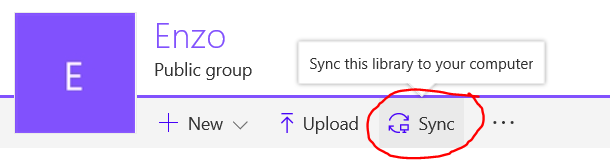
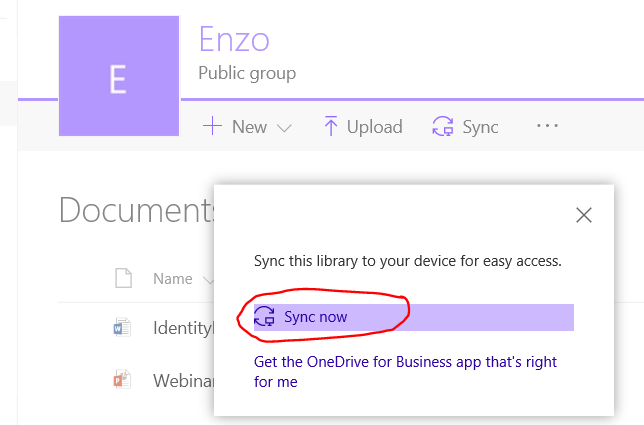
Possibly all the Documents section can be synchronized with a directory on your PC, simply clicking on Sync top menu item and agreeing in the Microsoft OneDrive for Business alert popup. If the OneDrive for Business is not installed yet, possibly you have to install it (see the Get the OneDrive for Business app that’s right for me link).
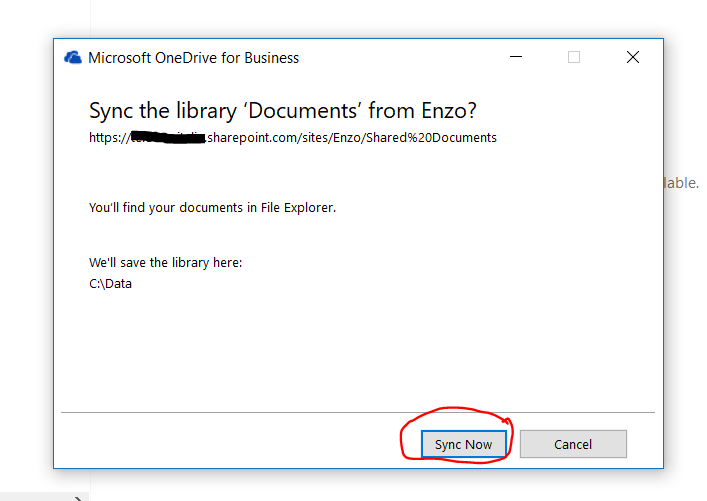
A proper directory nameOfSite – Documents will be created in a SharePoint directory, in a similar way as it happens for your OneDrive synchronization: that folder will contain all the documents available in that site and always synchronized. If someone modify a synchronized file, whenever it is saved locally, it is updated on the site repository and then there is an automatic synchronization of that file on all members PC directory (obviously if that kind of sync was activated by that user).
Moreover, as already said in previous step description, every new file inserted in that directory will be automatically synchronized with the Documents section of the associated SharePoint site.
Sync with a directory on your PC
Start now the synchronization
Agree to the alert popup of OneDrive for Business

A directory with the NameOfSite – Documents is created in the SharePoint folder
IMPORTANT NOTE
Note that the synchronization is done by OneDrive for Business and so the procedure is currently the one implemented by OneDrive. Therefore if you create that association with a local directory on your PC, you must take in mind the following warning that makes the use of this feature not recommended in a not
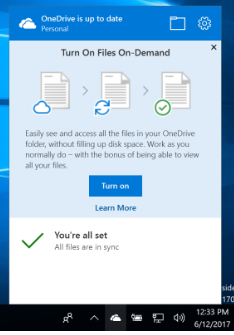
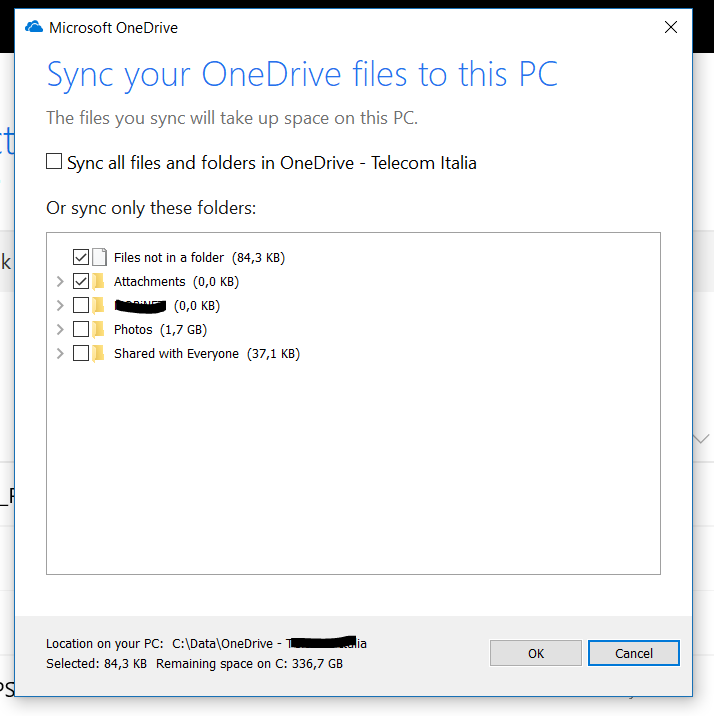
- ALL the files, available remotely on that site, currently are downloaded also locally and so, if the file repository is going to become big, it should waste a lot of your PC memory: in fact with the current version of OneDrive for Business it is yet not possible to have only a placeholder for some files and ask to have only some of them downloaded locally (or downloaded only when you click on the placeholder of that file). This is going to change and that feature – called File on-demand – was already available years ago in Windows 8 for the consumer OneDrive, before big changes in the Windows architecture had implied to rewrote the code for some components!): already the preview of the public OneDrive very recently introduced again in the Windows 10 Insider Preview Build 16215, so if you configure the OneDrive setting to have File on-demand, you can activate or deactivate for each file the option Save space and download the file only when you use it.
Online-only files don’t take up space on your computer (You see a cloud icon for each online-only file in File Explorer, but the file doesn’t download to your device until you open it; you can’t open online-only files when your device isn’t connected to the Internet. When you open an online-only file, it downloads to your device and becomes a locally available file. You can open a locally available file anytime, even without Internet access. If you need more space, you can change the file back to online. Just right-click the file and select “Free up space.”). Only files that you mark as Always keep on this device have the green circle with the white check mark. These files download to your device and take up space, but they’re always there for you even when you’re offline. For more details see Learn about OneDrive Files On-Demand.
However that feature will be available in the next update of Windows 10 (in few weeks) on the public OneDrive, but I do not know when it will be introduced also in One Drive for Business (usually a bit slower in upgrading): fortunately, being Office365 for Business an on-line platform, it does not require any update by the Company and so any new improvement done in the platform will be available to everyone as soon introduced by Microsoft.
Note that, with the current OneDrive for Business version, the Stop syncing a folder… , available in the right click menù on the associated taskbar icon, allows only to detach a SharePoint site directory (e.g. all the Enzo – Document folder, and not possibly only some folders created inside that site 😦 ) - If you delete a file in your local directory (currently each file must be always downloaded and synchronized) that change is reflected in the remote repository … so that file will be deleted also remotely as soon as there is an Internet connection and the automatic synchronization is performed. Fortunately, you can always recover a deleted file (no matter where it was deleted from – i.e. phone, PC, web site) going to the Recycle bin section of that SharePoint site.

Management of OneDrive for Business from taskbar icon (left click)

Management of OneDrive for Business from taskbar icon (right click)
File On-Demand next feature (not yet available in OneDrive for Business)

Recycle bin where all deleted files can be restored if the case (no matter where it was deleted from)
Step 8 – Note that it is also automatically handled the versioning, so also previous versions of each document can be always be recovered, if the case. If someone else is working on the same document, it will be forbidden to edit/save (and then automatically sync) that file: therefore, if you want to a cooperative editing of the same file you should open it from the site using the on-line editor (see some more details how to do, at end of the post).
After one file modification, if you go to the site Document section, you will see that the new version of that file is already saved and available to everyone: right clicking on one file, the list of all the versions list is shown in a popup window. Each version can be downloaded simply clicking on the date/hour link or can be possibly made again the current version if the case choosing from the associated combo menu . Take care that the date/hour shown is (at least for my Company) the one of Seattle and not the local one, possibly a configuration problem of the business Office365!!! There should be a proper setting voce in the Settings top menu that should allows to set the language and time zone … but at least in the version I tested, with my user privileges, that item is not available (see here where it should be that menu item).

No simultaneous local editing of a local document is allowed: use instead the online version of Office

The changed file is suddenly saved and made available to every member ot the group
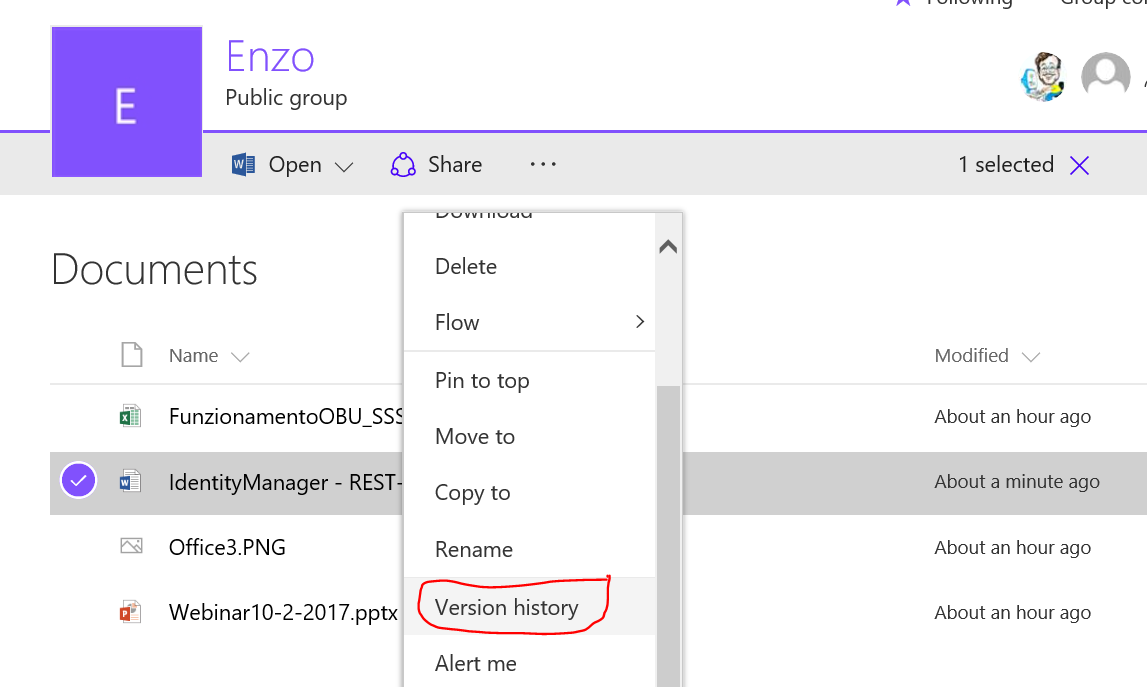
The versioning is handled automatically

All versions can be listed and possibly downloaded/restored

Combo menu to View, Restore or Delete; left click to the date/time link to download that version
=============================================================
Possibly you want to have your OneDrive folder not in your User folder (as it is for default), but somewhere else (e.g. C:/Data): you can do it ONLY during the setting of the OneDrive Syncronization with with your PC and you will have this choice on both your OneDrive – Personal and your OneDrive for Business/Sharepoint.

FIrst synchronization of a Sharepoint Document folder

OneDrive app will be started

 Possibly you have t update OneDrive app from the link provides in the previous popup window
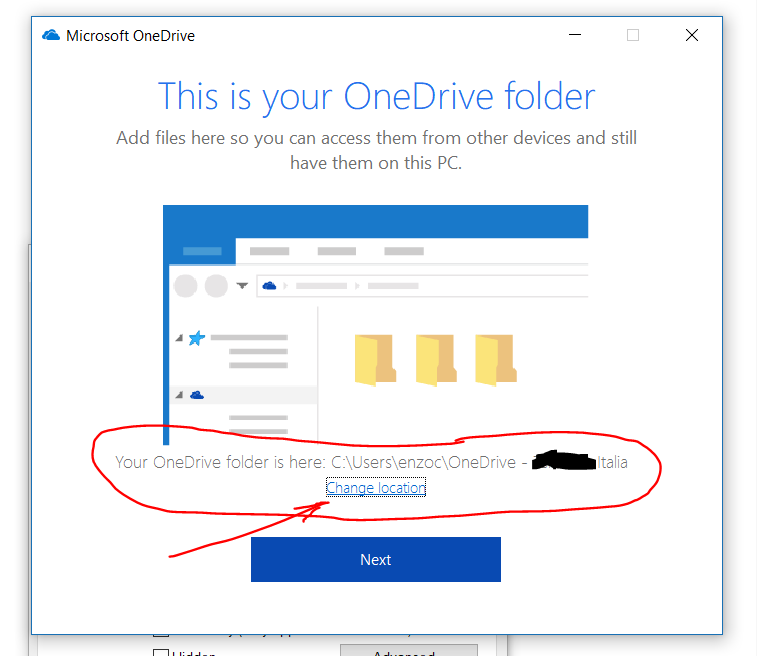
Here is the only possible way to choose a different folder location on your PC/tablet for your OneDrive (personal, business or Sharepoint Document)
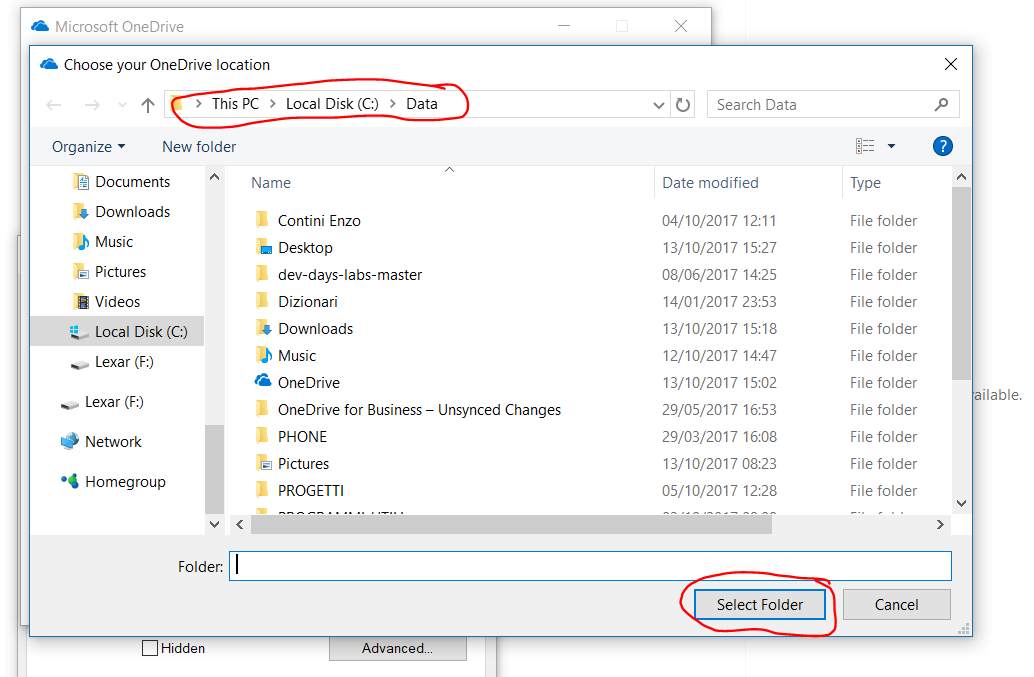
Select the folder you like (e.g. C:/Data)
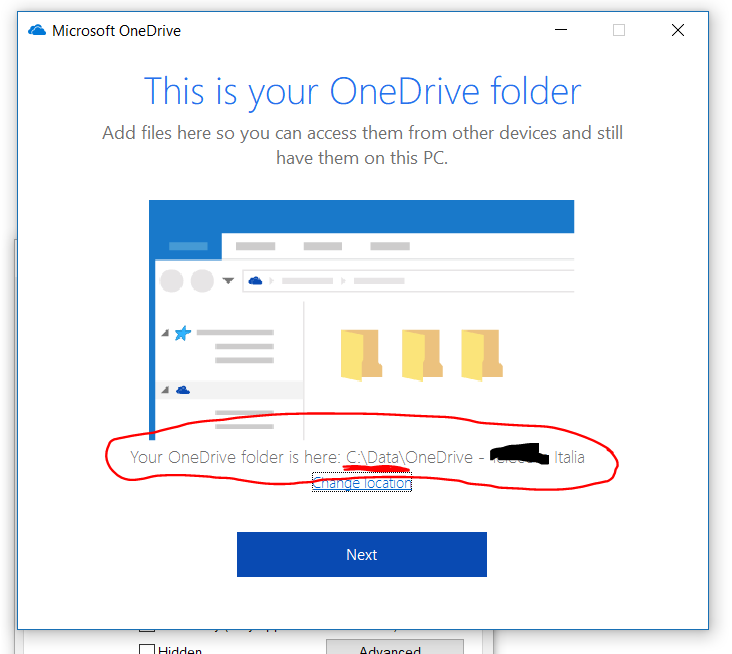
Now the chosen folder is shown as the one the OneDrive folder will be created

From the cloud icon Setting menu option, you can manage all the business cloud features [for your OneDrive for Business space and the Sharepoint Document one). There is a futhermore cloud icon for the OneDrive – Personal (not business)]
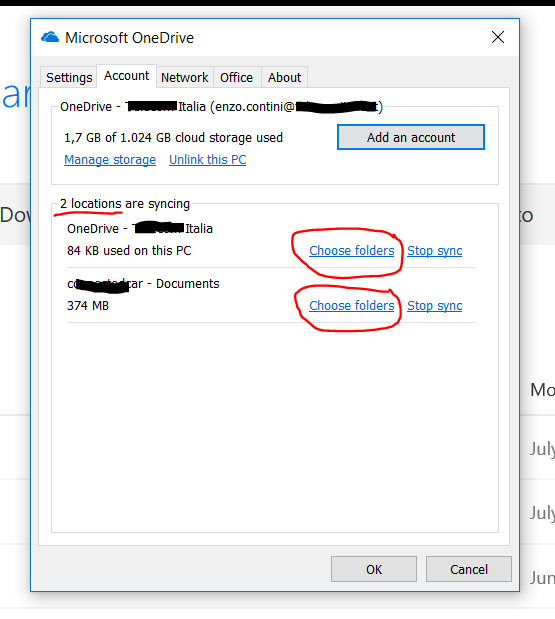
Two locations are available: one from OneDrive for Business user space and another for the Sharepoint Document I asked to be synchronized.

Synch option for the Sharepoint Document folder
Synch option for my own OneDrive for business folder

In the File Explorer I will find 3 folders (located in C:/Data as requested) 1) public OneDrive – Personal; 2) OneDrive for Business of my user; SharePoint Document folder I asked to be synchronized
===========================================
What previously explained is only the handling of documents inside a SharePoint site, but that is only one of the possible features that can be handled using that site to support a project and/or a collaborative work.
It is possible also to have not only a collaborative editing of documents in real time (see in the following of this post for some details) but also insert pages in that site (to introduce some useful information to be shared and always updatable), see all the recent activities and/or create customizable lists to keep team activities organized (e.g. adding a list called TODO list, it will be shown on the left menu, easily accessible; each list can be associated to a flow that can be defined by Microsoft Flow).
On the left menu of each SharePoint site, just next to the Documents item, there is the Notebook item that let you go to a OneNote Online file associated to that site: as the desktop version of OneNote, you can create more sections and for each one more pages and possibly share also these information with some colleagues.

Add news to the site

See last activities, view and share files, get organized with lists
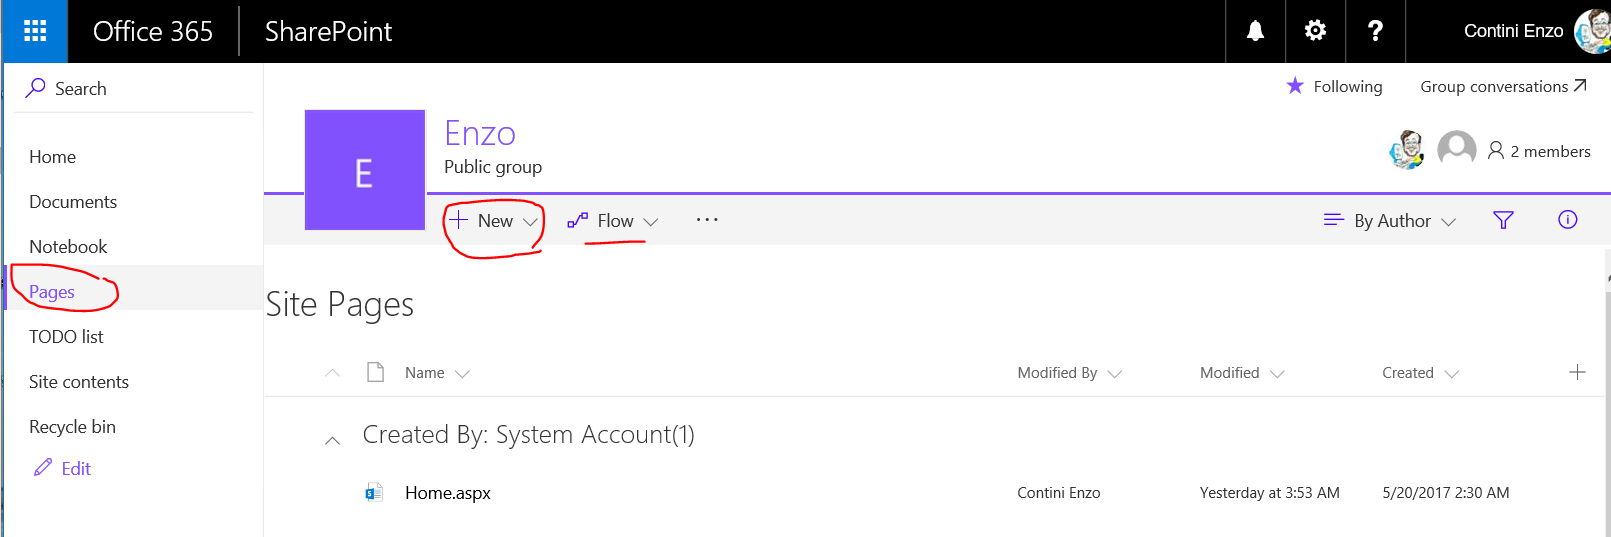
Add pages to the site

Custom list creation with a possible creation of a specific flow defined with Microsoft Flow

Definition of a flow associated to a list
Notebook menu item associates a OneNote Online file, possibly shareble
=============================================================
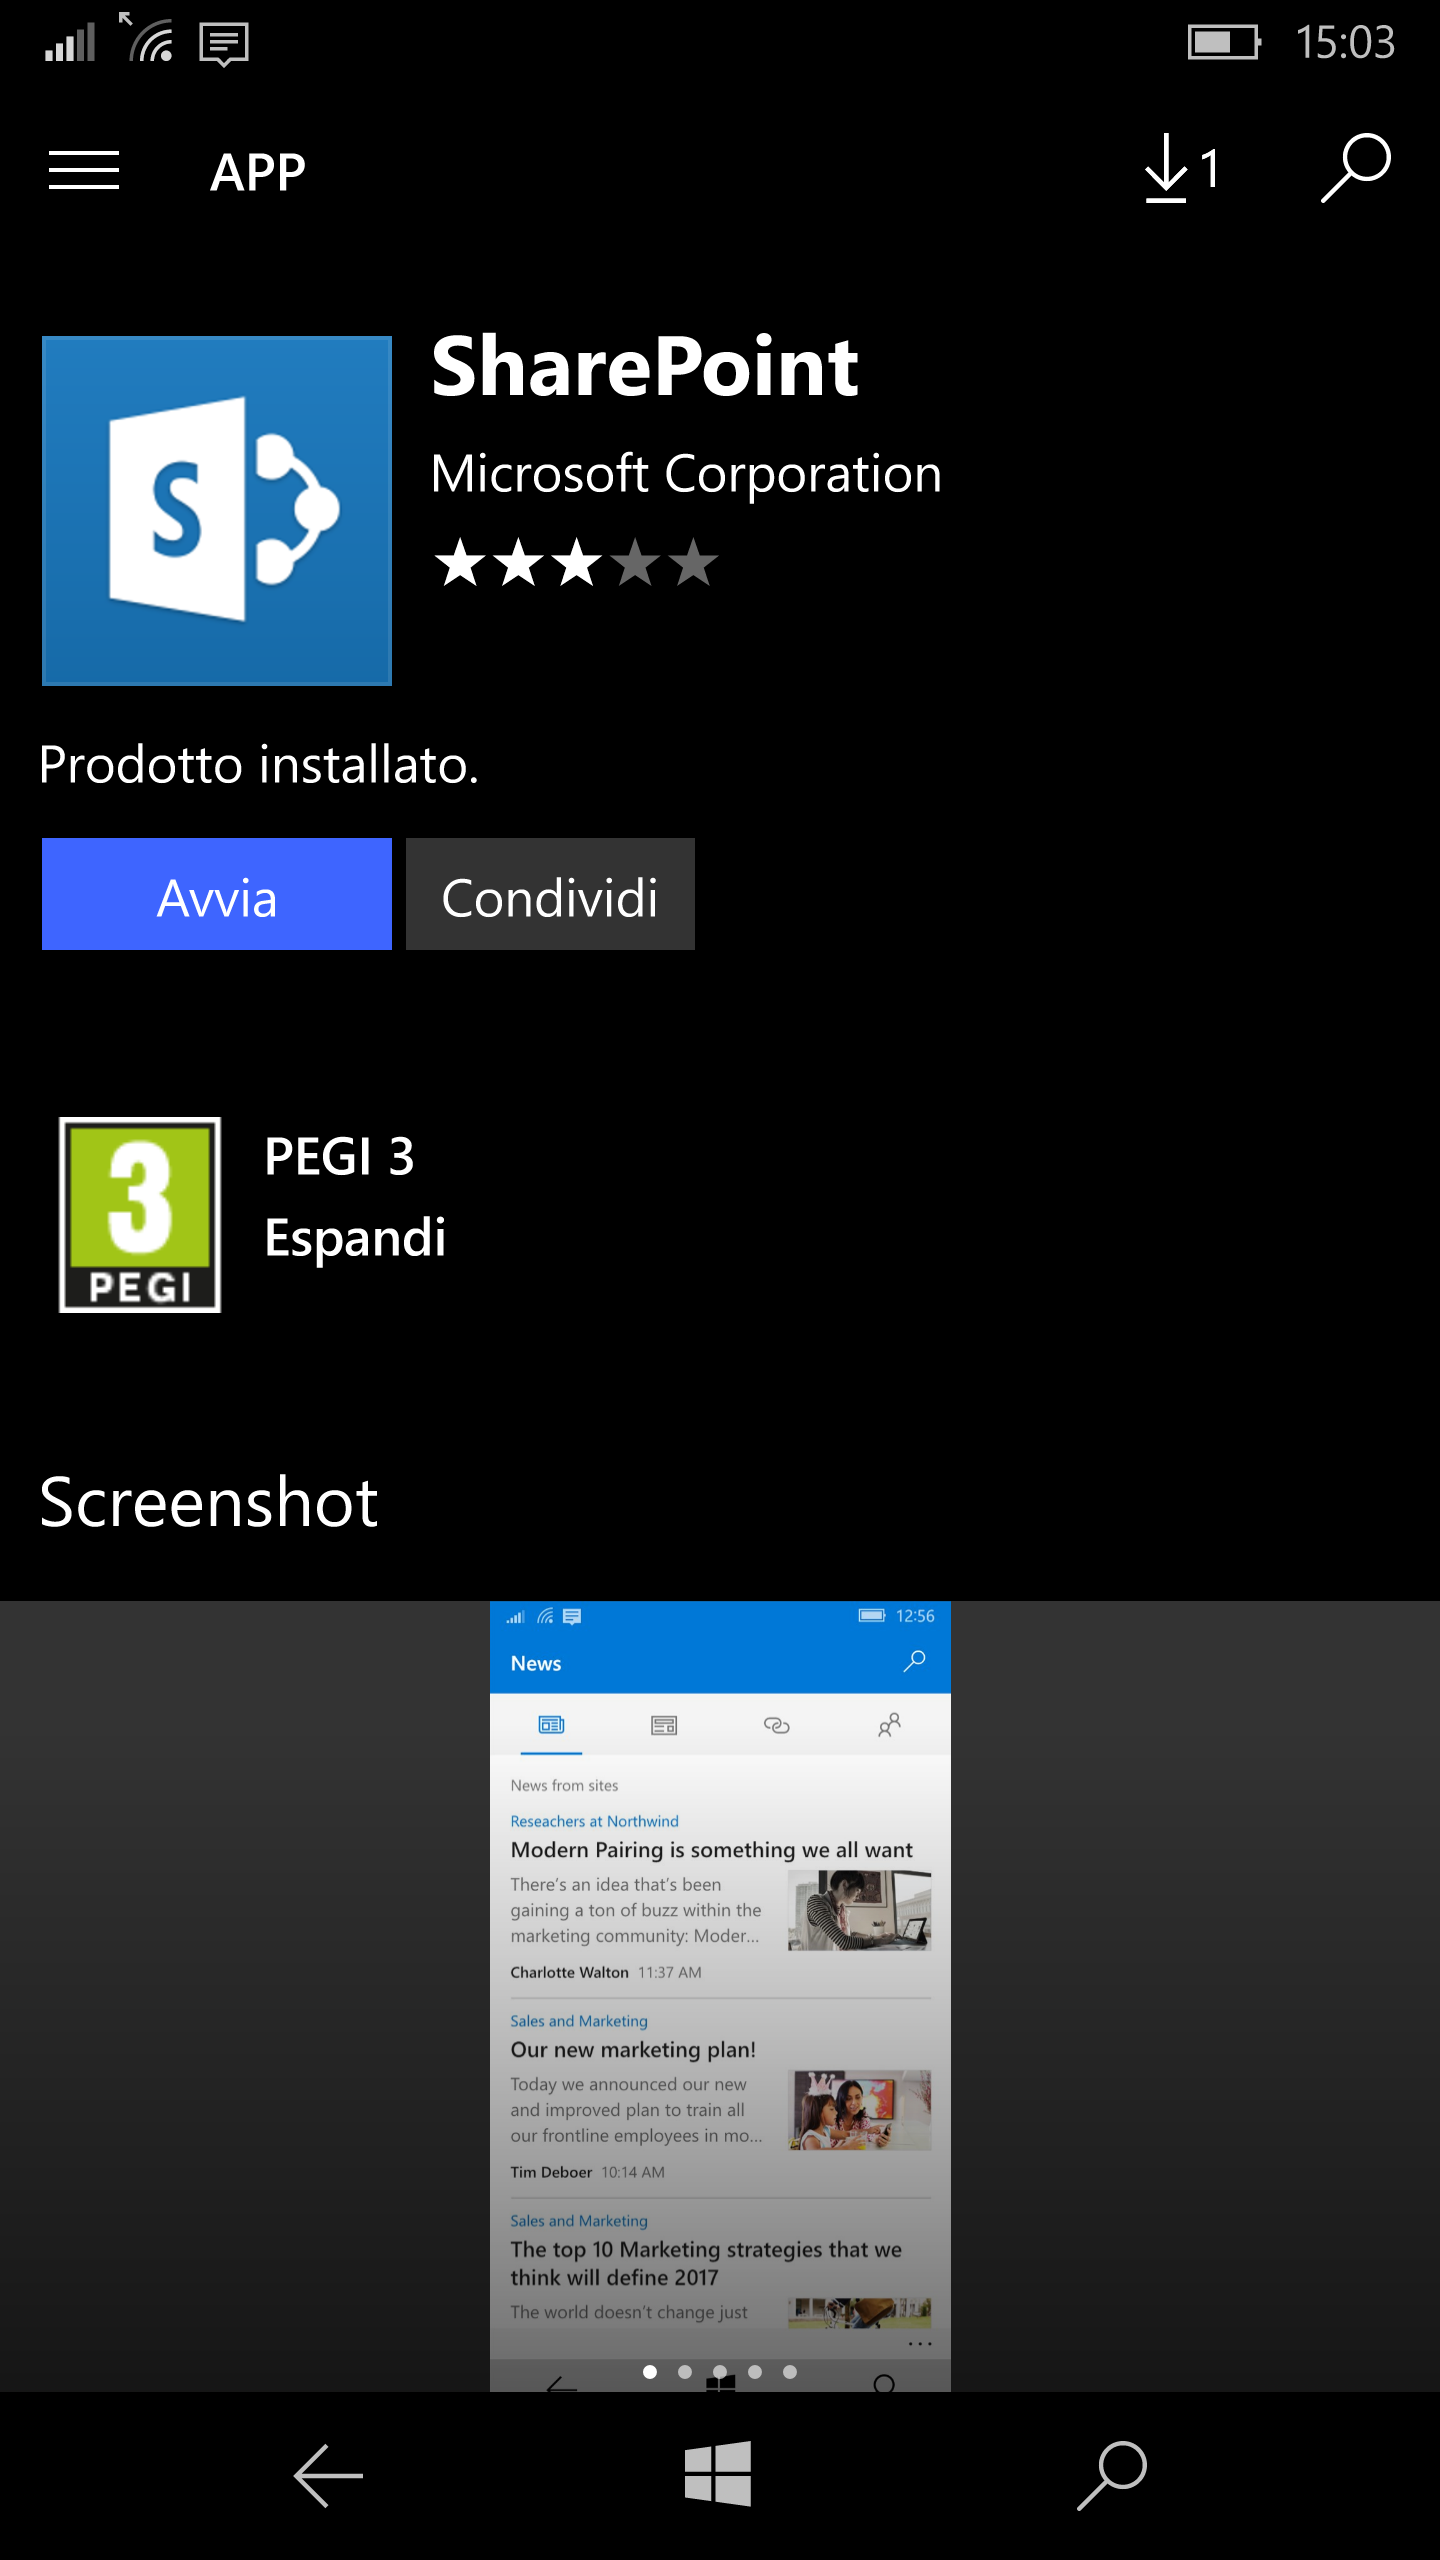
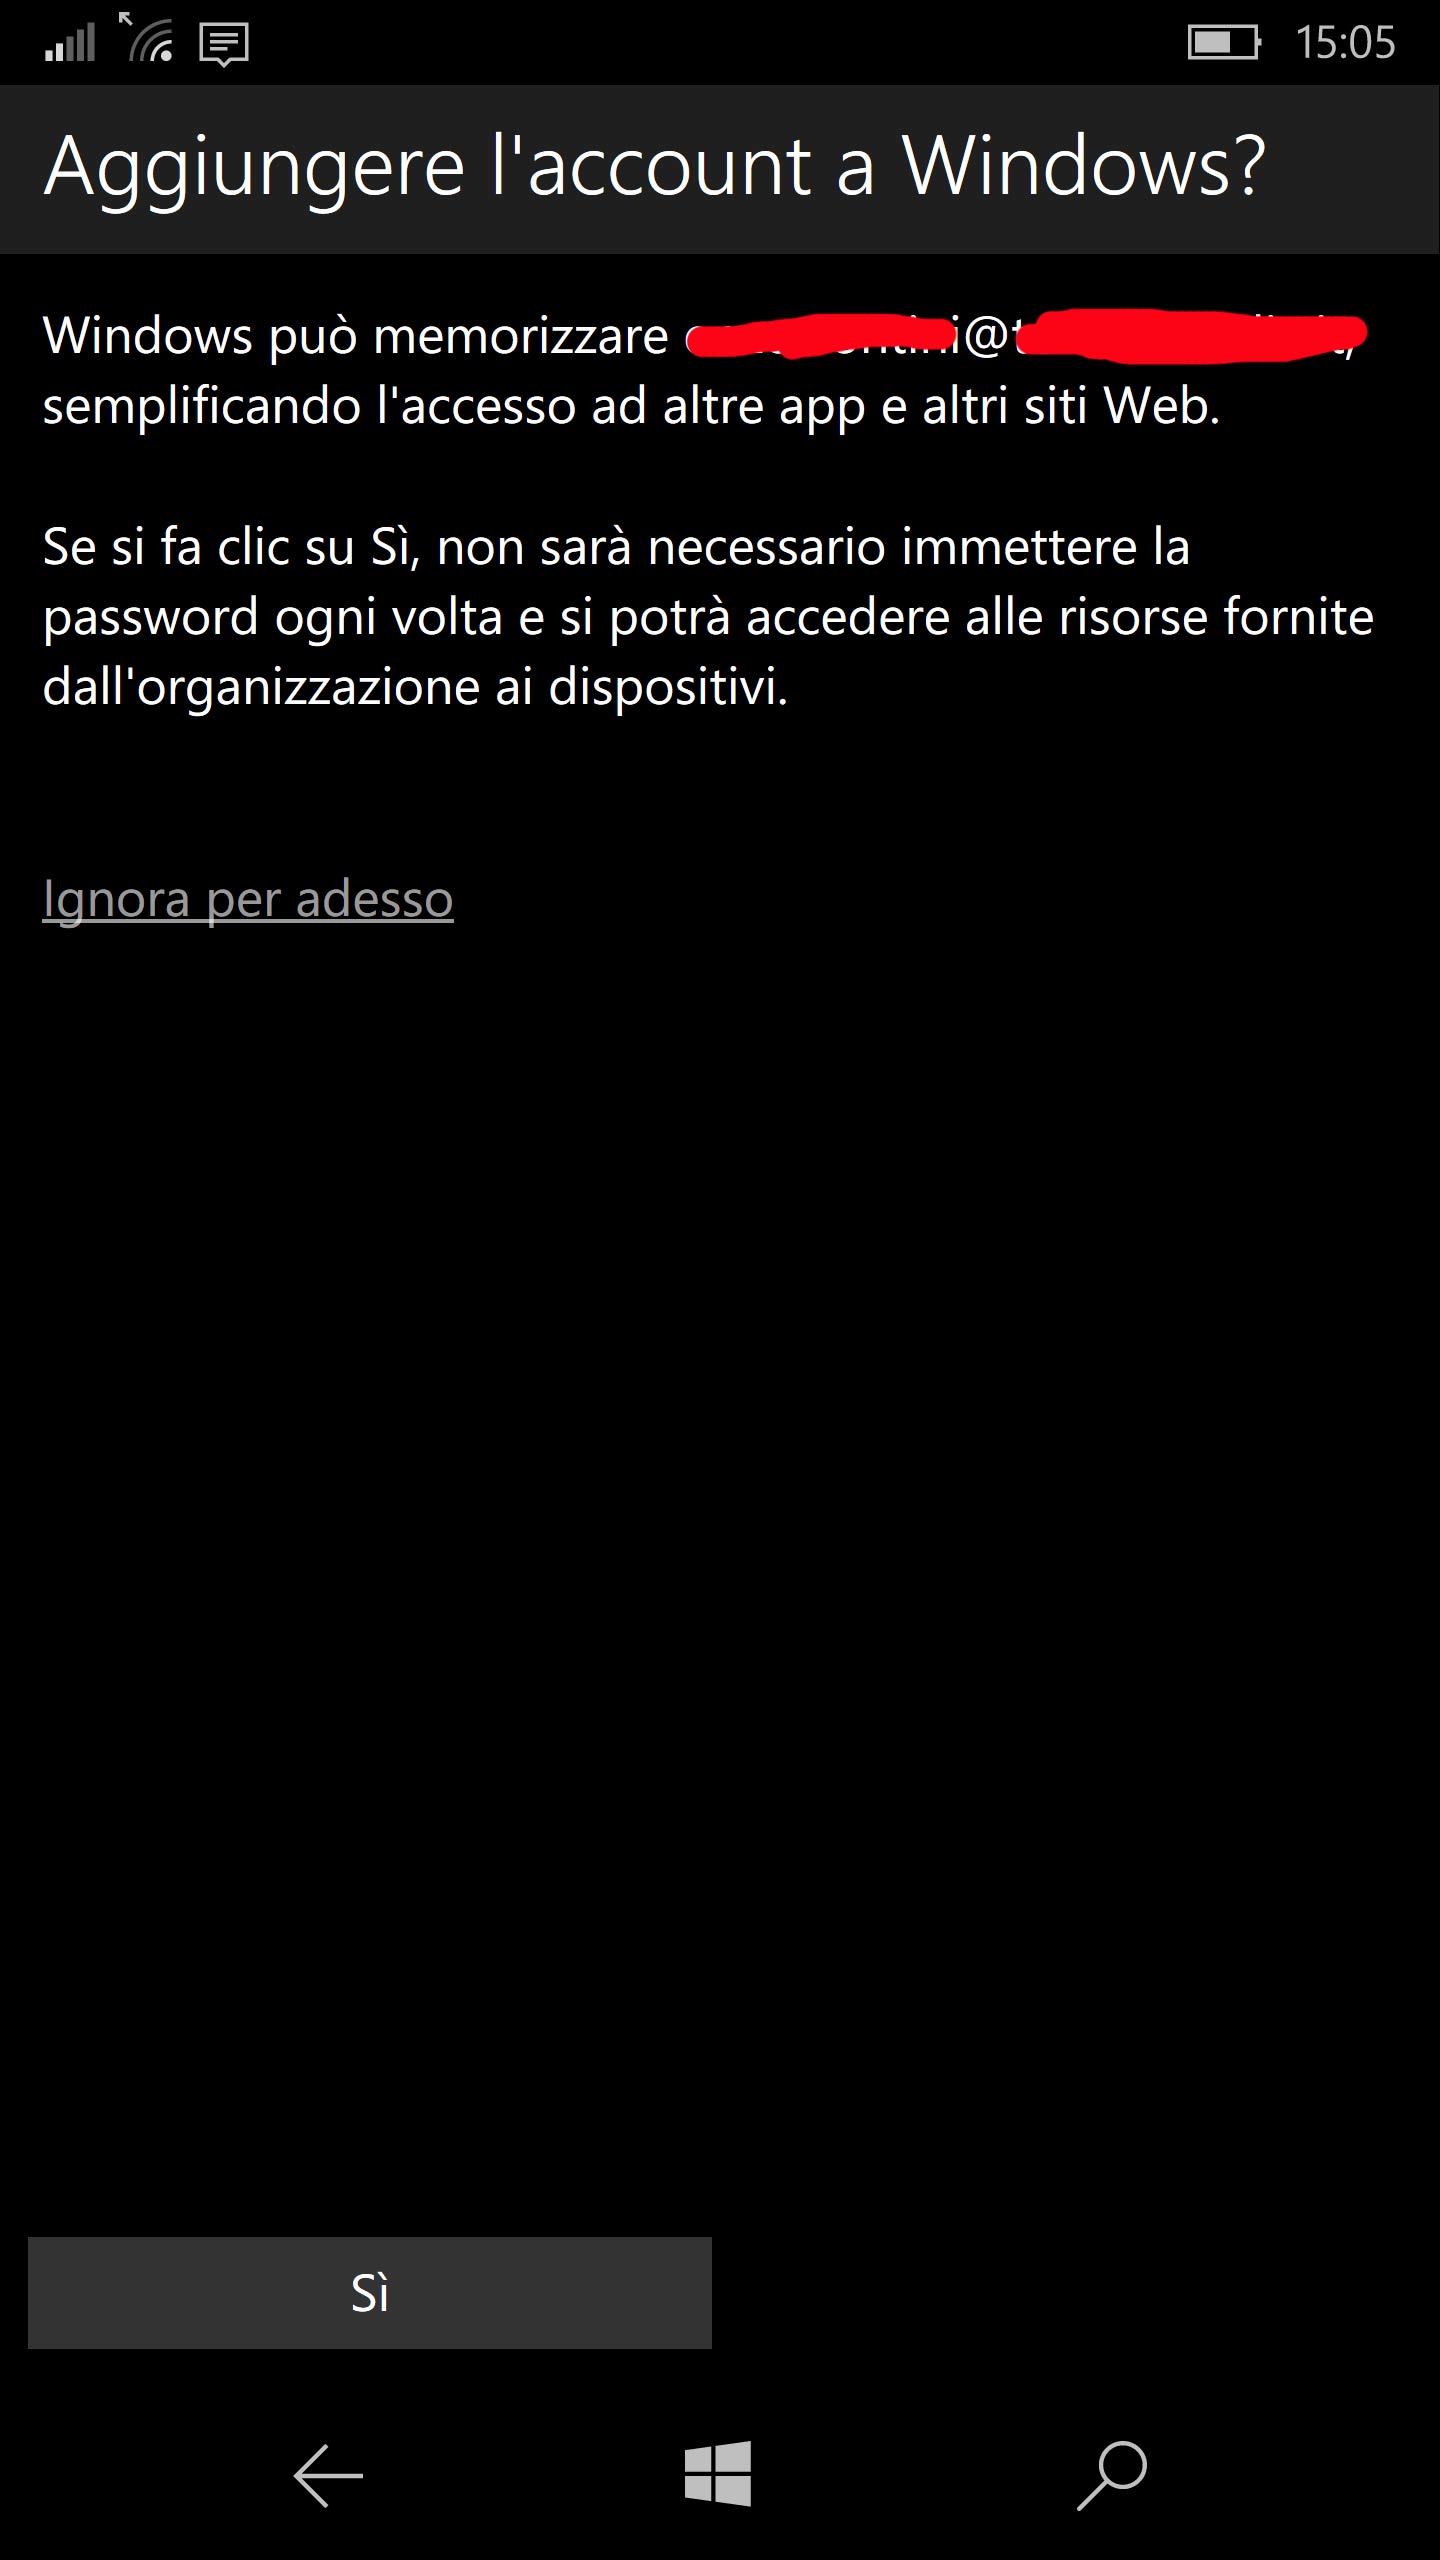
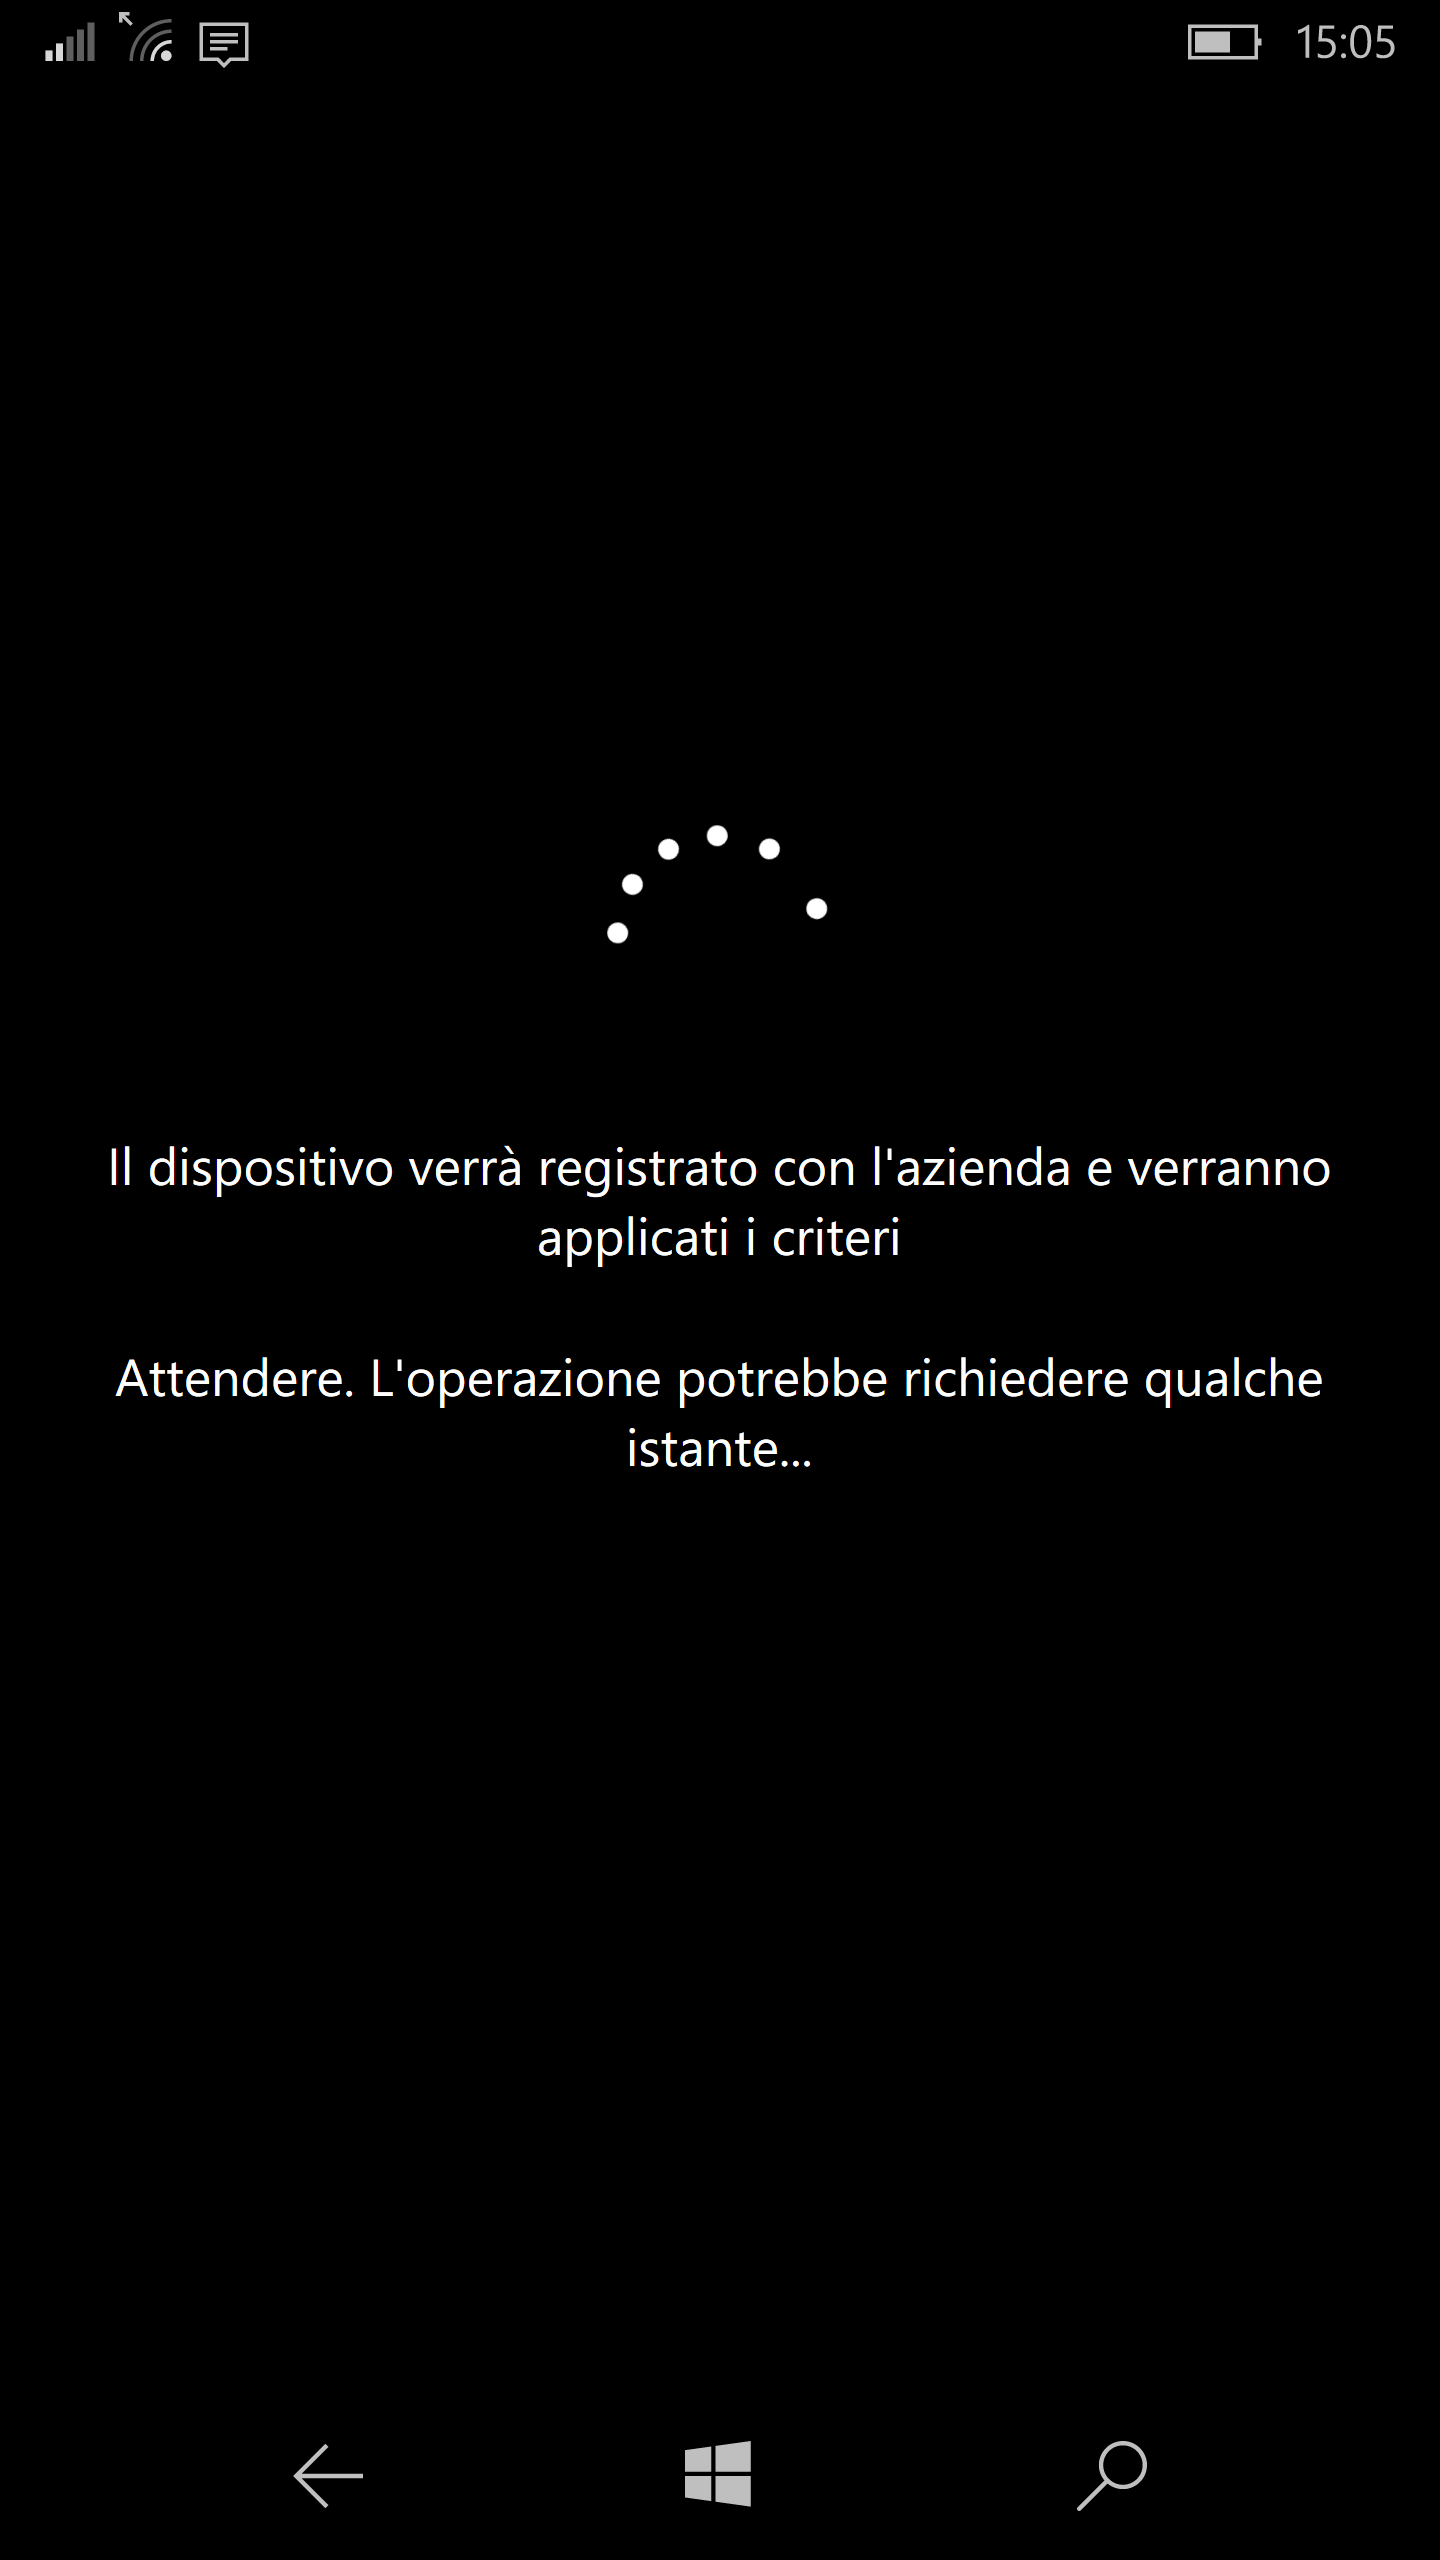
Here you can find some screenshots related to the installation and access of the SharePoint site from a smartphone: the same SharePoint app is available for every platform (Windows Store, iTunes or GooglePlay) so you can see all the site content also on your smartphone!
The following screenshots show all the step by step procedure for the first access after the installation: afterwards, you will only to launch the app 😉


=============================================================
Cooperative editing of documents in real time
We saw in step 8 that it is forbidden to locally edit the same file available in a synchronized SharePoint / OneDrive for Business local directory.
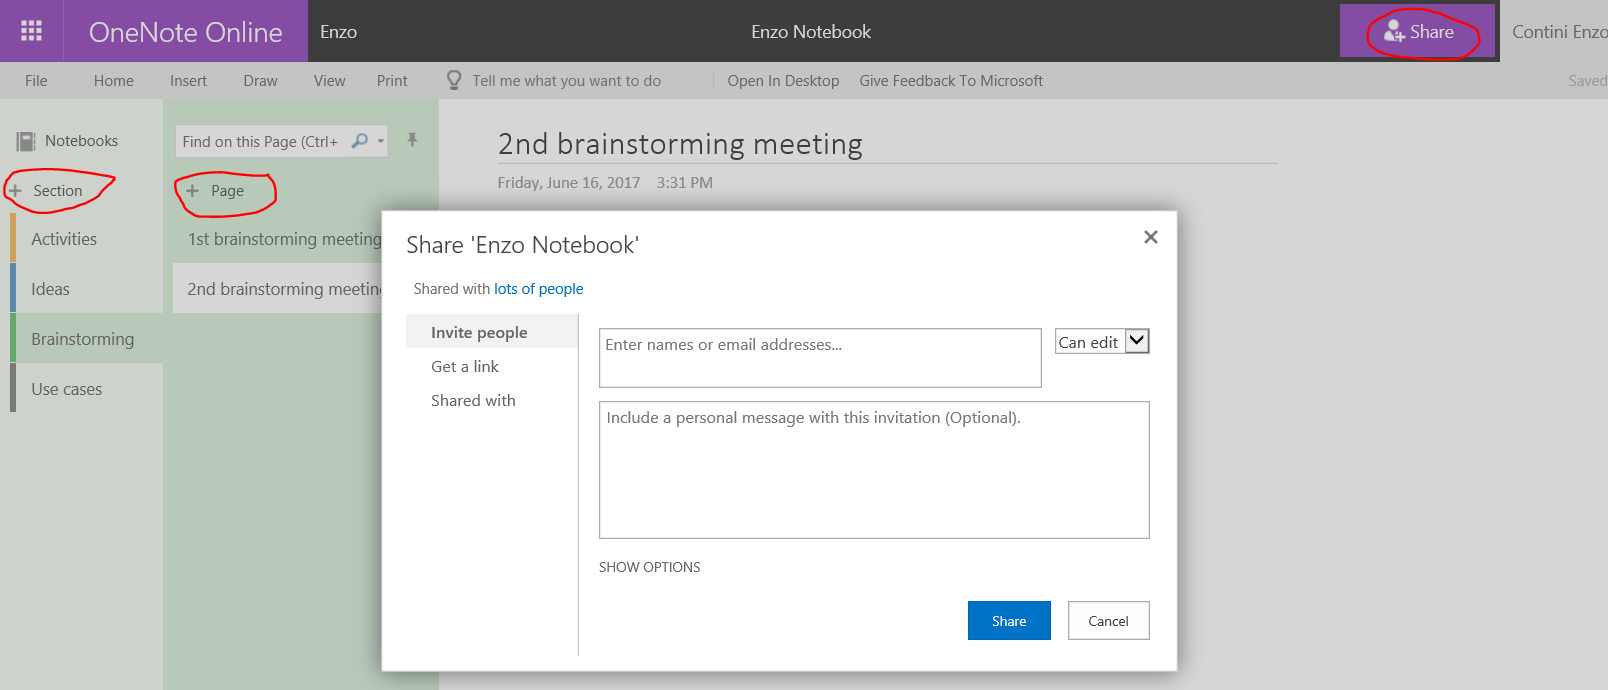
If you want to a cooperative editing of the same file you should open it from the site using the on-line editor as explained at the end of the post. For example to have a cooperative editing in real time of a Word document listed in the Document section of a SharePoint site you have to:
- Double click on the document file to have it opened with Word Online
- Click on +Share in the right top menu to open a sharing popup page
- Invite one or more colleagues: starting writing the surname of each in the input box, it makes a combo show a subset taken from the Company LDAP.
- Choose if they can edit the document also to those people or they can only view it.
- Click on the Share button in the popup to have an email sent to everyone, inviting them to the cooperative work.

Cooperative editing of a document
This method can be useful also for having something similar to a blackboard where everyone can draw something, helping in the discussion: in that case possibly a PowerPoint Online or (better) OneNote Online file is the more appropriate one: with OneNote you can even use a pen to handwrite, if you have a Surface 😉
==================
Questo post si aggiunge ad altri che sono specificatamente indirizzati a colleghi.🙂
PS: puoi trovare gli altri post filtrando, nella combobox a desta, sulla categoria “Aziendali”. Alcuni sono protetti da password per cui se ti interessano puoi contattarmi tramite l’email aziendale o telefonicamente.


Pingback: Come attivare/rinnovare un abbonamento a Office 365 tramite il codice ricevuto acquistandolo su Amazon | Enzo Contini Blog
Pingback: Come comperare/rinnovare Office 365 Family a 59,99€ per 15 mesi (anziché a 99€ per soli 12 mesi!) | Enzo Contini Blog
Pingback: Windows 10 Fall Creator: nuova funzionalità di Files on-Demand (ex placeholder) in OneDrive [anche per OneDrive for Business e documenti su SharePoint] | Enzo Contini Blog