
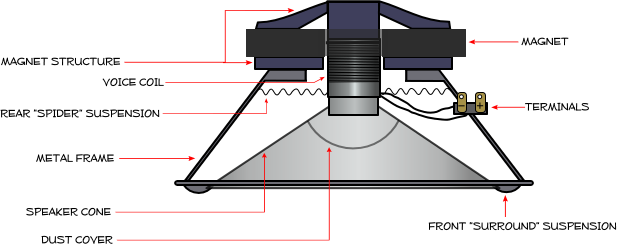
It may happens that your Hi-Fi stereo speakers do not play as before … and if you look to their woofers you can see that possibly the front surround suspensions (IT: sospensione pneumatica), usually made of foam, are partially broken: even though you did not used them too much, after years these are the parts of a woofer that usually shatters, especially the biggest ones used for bass tones.
This is what happened to the biggest woofers of my Boston T830 speakers that I bought 28 years ago!
I found several vendors of Foam Repair Kit (8”) for my Boston Acustic T830 and I did the work myself, following step by step the included instructions: I thing it is an easy procedure that everyone can do spending only about 20$ for repairing both speakers. Each repair kit usually consists of two foams and some special glue.

Front surround suspension (made of foam)

Front surround suspensions (new one)
In the following you can see some pictures I took during the repair with some advices: anyway, you can see several video on YouTube showing all the procedure if you need!
First you need to unscrew the woofer and disconnect the two wires: note that, besides being of different colors (black and red) the connectors are of different size so it will be impossible to make a mistake in reconnecting them!
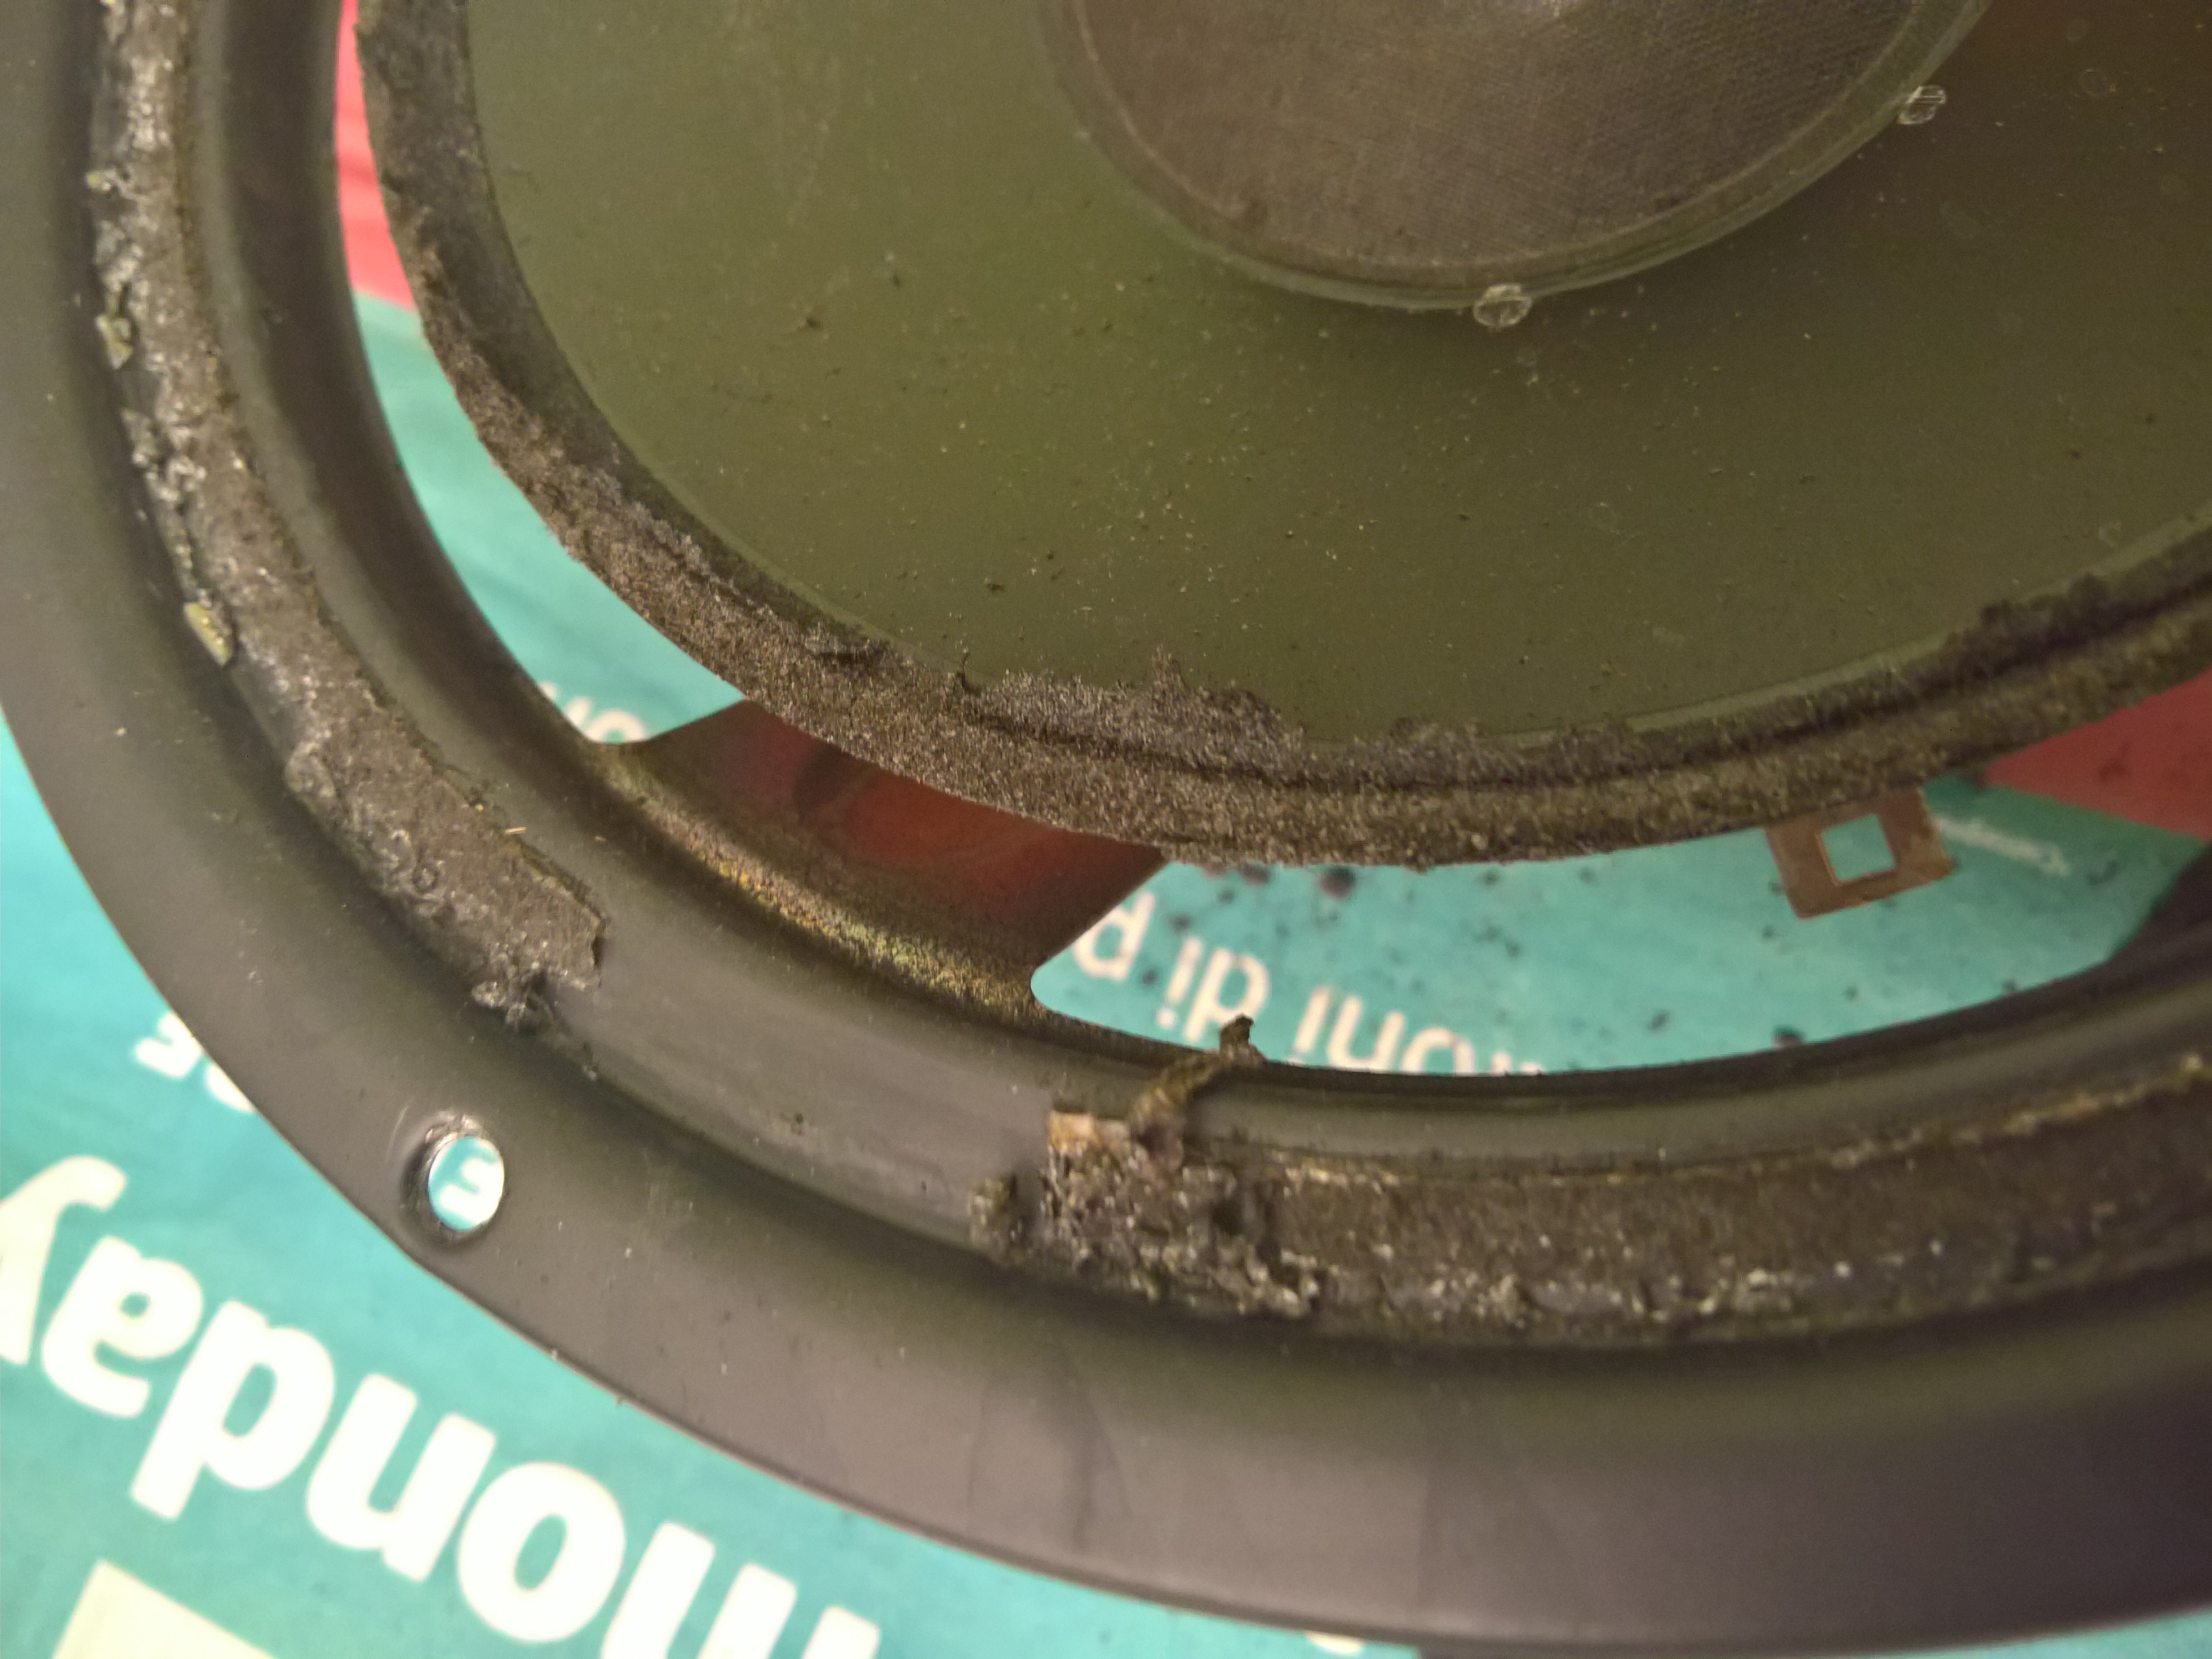
In the following picture you can see my speaker with a woofer with the broken foam:

Front surround suspensions (broken)
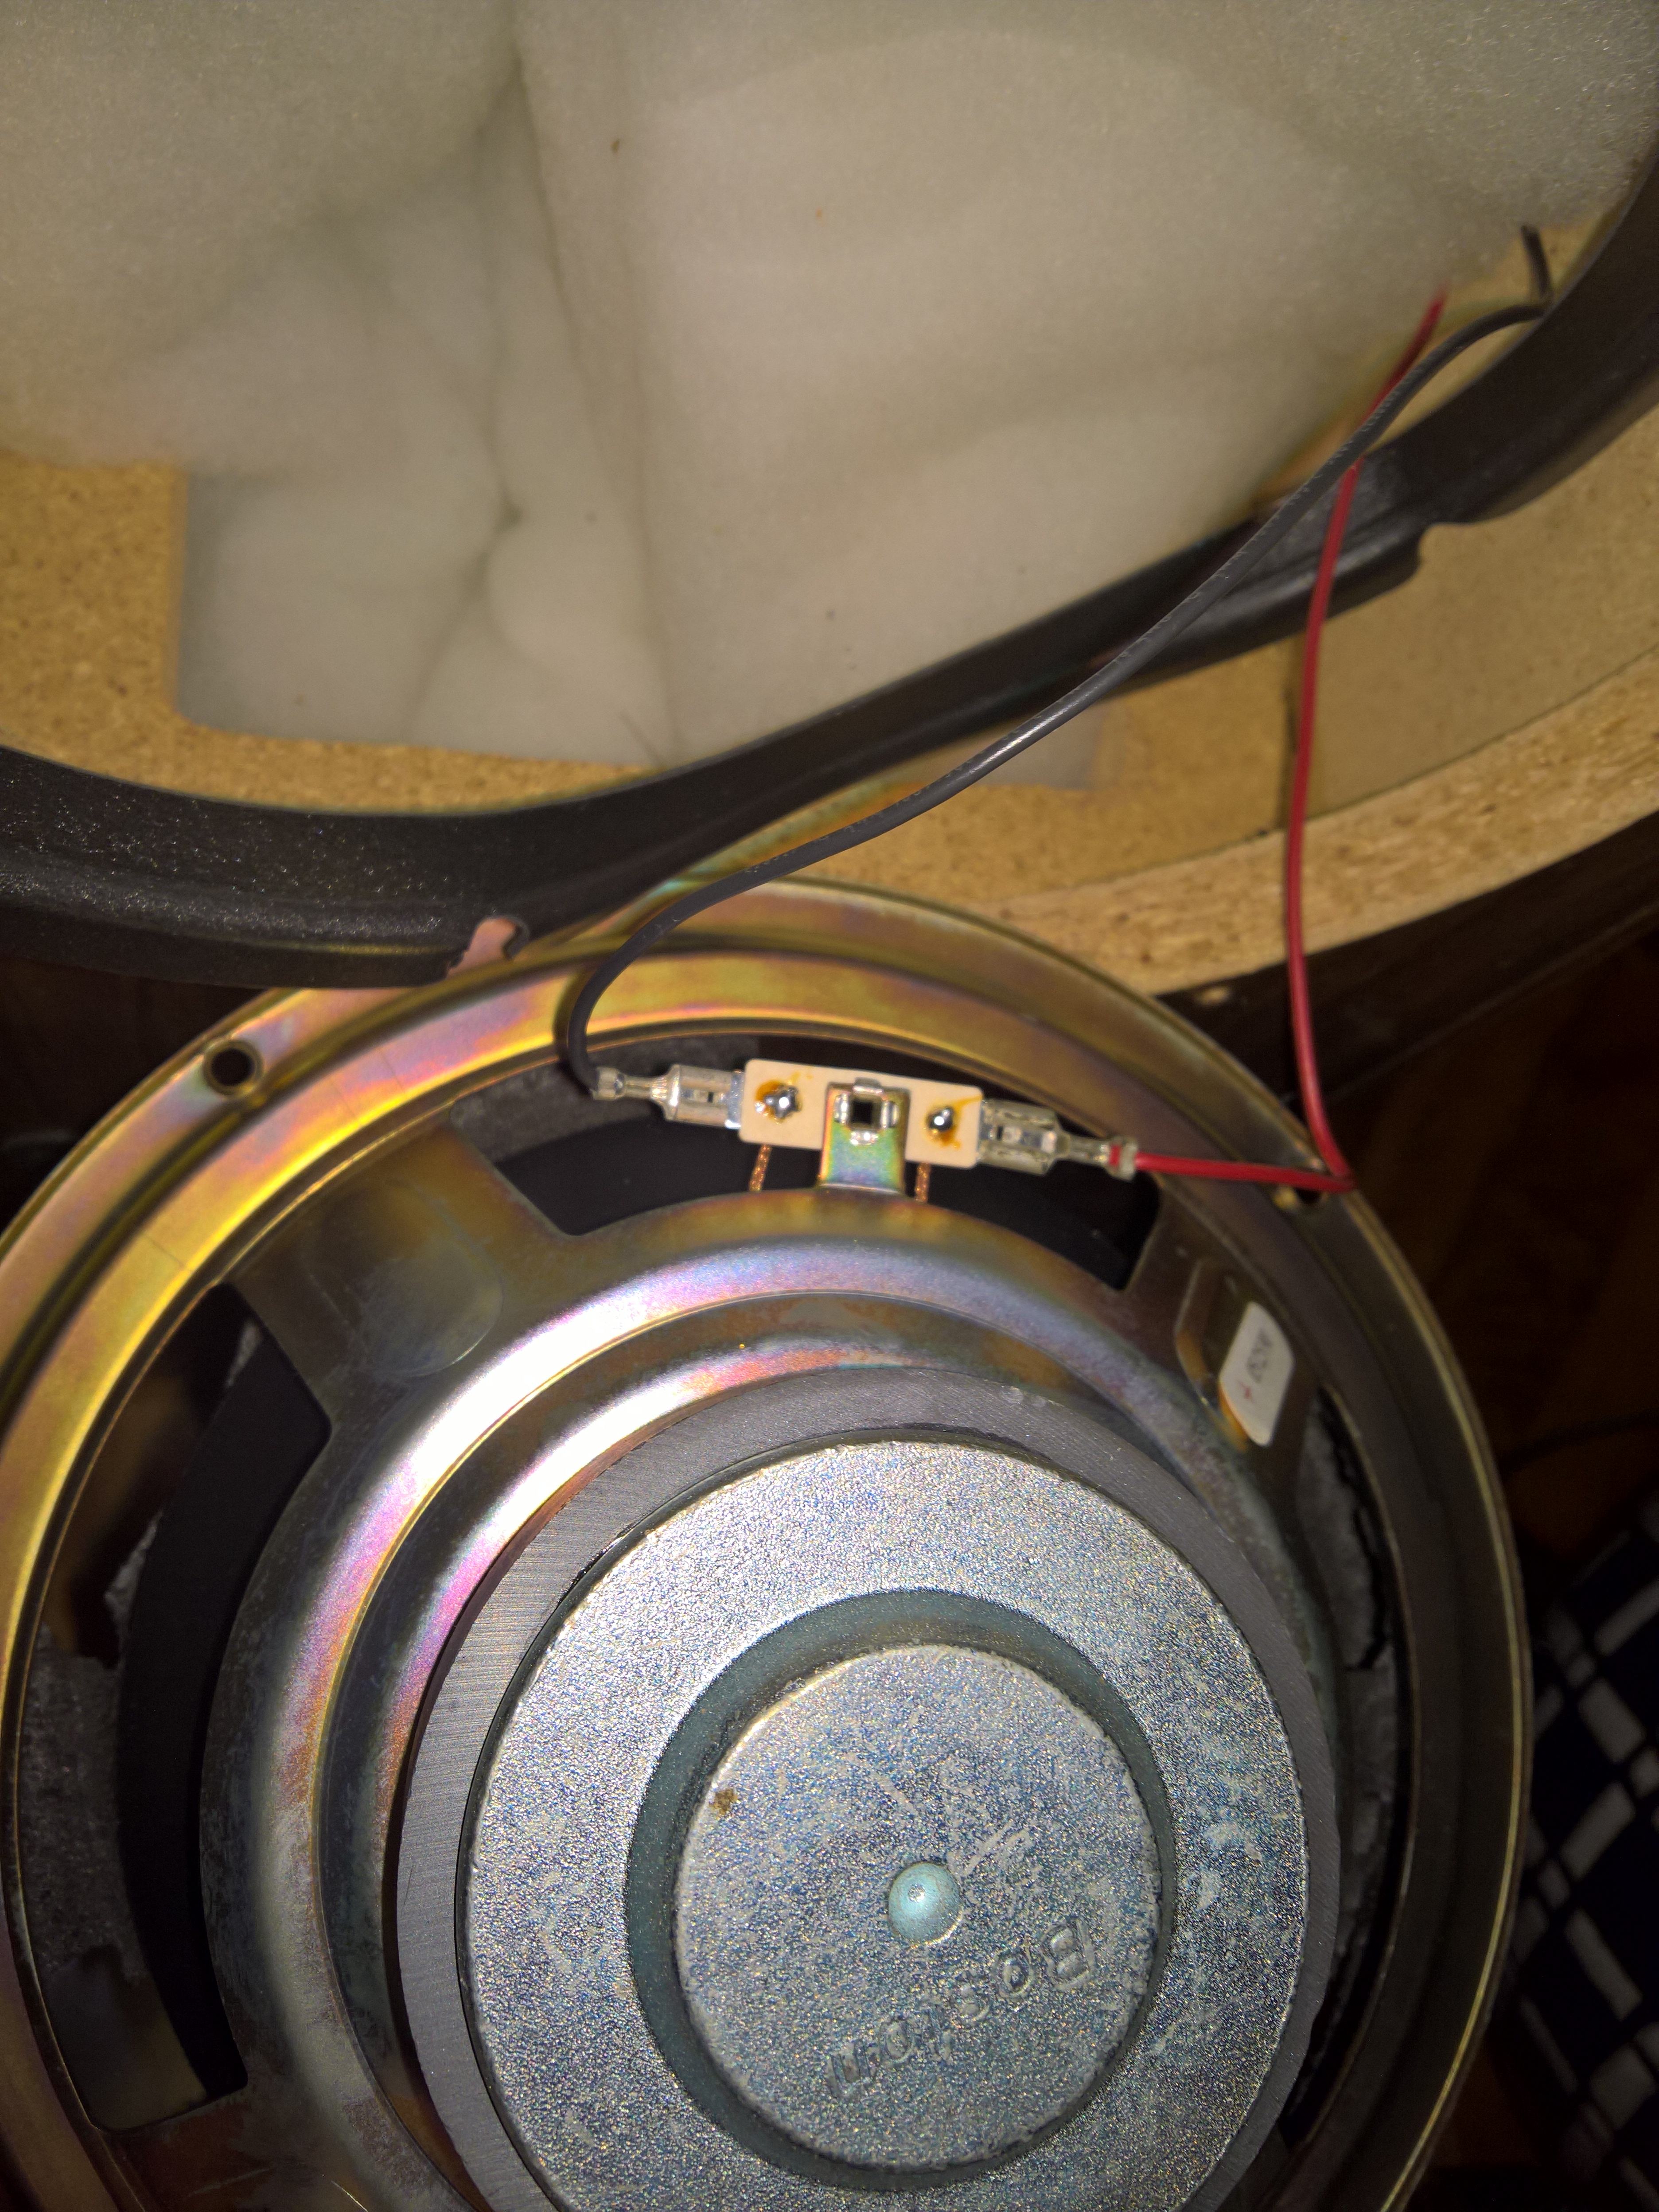
Wires connectors of different colors …

… and different size.
Then you need to completely remove both the old foam and the glue used to attach it. First you can help with a screwdriver or a cutter, then I simply used my fingers to remove the remaining glue: you have to do it for both the edges: you have to be careful especially with the speaker cone side (there, I only used only my fingers and then a rag soaked of alcohol to better remove the remaining glue).

Remove the old foam with screwdriver and fingers
Remove the external edge of the foam (with screwdriver and fingers)

Carefully remove the internal edge of foam from the speaker cone (with fingers and a rag soaked of alcohol)

All foam and glue removed
All around the speaker cone, distribute the glue provided in the kit: put the glue ONLY on this side and not on the foam: do not use too much glue and be careful to distribute it in an uniform manner with a finger.
It is convenient to attach the foam first only to the speaker cone and wait about 2 hours so that it dries: then distribute the glue on the metal, gently listing the foam external edge, and attach also this other side. When attaching each edge of the foam, press several times all around (one finger of one hand belove and one finger of the other hand above) to make the foam be well attached everywhere …
Distribute the glue on the external edge of the speaker cone (1)

Distribute the glue on the external edge of the speaker cone: distribute in a uniform manner with a finger (2)

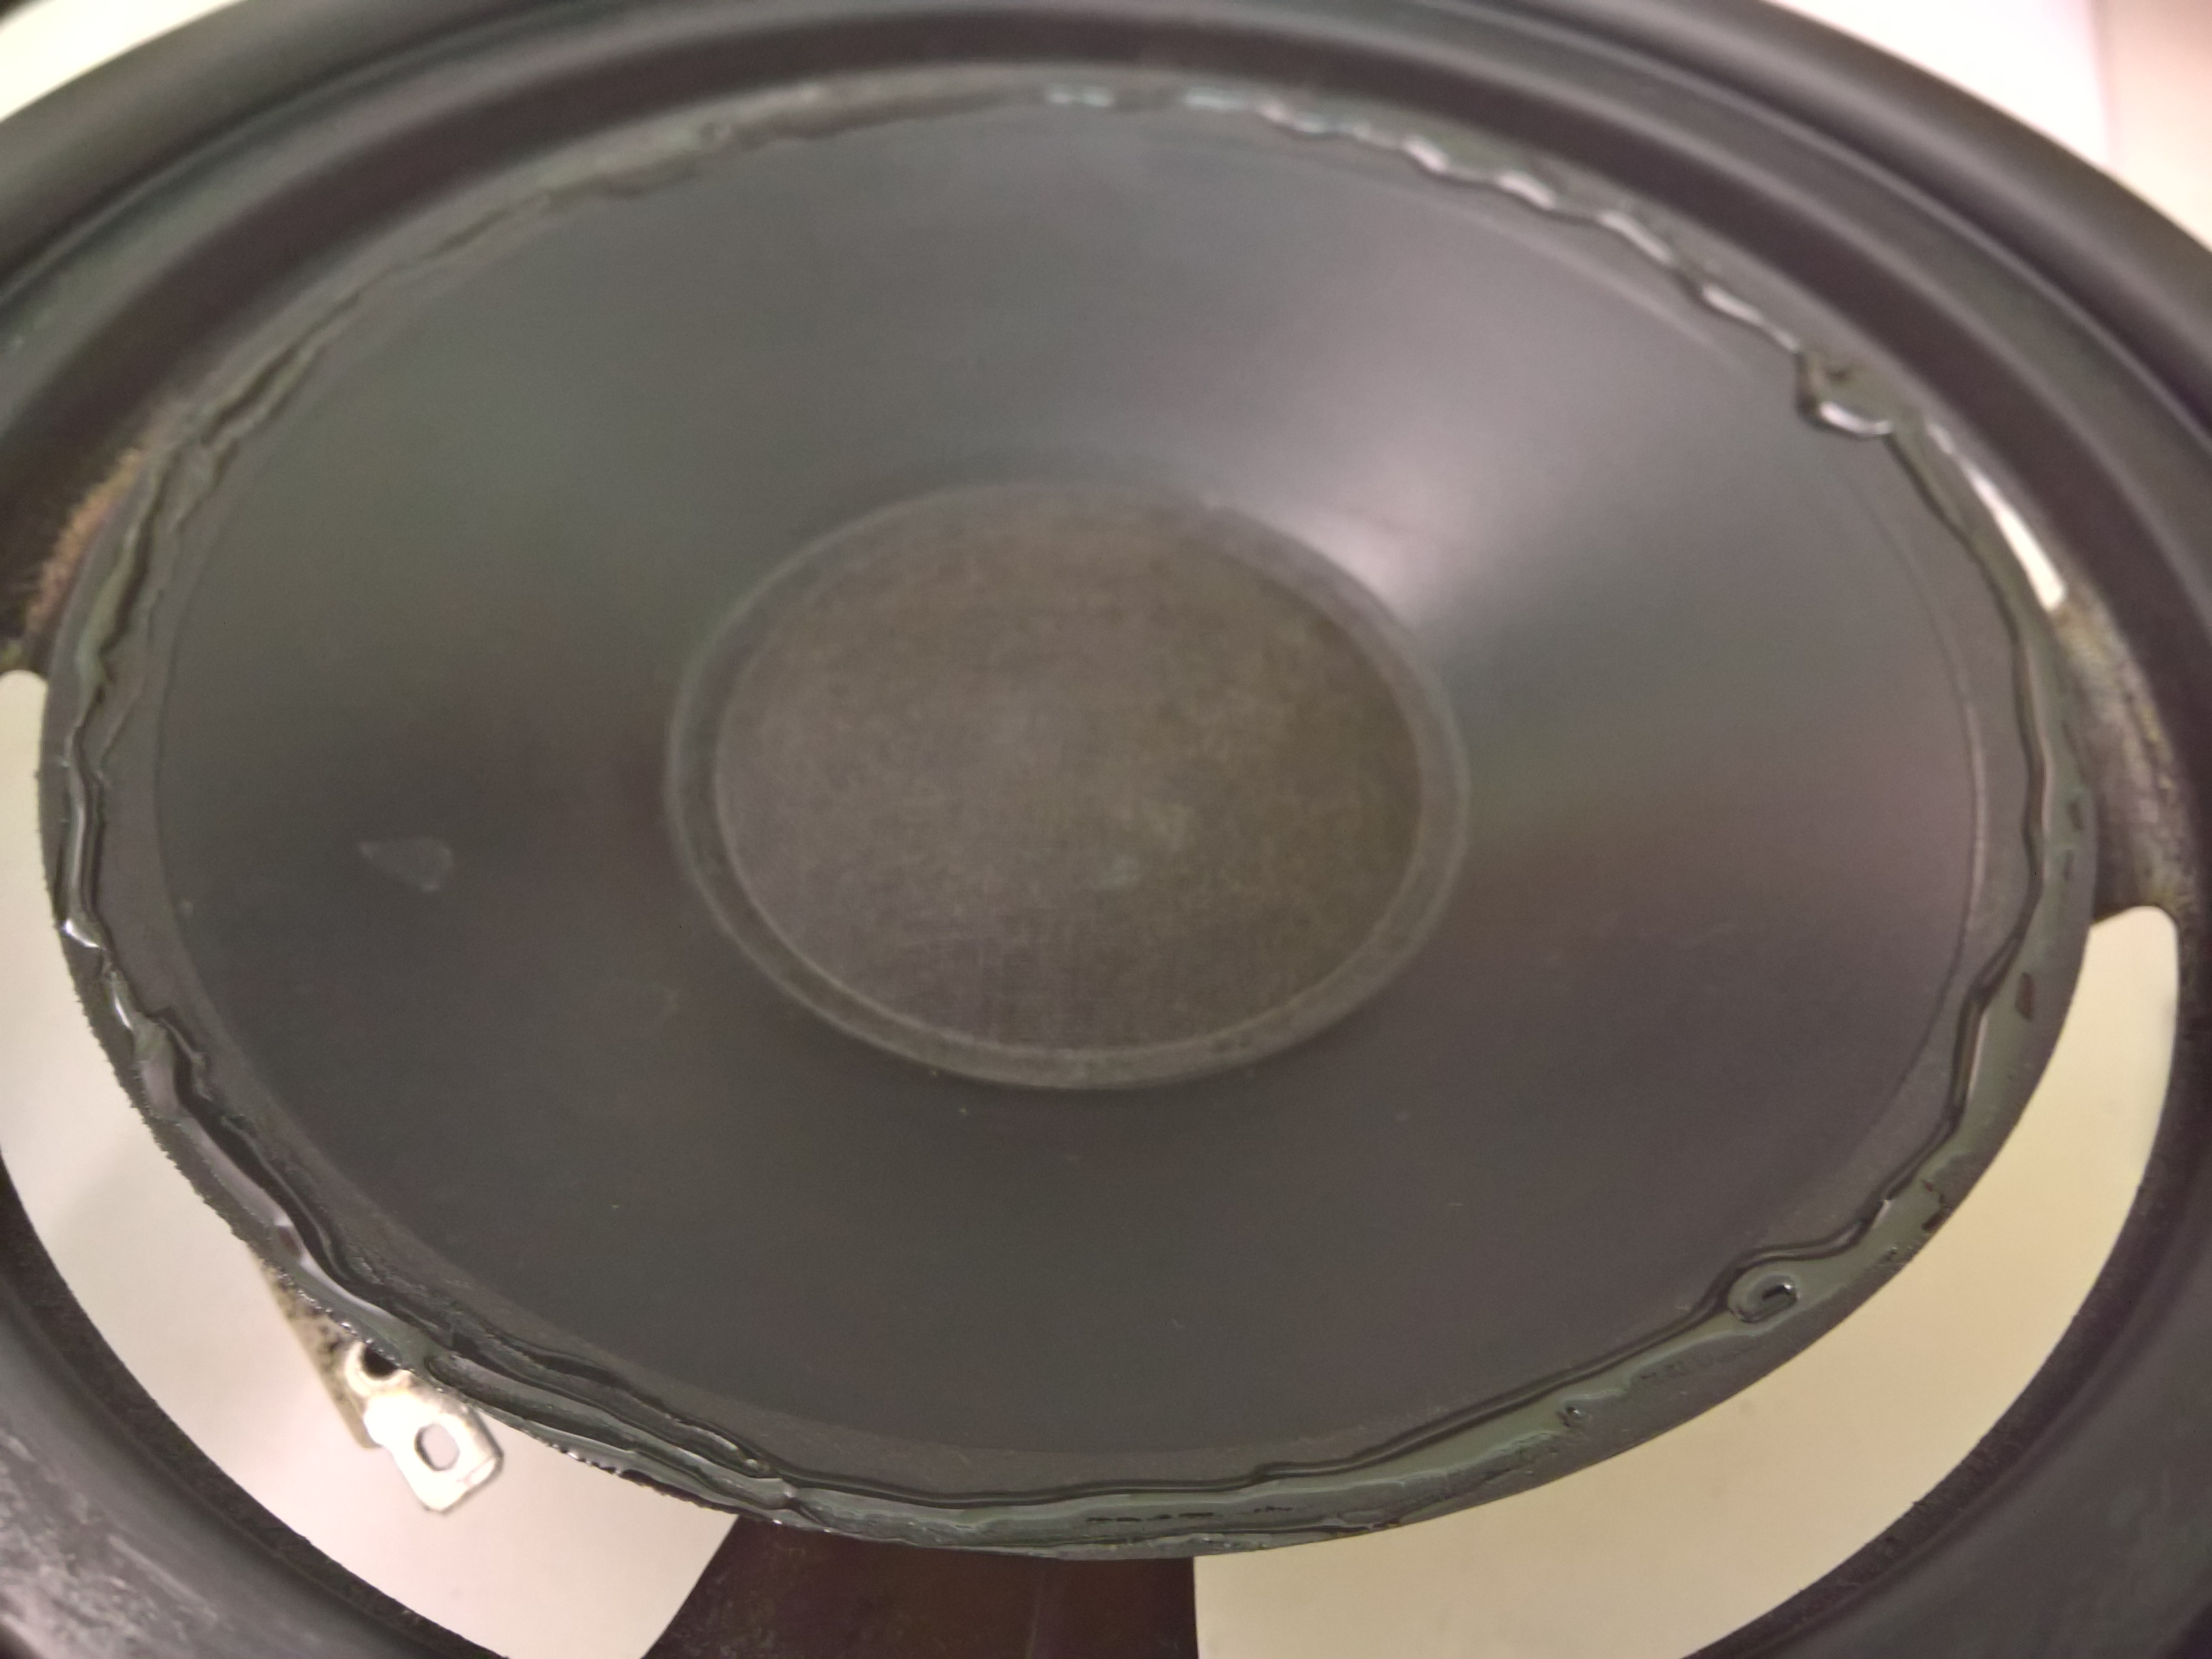
The new foam properly attached to the woofer
Finally you have only to screw again the woofers into the speaker’s case and try them with your stereo … and appreciate again their original sounds


