
Very often when you buy a CD you like to have also its MP3 version in order you can upload it in a MP3 reader or a smartphone.
There are a lot of SW that can do that (even free ones) and possibly you have to install the proper codec (e.g. Lame). However, if you have a Windows 10 PC (or even an older version) you have already installed the SW that can do the work!! It is Windows Media Player that you possibly already used to listen music: in fact, this desktop application allows ripping music (e.g. convert a CD audio to MP3 files) too in a very easy way, as I’ll explain in the following.
Note that, on the contrary, the Groove Music app player does not have that rip feature, at least for the time being …
Obviously you must have a DVD/CD reader on your PC in order to insert the CD. Unfortunately, very often new laptops have no more integrated DVD reader/burner, as tablets do not! They are too slim to have one integrated into their HW: now USB keys are more flexible than a DVD/CD and the use of a DVD reader/burner has become sporadic. However, you can buy an external one for very few money: usually they are little and powered via USB port, so you have only to insert the USB cable to make it work! I bought this one for my Surface and it works very well:

As stated in this Microsoft support page, “Windows Media Player 12 is included in clean installations of Windows 10 as well as upgrades to Windows 10 from Windows 8.1 or Windows 7. In some editions of Windows 10, it’s included as an optional feature that you can enable. To do that, select the Start button, then select Settings > Apps > Apps & features > Manage optional features > Add a feature > Windows Media Player, and select Install. (Enable Windows Media Player)“. Note that it is also stated that “DVD playback isn’t included. Go to the DVD playback for Windows page to find out how to add DVD playback to Windows 10“. (however, see my post How to get a DVD player in Windows 10 for free)
You can launch the Windows Media Player from the Start app list or search through Cortana search icon:
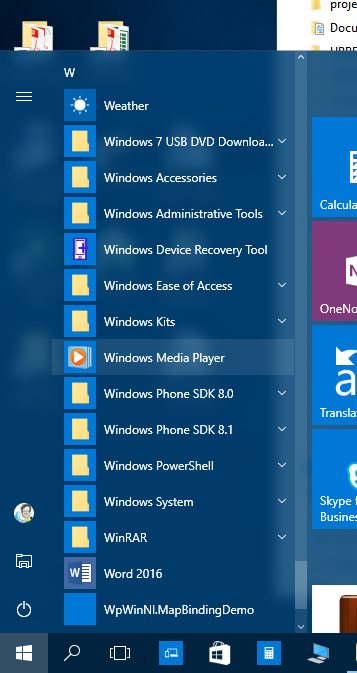
Launch of Windows Media Player from the apps list

Launch of Windows Media Player searching with Cortana
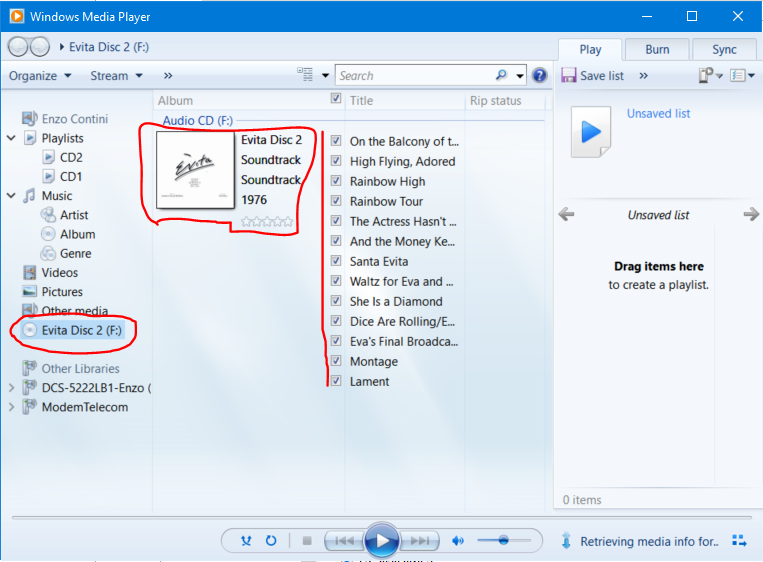
Once a CD is inserted in the reader, all its tracks are shown in that application: it also recovers from Internet all the related information (e.g. title of each track, cover, album name, genre) … and all of them will be used to populate the metadata of the next generated mp3 files.
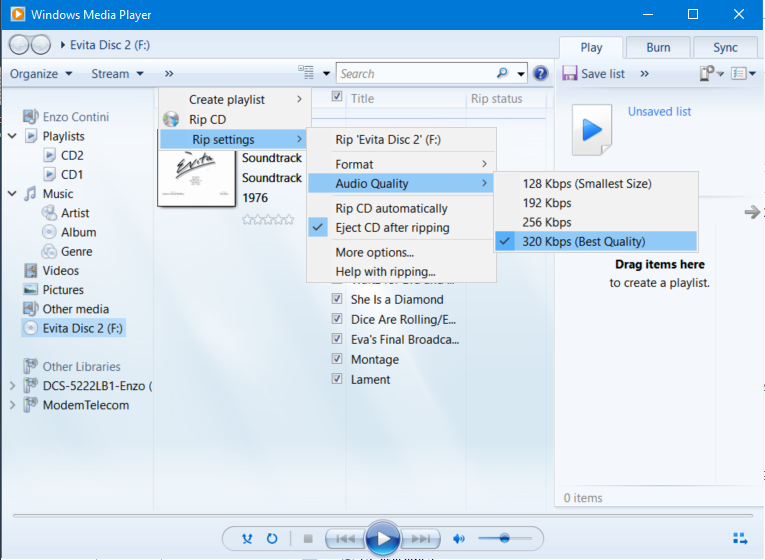
Before starting and ripping, you can possibly choose the best options for you, by going to Organize -> Options – Rip Music (or from >> -> Rip settings – Audio quality).
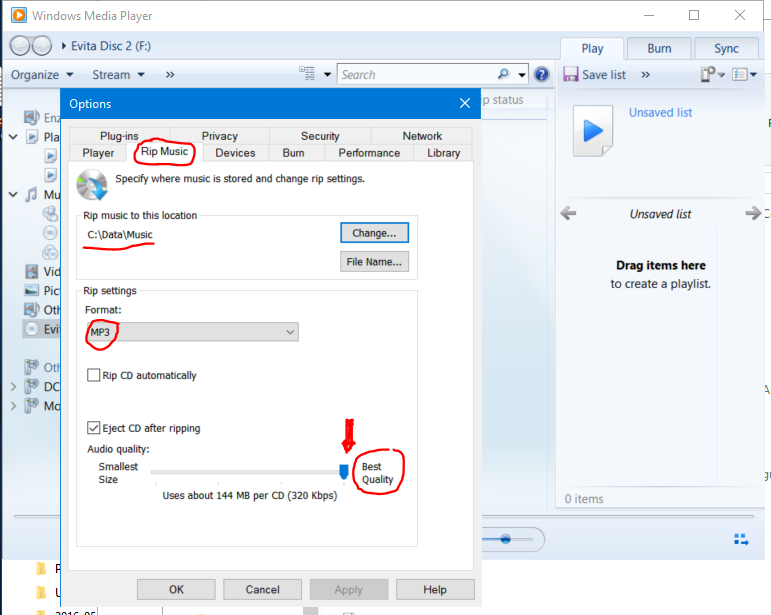
Options related to location, format, audio quality
BE CAREFUL:
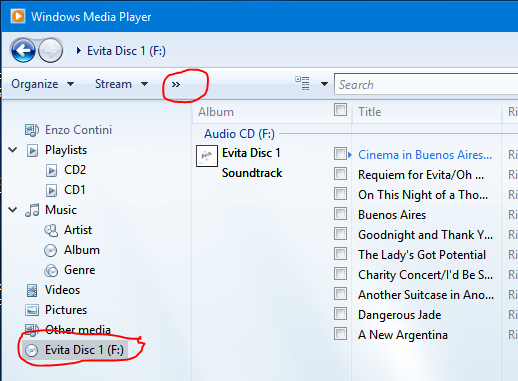
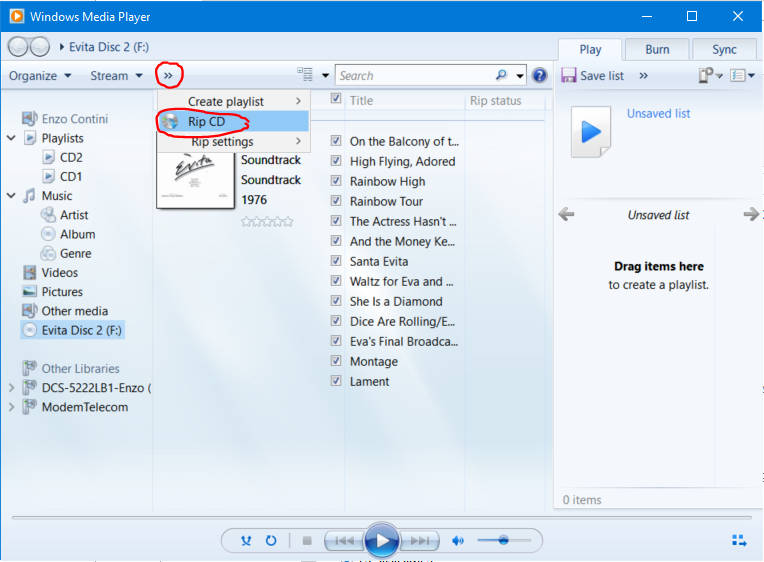
- The Rip CD item is available only if an audio folder is selected in the left tree menu (e.g. the F: in the following case, that is the driver mapped to the DVD reader of my PC) otherwise it is missing.
- The Rip CD item is enabled only if you select at least one track you want to rip.
Check the audio quality settings for the ripped music

The Rip CD option is not available because no folder containing music is selected from the tree menu
NOTE: both Rip CD (IT: Copia da CD) and Rip setting (IT: Impostazioni copia da CD) menu items are shown ONLY if a CD is inserted so ripping is possible, otherwise are not displayed: in my opinion it would have been better to leave those items grayed out, to make them not selectable but still visible (anyway showing that available feature), but this is so!
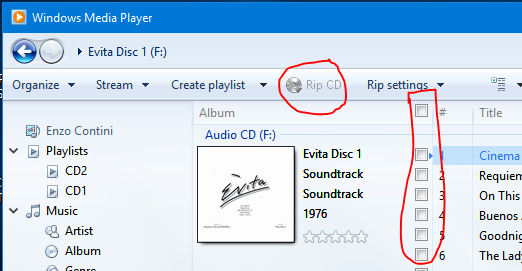
The Rip CD option is disabled because no track to be ripped is selected
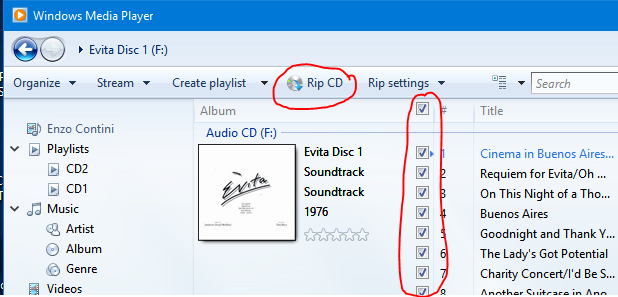
All tracks are selected to be ripped
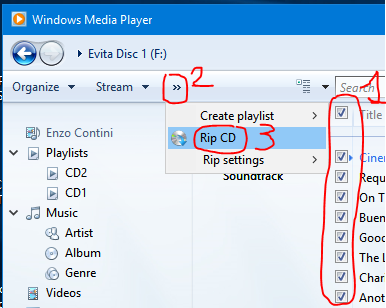
To start the rip select Rip CD (maybe through the >> option menu, if that application window is small).
The MP3 files of all the selected tracks will be generated in few minutes and you will find them in the Music defined folder.
Here you can find a video that I did in order to make all the procedures more clear and easy to understand 😉
Note that as each selected track is ripped, it is unchecked and the job starts with the next checked one.


Pingback: Come modificare a piacere la velocità di riproduzione di un audio mp3 in modo da poterlo meglio utilizzare come base per suonarci sopra con un proprio strumento | Enzo Contini Blog
Pingback: Come duplicare gratis un DVD/CD con Windows o MAC | Enzo Contini Blog
Pingback: Come convertire/modificare opportunamente un file audio/video, di un formato non supportato nativamente da Adobe Premiere Elements, in modo da poi renderlo utilizzabile anche da quel programma | Enzo Contini Blog
Pingback: Come convertire/modificare opportunamente un file audio/video, di un formato non supportato nativamente da Adobe Premiere Elements, in modo da poi renderlo utilizzabile anche da quel programma | Enzo Contini Blog
Pingback: Come convertire opportunamente un file audio/video, di un formato non supportato nativamente da Adobe Premiere Elements, in modo da poi renderlo utilizzabile anche da quel programma | Enzo Contini Blog
Pingback: How to get a DVD player in Windows 10 | Enzo Contini Blog
Pingback: Nice tools (for free) … and other useful links :-) | Enzo Contini Blog