
Sometime. for example for explaining how to do something, it is useful to record a video of what is happening on a screen and possibly record also what you are saying using the microphone.
How to do that on a Windows 10 PC was already a matter of some old posts (How to record the screen in Windows 10 for free … with the Xbox app; Microsoft Expression Encoder 4: how to record your PC screen for free (in HD)) but in this post I will show you some more and in particular a “new” one embedded in Windows 10 since May 2019 (1903 version):
the Game bar (IT: Barra dei giochi). You can find its settings in a proper section Settings -> Game -> Game bar [IT: Impostazioni -> Giochi -> Barra dei giochi] of the Windows 10 settings: from here you can find the default settings for open that game bar (Win + G), start a recording (Win + Alt + G), Start/Stop recording (Win+ Alt + R), activate/deactivate microphone (Win + Alt + M), take a screenshot (Win + Alt + Print) and other things.
As I said for the Xbox app, even this Game bar initial target were games, but now its features can be used in several situations, even for the teaching purposes.
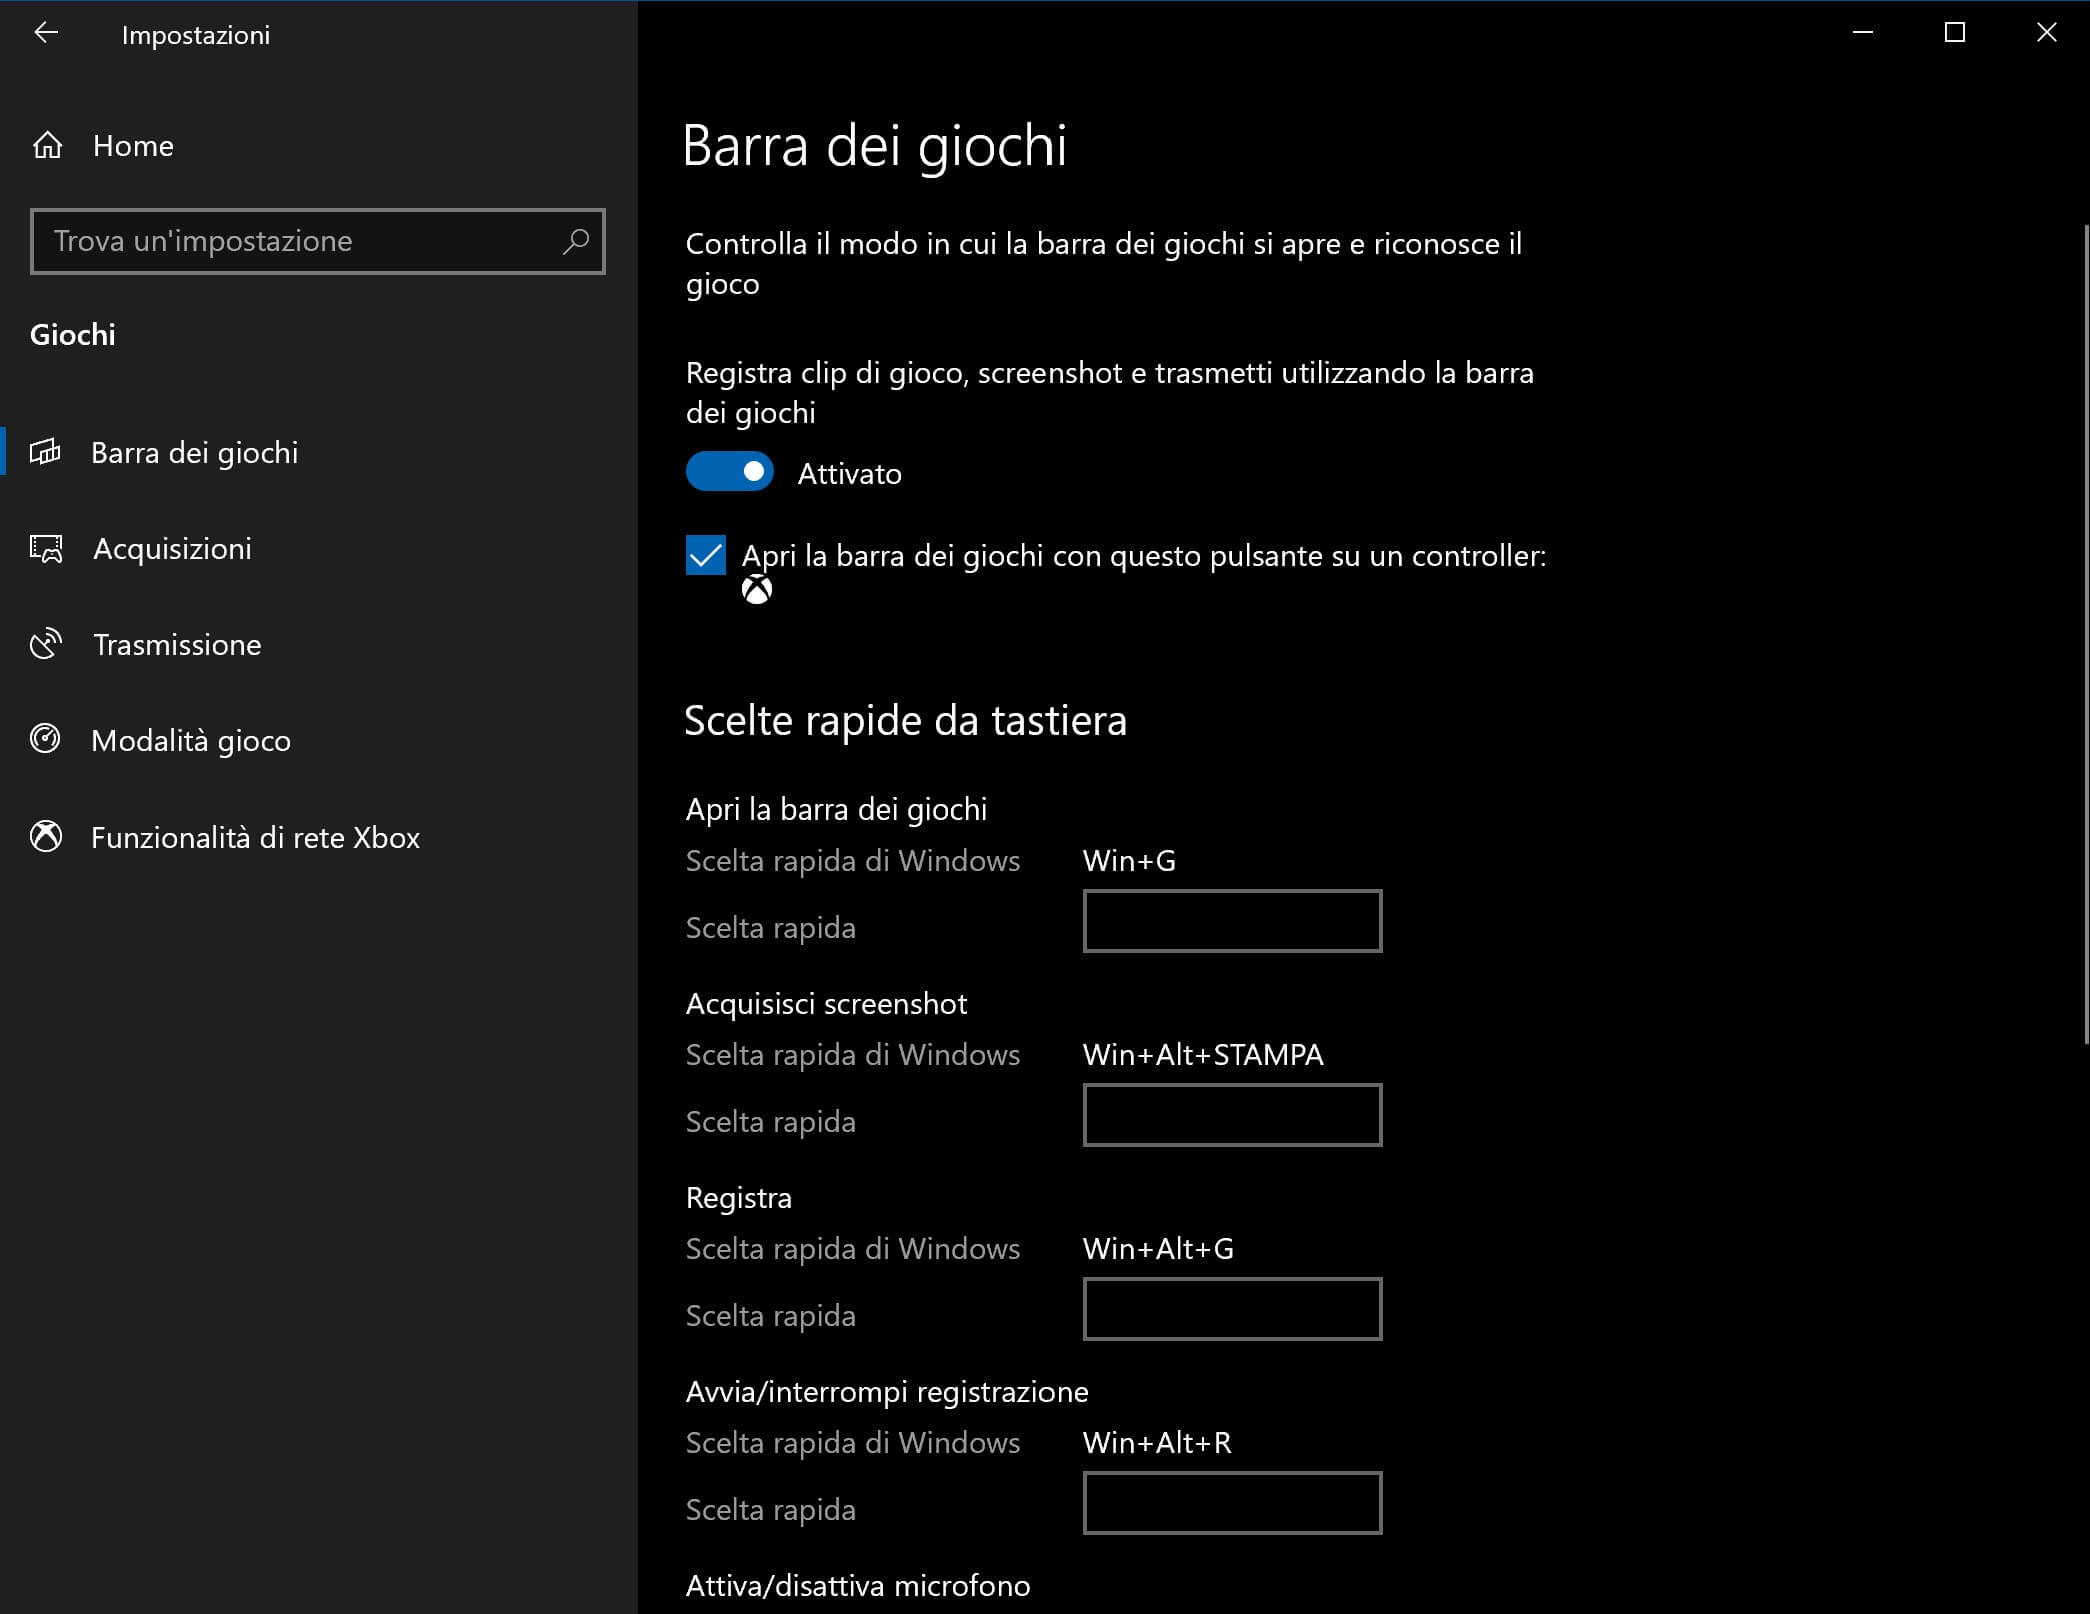
Game bar (IT: Barra dei giochi) settings page
Pressing Win + G starts a series of floating panes that overlap any displayed application: note that, if you are using more than one screen, they will appear on the screen where you currently have the active window and on that screen the game bar will act.
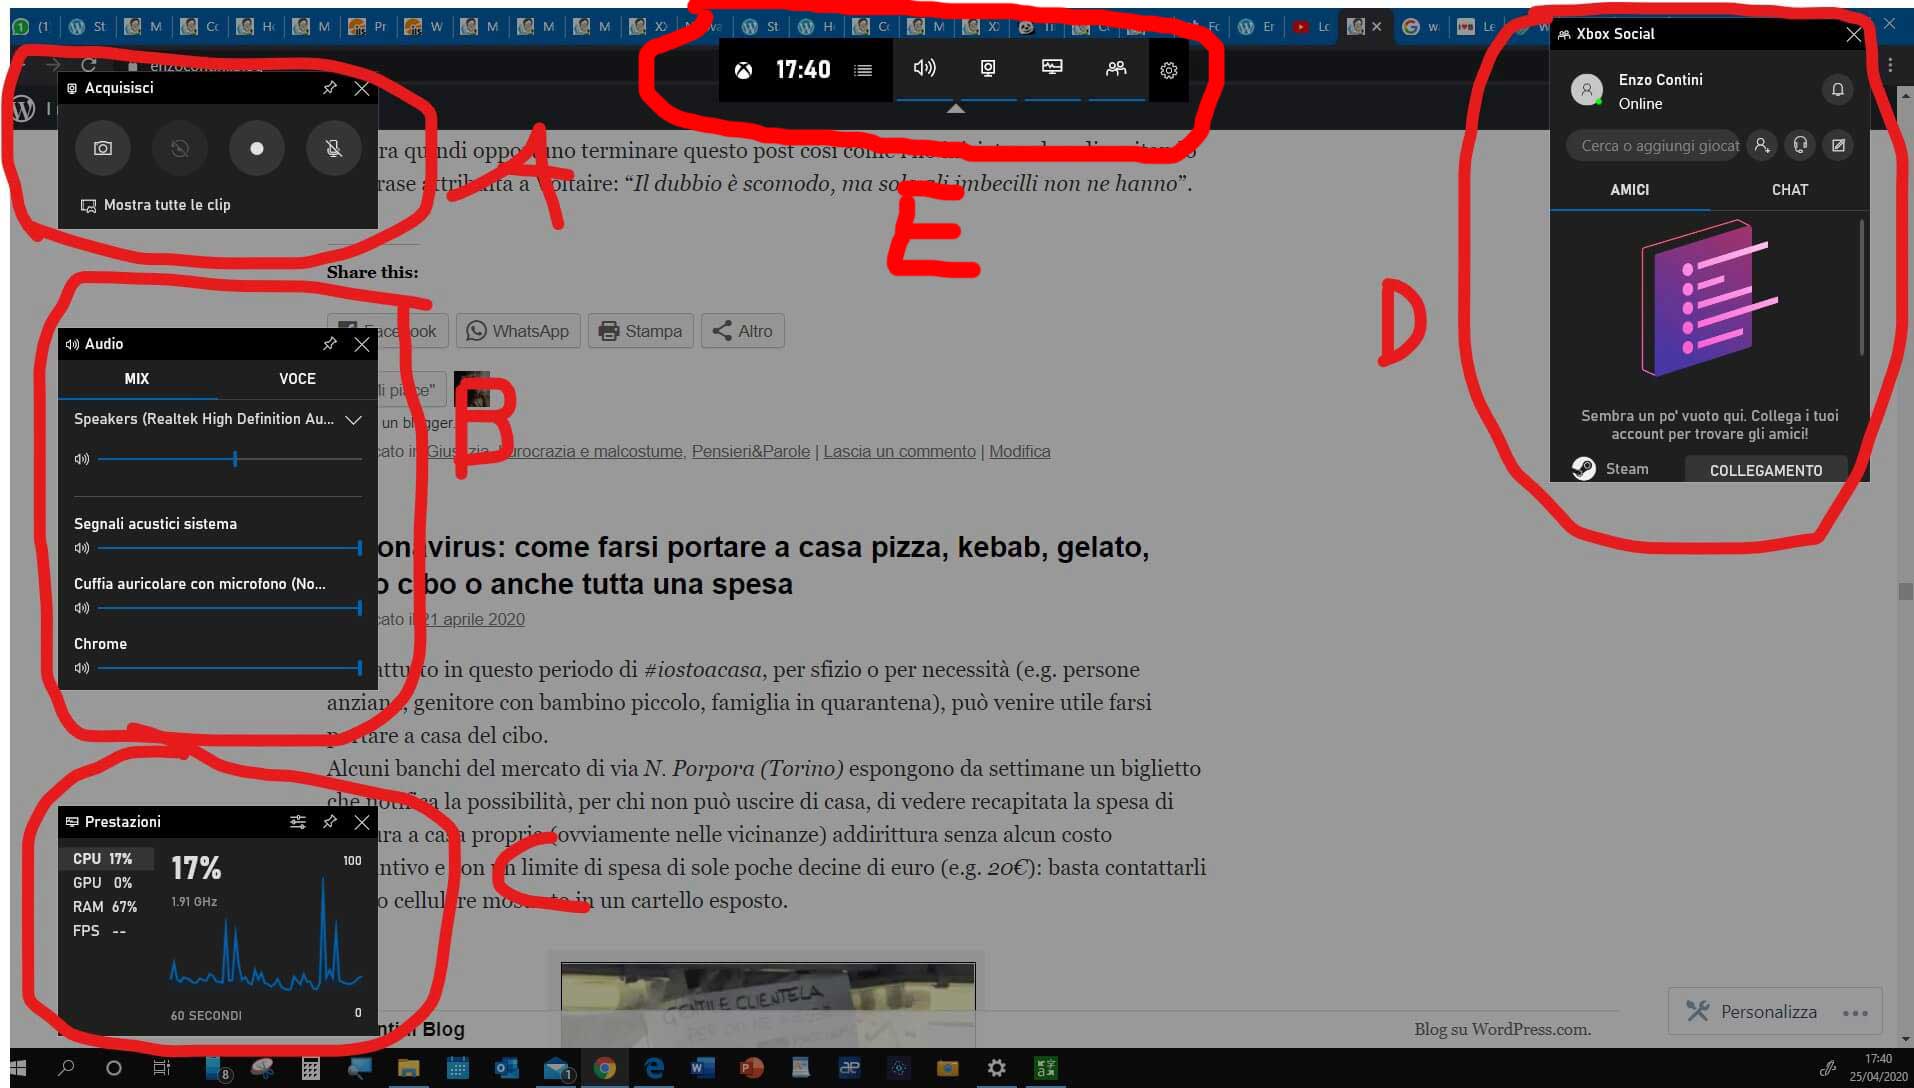
Game bar floating panes that overlap any displayed application
With E I highlighted is the main Game bar that allows to activate several other floating panes. The A and B pane are the most interesting one is you ara not interested in using that bar for games. In particular with the A pane you can take a full screen shot, start a background recording for the current running app, start a recording and set the microphone ON/OFF.
Note that the background recording obviously takes CPU computation and so it is to be activated only when needed, e.g. capture the last 30 seconds to retrieve abnormal behavior detected in the running program/app/browser.

Last 30 seconds background recording, must be activated only ìf needed
After any recording, you can find the file in the default Video forlder (by default %userprofile%\Videos\Captures [IT: %userprofile%\Video\Acquisizioni] but that folder can be even reached clicking on Show all clips and then Open file path:
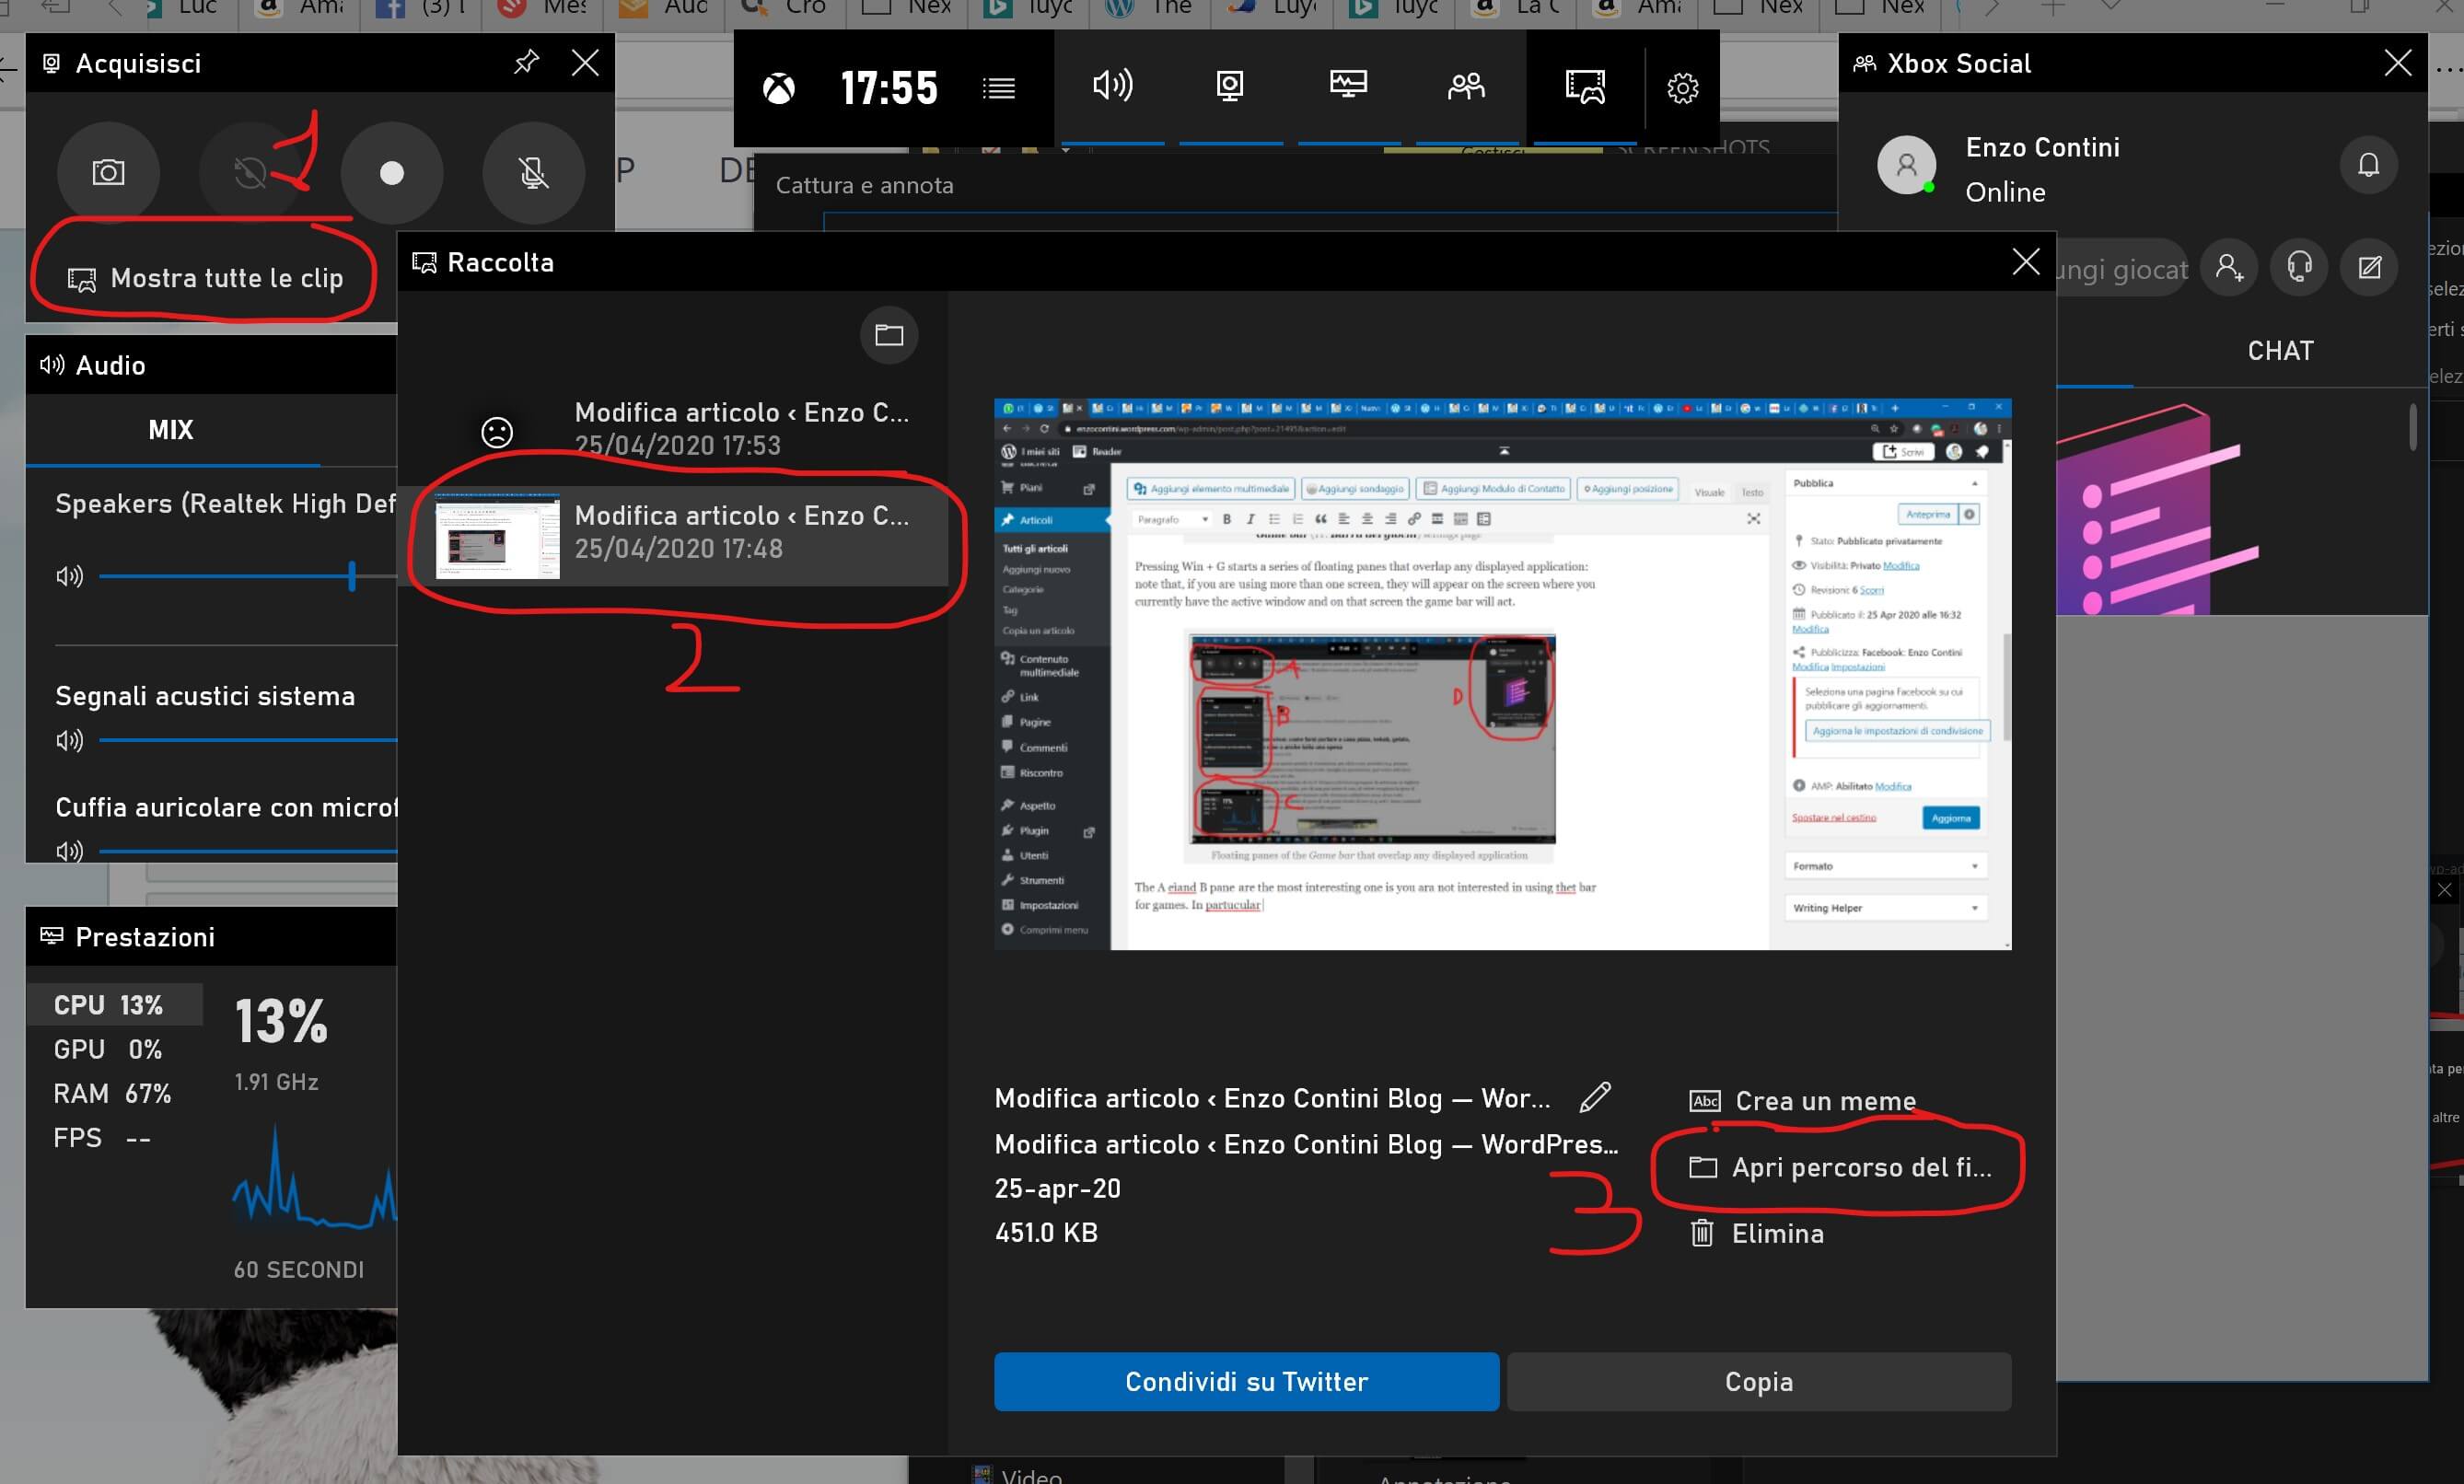
How to open the folder where all clips are saved
_____________
Another possible solution to record your PC screen is to use the free OBS Studio, downloadable from here. It is compatible with Windows, Linux and macOS and it allows not only to record the screen but also to send online streaming in real time, for example on YouTube (OBS is in fact an acronym for Open Broadcaster Software).
The Sources pane [IT: Fonti] at the bottom allows you to select the source of the video stream: to record the screen you just need to select Display [IT: Cattura lo schermo].
Choose as source the display right clicking on the Sources area and then Add -> Screen capture or Windows Capture, instead of an external source like a webcam:

Choose as source the display right clicking on the Sources area and then Add -> Screen capture or Windows Capture
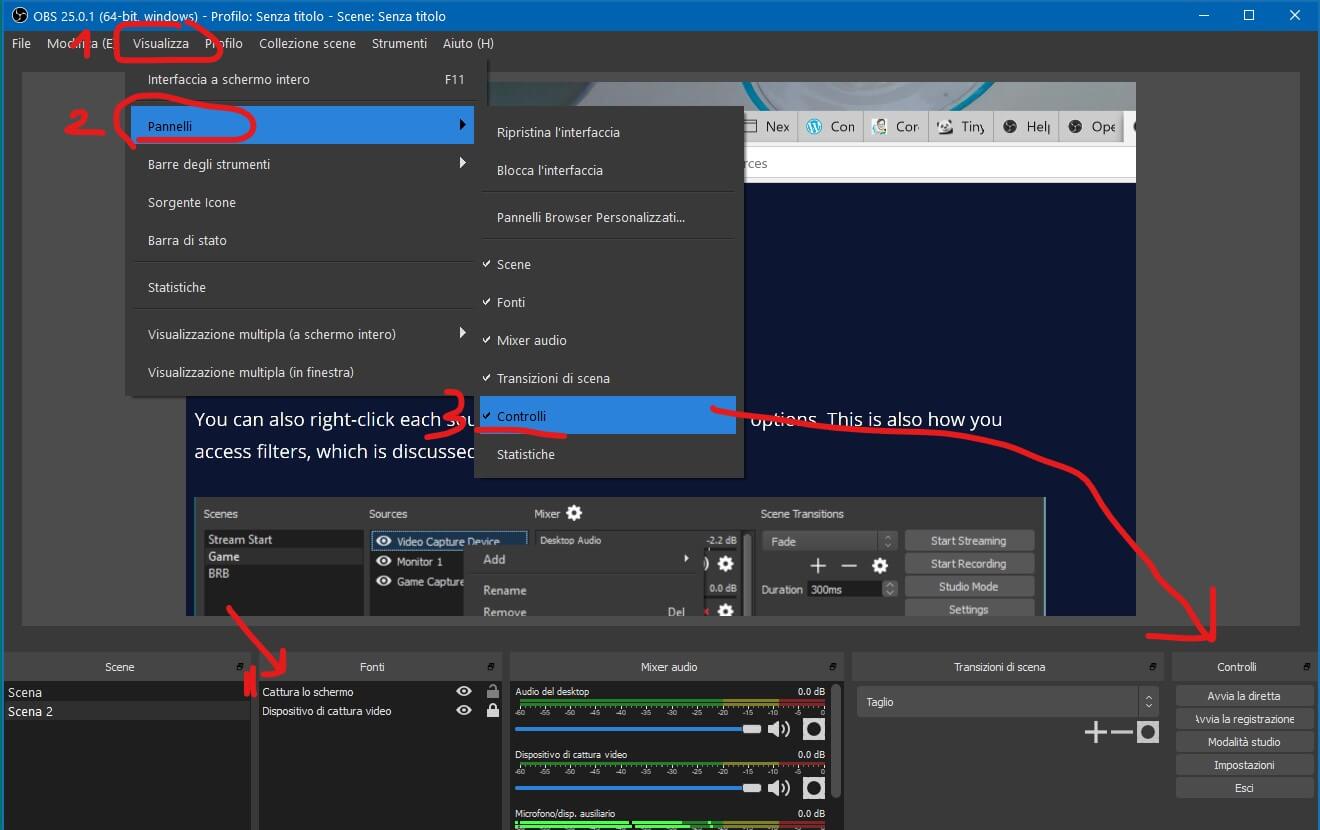
The Start/Stop Recording buttons at the bottom right let you start recording the screen and save it, by default in Windows, as a FLV file in the %userprofile%-Videos folder (you can quickly access it with a click on File -> View Recordings). Note that if you do not see the Control [IT: Controlli] panel on the bottom right, you need to go in Show [IT: Visualizza] on the top menu, then Panel and check Controls:
By clicking Settings then on Shortcuts, you can define keyboard shortcuts to start or block recording.
Finally, clicking File -> Convert Recordings, lets you use OBS Studio to turn FLV files into MP4 format.
______
You can see even more solutions in this article (it is in italian, but pictures and link can be useful to understand its text … and you can always use the translation feature of your browser!) talking also of Ezvid, Electa Live Screen Recorder, Screencastify a versatile chrome extension.


Grazie mille per aver condiviso passaggi molto dettagliati poiché OBS non è adatto ai principianti ma il tuo tutorial è molto chiaro, molto utile! Se non ti dispiace, vorrei suggerire anche Camtasia e Joyoshare VidiKit perché fanno anche un buon lavoro e hanno un editor video integrato. Ma il software che hai introdotto è totalmente gratuito! Così buono!
"Mi piace""Mi piace"