Diversi sono i casi in cui è necessario attivarsi per non avere impropriamente addebitate le rate del canone RAI … automaticamente, per default: una di queste è in caso di decesso dell’intestatario del canone, magari un genitore che viveva per conto suo, come è stato nel mio caso.
Mi sono quindi attivato mesi fa, ricercando online la modalità per effettuare tale procedura di cessazione: come spesso avviene, avevo proceduto da un motore di ricerca con un search generico tipo “come cessare il canone RAI“. Probabilmente non avevo neppure provato a ricercare la risposta nel sito che teoricamente avrebbe dovuto fornire tale indicazione, vale a dire quello della RAI, … presupponendo già che molto probabilmente tale informazione, (seppur necessariamente presente) non sarebbe stata particolarmente evidenziata e quindi sarebbe stata difficilmente reperibile.
Avevo quindi trovato, non so dove, il seguente modulo di autodichiarazione, con le indicazioni che doveva essere spedito per raccomandata, allegando copia sia del certificato di morte sia della carta di identità del dichiarante: ho quindi stampato, compilato e spedito il tutto alle poste.
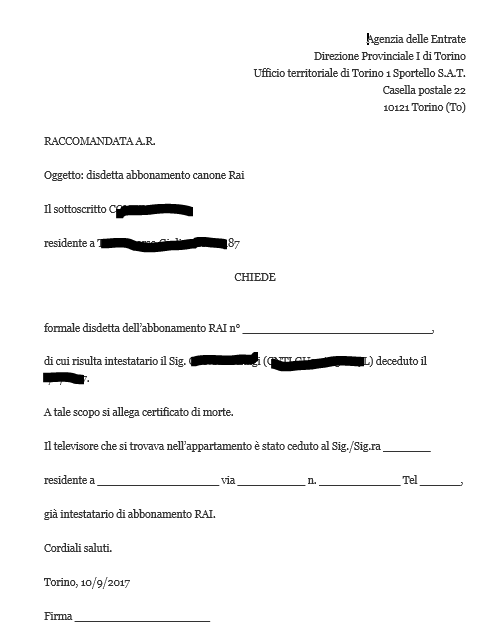
Modulo di richiesta cessazione canone RAI (NON PIU’ VALIDO)
A distanza di un mese e mezzo, per posta ordinaria ricevo dall’Agenzia delle entrate la comunicazione seguente, alquanto criptica, da cui difficilmente si comprende a cosa si riferisca e soprattutto cosa si richieda: anche solo per il fatto che viene indicato solo un numero di canone televisivo (e non anche l’intestatario) non aiuta nella comprensione!
Suppongo comunque che sia un qualcosa relativo alla mia precedente richiesta di cessazione del canone di mio padre defunto … sebbene non sia del tutto sicuro della tipologia di quella notifica (forse per mie deficienze, ma provate anche voi a leggere il testo della comunicazione, che personalmente trovo troppo generica e poco chiara …): quel canone era il mio o quello di mio padre? Se era quello di mio padre, non era stato disdetto come richiesto? Perché?

Comunicazione dell’Agenzia delle entrate … assai generica e criptica!! 😦
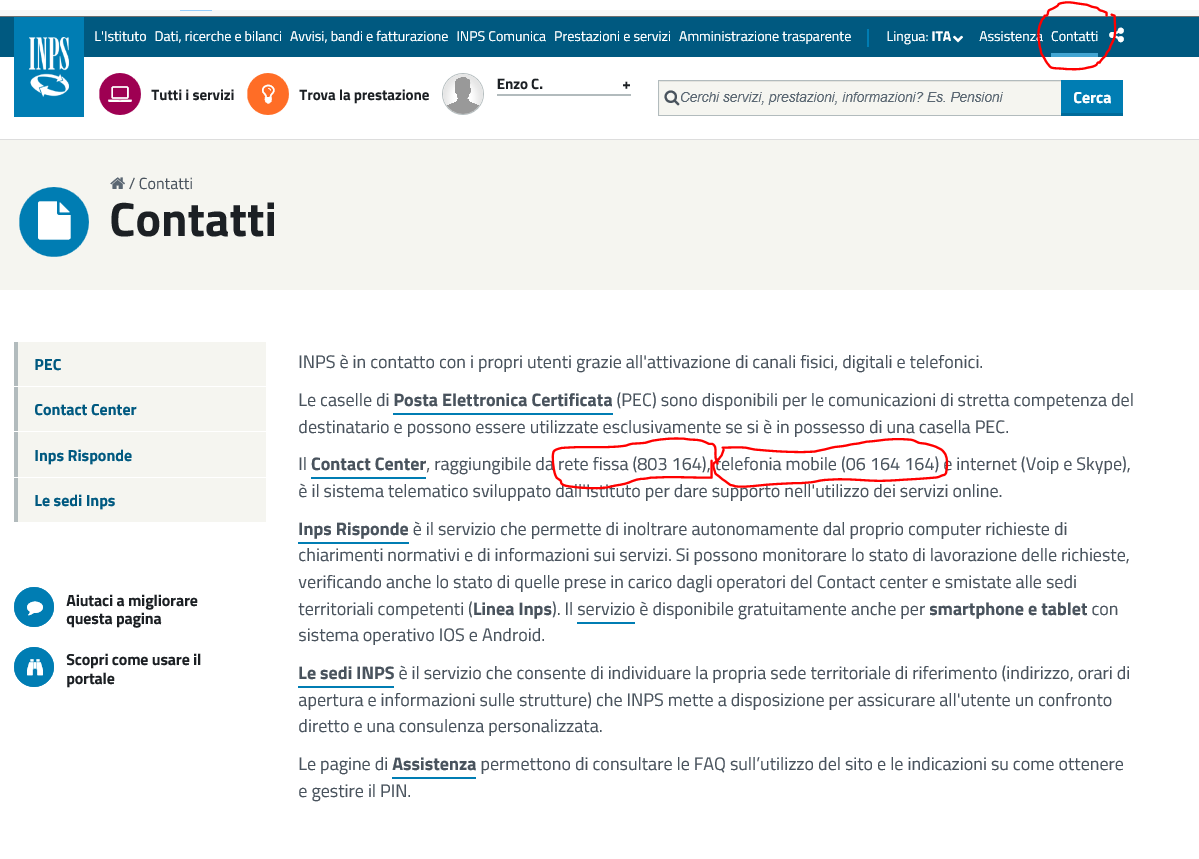
Per fortuna viene indicato un numero verde a cui chiedere possibili chiarimenti: 800938362.
Così telefono e, dopo neppure tanta attesa, mi risponde un operatore che, fornendo il numero di contratto RAI indicato nel foglio, mi conferma che si tratta di una comunicazione relativa al canone di mio padre deceduto: la procedura di cessazione da me precedentemente effettuata non era più valida dal 2016, vale a dire da quando l’importo del canone viene effettuato tramite la bolletta telefonica.
Mi dice pure che la nuova procedura da effettuare è descritta nel sito www.abbonamenti.rai.it: sotto mia esplicita richiesta di dove esattamente trovare tale procedura in quel sito, mi dice che il link (Il modulo è scaricabile qui) si trova nell’ultimo riquadro in basso della homepage … non proprio nascosto ma neppure in primissimo piano, come supponevo! Aggiunge anche di eventualmente poi ritelefonare qualora avessi necessità di chiarimenti sulla sua compilazione, facendomi intendere che non sarebbe stata una banalità completare quella procedura!
Già che ci sono chiedo anche delucidazioni sui documenti da allegare con quella nuova procedura e mi viene detto che NON richiede più l’invio del certificato di morte, qualora la disdetta sia fatta per quel motivo, bensì solo l’invio della copia della carta d’identità del dichiarante: scoprirò poi, leggendo nel dettaglio le istruzioni, che l’invio della copia della carta di identità è necessario unicamente qualora la disdetta avvenga per via cartacea e non informatica.
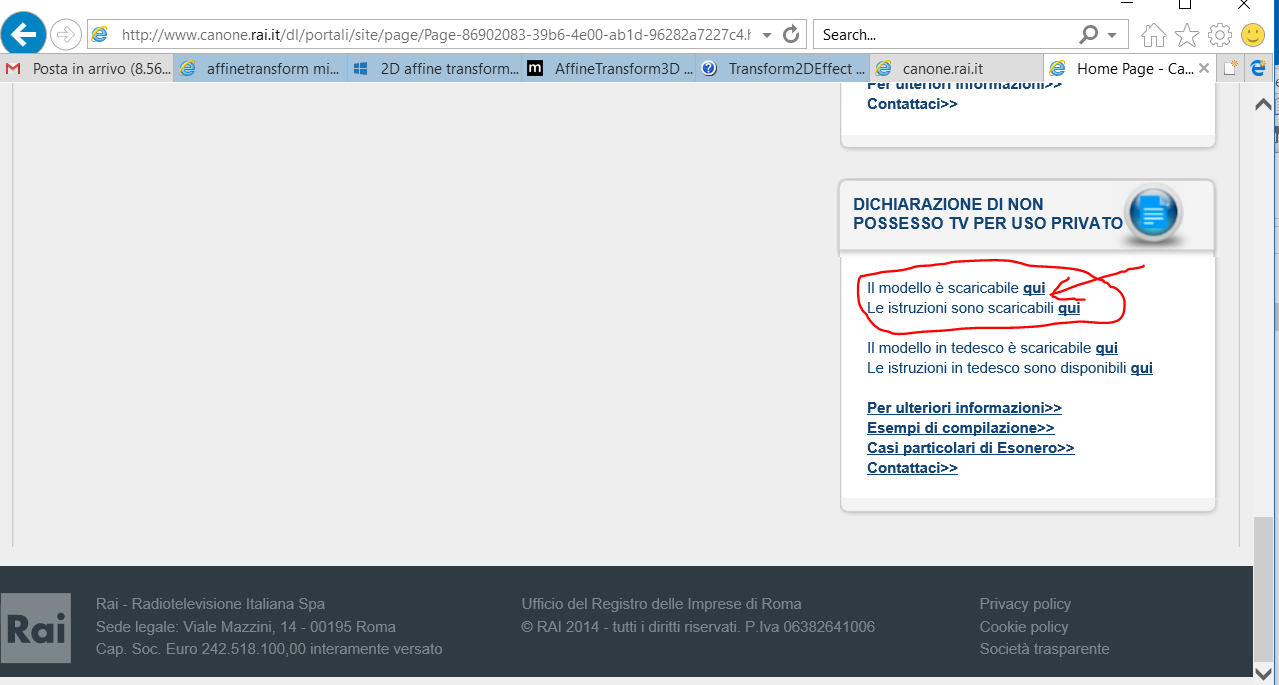
Sezione di accesso alla Dichiarazione presente in basso nella homepage del VECCHIO sito RAI (1)
Nel pannello scorrevole presente in alto, sempre nel sito RAI, veniva periodicamente comunque fornita la informazione seguente, che chiaramente indica come la procedura possa avvenire anche per via telematica tramite il sito dell’Agenzia delle entrate.
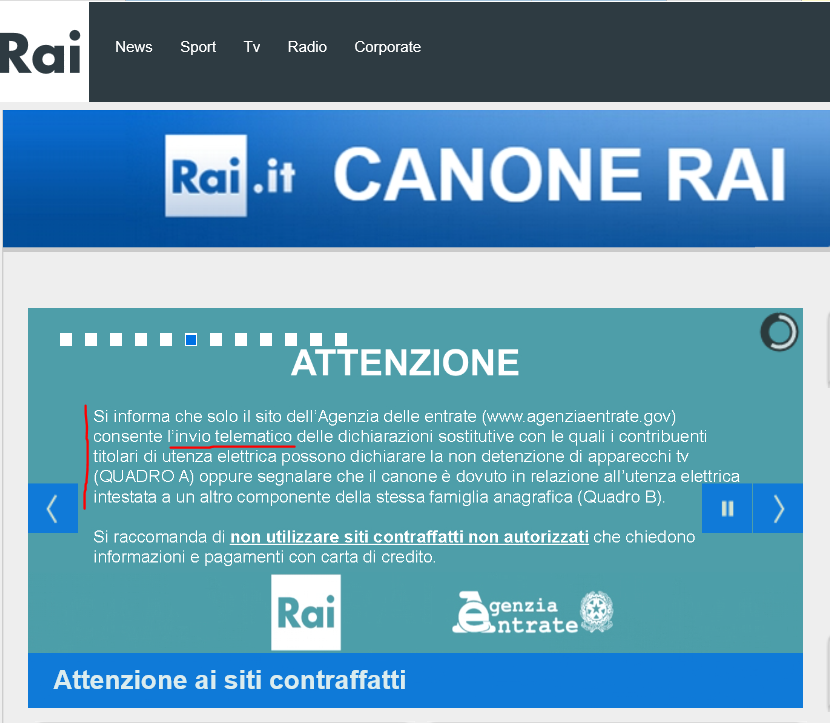
Sezione della homepage del VECCHIO sito RAI (2)
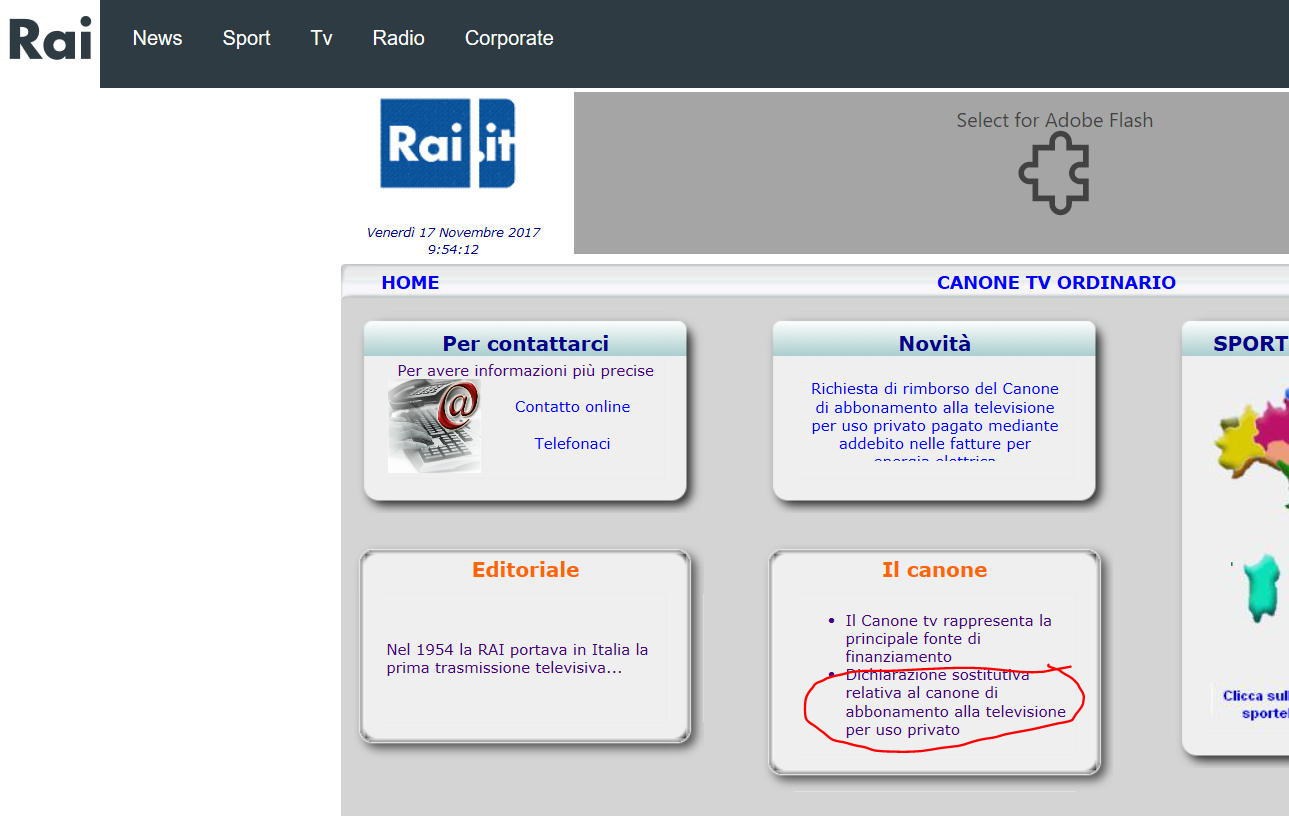
Noto oggi che il portale è cambiato … e non necessariamente in meglio, almeno relativamente alla visibilità di quella informazione. Ora si deve infatti andare nella sezione Canone TV Ordinario RAI, andare quindi nel riquadro Il Canone e premere link Dichiarazione sostitutiva relativa al canone di abbonamento alla televisione per uso privato. Scorrendo la pagina per visualizzare la sezione Dichiarazione sostitutiva, si arriva finalmente al link Clicca per la Dichiarazione sostitutiva relativa al canone di abbonamento alla televisione per uso privato:. Attualmente scarica il file relativo a giugno2017 (dich_sost_mod_giugno2017.pdf), ma potrebbe variare nel corso dei prossimi mesi visto il susseguirsi di modifiche nel sito!
Insomma ce la si può fare anche ora a trovare quella informazione … tuttavia, trattandosi di un qualcosa di utile a molti, probabilmente un link diretto e ben evidente nella homepage non farebbe sicuramente male: anziché migliorarne l’accessibilità, ora la si è oggettivamente peggiorata, anche solo rispetto a qualche giorno fa!!

Scaricare la dichiarazione sostitutiva per cessare canone RAI (1) (NUOVO portale)
Scaricare la dichiarazione sostitutiva per cessare canone RAI (2)
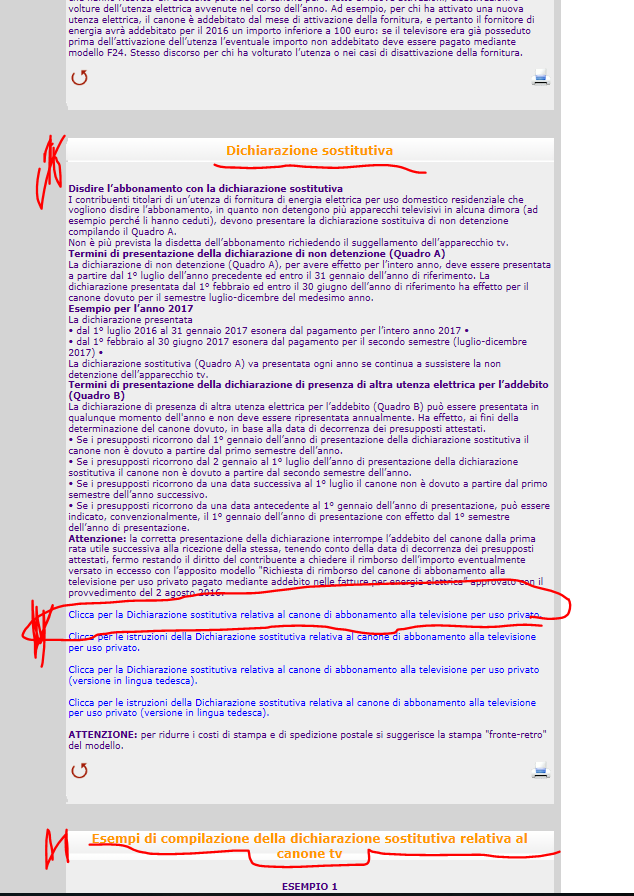
Scaricare la dichiarazione sostitutiva per cessare canone RAI (3)
La sezione seguente fornice poi esempi di compilazione di tale dichiarazione per i molteplici casi che si possono avere: sono ben 19 esempi di diversa possibilità di compilazione e questo già implicitamente, secondo me, dimostra il livello di burocrazia che il meccanismo attualmente adottato richiede! (NOTA: sicuramente per un bug, attualmente questi 19 esempi sono presentati in due omonime sezioni adiacenti, chiamate entrambi “Esempi di compilazione della dichiarazione sostitutiva relativa al canone tv“, la prima contenente gli esempi dall’1 al 14, la seconda contenente quelli dal 15 al 19)
Consiglio vivamente di ricercare tra quegli esempi, il caso specifico che rientra nella propria situazione: in particolare, qualora si desideri la cessazione per decesso dell’intestatario, gli esempi 9 e 18 sono quelli che contemplano le due specifiche modalità di compilazione. Sottolineo che, se non avessi visto l’esempio che faceva il caso mio e non avessi poi interpretato poi di conseguenza i passi richiesti dalla procedura informatizzata, personalmente dubito che sarei riuscito a compilarla correttamente, anche richiedendo l’aiuto al numero verde (quando mi sono imbattuto in un problema nell’inserimento informatizzato della richiesta, non mi è stato assolutamente di aiuto!!).
La procedura che prevede l’invio cartaceo della autodichiarazione risulta comunque più dispendiosa sia in termini di tempo sia di denaro (contemplando un invio del tutto per raccomandata, e richiede anche di allegare la fotocopia della carta di identità del dichiarante. Perciò ho optato per la modalità telematica tramite il sito dell’Agenzia delle entrate: attualmente questo è il link diretto. per accedere alla pagina per inoltrare tale dichiarazione, dopo essersi autenticato.
Purtroppo penso che non molti cittadini hanno effettuato la procedura per poter avere accesso ai servizi presenti nel sito dell’Agenzia delle entrate, e quindi devono necessariamente scaricare il modulo dal link presente sul sito della RAI: per fortuna io avevo da tempo già effettuato tale registrazione e ero in possesso di password ed apposito PIN dispositivo 😉
Se ancora non l’hai fatto, ti consiglio comunque di registrarti al portale dell’Agenzia delle entrate (seppur non si tratti di una procedura indolore) in quanto risulta sicuramente utile in molteplici occasioni .. ed anche solo per la disdetta del canone RAI, qualora tu rientri nei casi di esonero indicati dai 19 esempi: infatti tale procedura deve essere effettuata per tempo tutti gli anni (eccetto nel caso di cessazione per decesso), … con relativa spesa di raccomandata qualora non si adotti la modalità informatizzata!
Dal sito dell’Agenzia delle entrate si legge anche “La dichiarazione sostitutiva presentata dal 1° luglio 2016 al 31 gennaio 2017 esonera dal pagamento dell’intero canone dovuto per l’anno 2017. La presentazione dal 1° febbraio al 30 giugno 2017 esonera, invece, dal pagamento del canone dovuto per il secondo semestre 2017.
Per gli anni successivi i termini di efficacia delle dichiarazioni di non detenzione sono i seguenti:
- dichiarazione presentata dal 1° febbraio al 30 giugno: esonera dall’obbligo di pagamento per il secondo semestre dello stesso anno
- dichiarazione presentata dal 1° luglio al 31 gennaio dell’anno successivo: esonera dall’obbligo del pagamento per l’intero anno successivo (per esempio, una dichiarazione presentata nel novembre del 2017 avrà effetto per il canone del 2018)“.
Si noti poi che, come specificato nel modulo della dichiarazione, che l’invio via posta deve essere fatto tramite raccomandata senza busta, una modalità alquanto “strana” che non sapevo neppure esistesse: il foglio della dichiarazione e quello della carta di identità del dichiarante (con entrambe le facciate della carta di identità su un medesimo lato del foglio – altrimenti dovrai rifare la fotocopia –, in modo da lasciare in bianco uno dei lati, che deve poi essere utilizzato per scrivere l’indirizzo, una volta piegato il tutto e pinzato!!) vengono piegati e poi pinzati, scrivendo l’indirizzo di destinazione sul lato esterno di uno dei fogli (che DEVE risultare in bianco) … il tutto alla modica cifra di più di 8€!!!
Ad esempio da questo sito si leggono le istruzioni precise di come effettuare il tutto: Bisogna prendere i fogli da spedire spillati tra loro, avendo cura di mantenere l’ultima facciata, quella posteriore, completamente bianca. Il plico di figli va piegato in tre parti a soffietto in 3 sezioni di uguale dimensione avendo cura che la parte scritta rimanga all’interno e la parte bianca esterna. Il soffietto creato dal plico può essere chiuso da un punto di spillatrice sui lati più corti, per fare in modo che non venga aperto e letto. Sulla parte bianca scrivere l’indirizzo del destinatario, in questo caso Agenzia delle Entrate Ufficio di Torino 1 S.A.T. – Sportello abbonamento tv – casella postale 22 – 10121 Torino, e andare all’ufficio postale a spedire la raccomanda con ricevuta di ritorno. La ricevuta che vi rilascerà l’ufficio postale andrà conservata insieme alla ricevuta di ritorno che riceverete dall’Agenzia delle Entrate.”
Perché poi richiedere una raccomandata senza busta che costa di più, … qui puoi leggere (se credi, io non l’ho fatto!) ipotetiche motivazioni ![]()

Dichiarazione sostitutiva relativa al canone di abbonamento alla televisione per uso privato dove viene specificato che, in caso di invio per servizio postale, deve avvenire con RACCOMANDATA SENZA BUSTA
Insomma, se volevano rendere le cose complicate e costose, ci sono riusciti alla perfezione!!
===========================================================
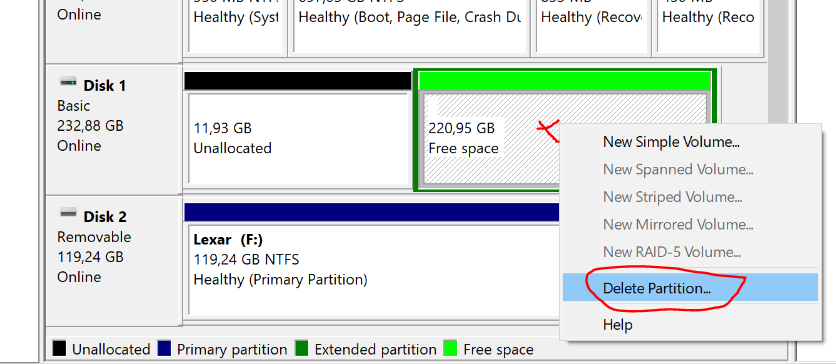
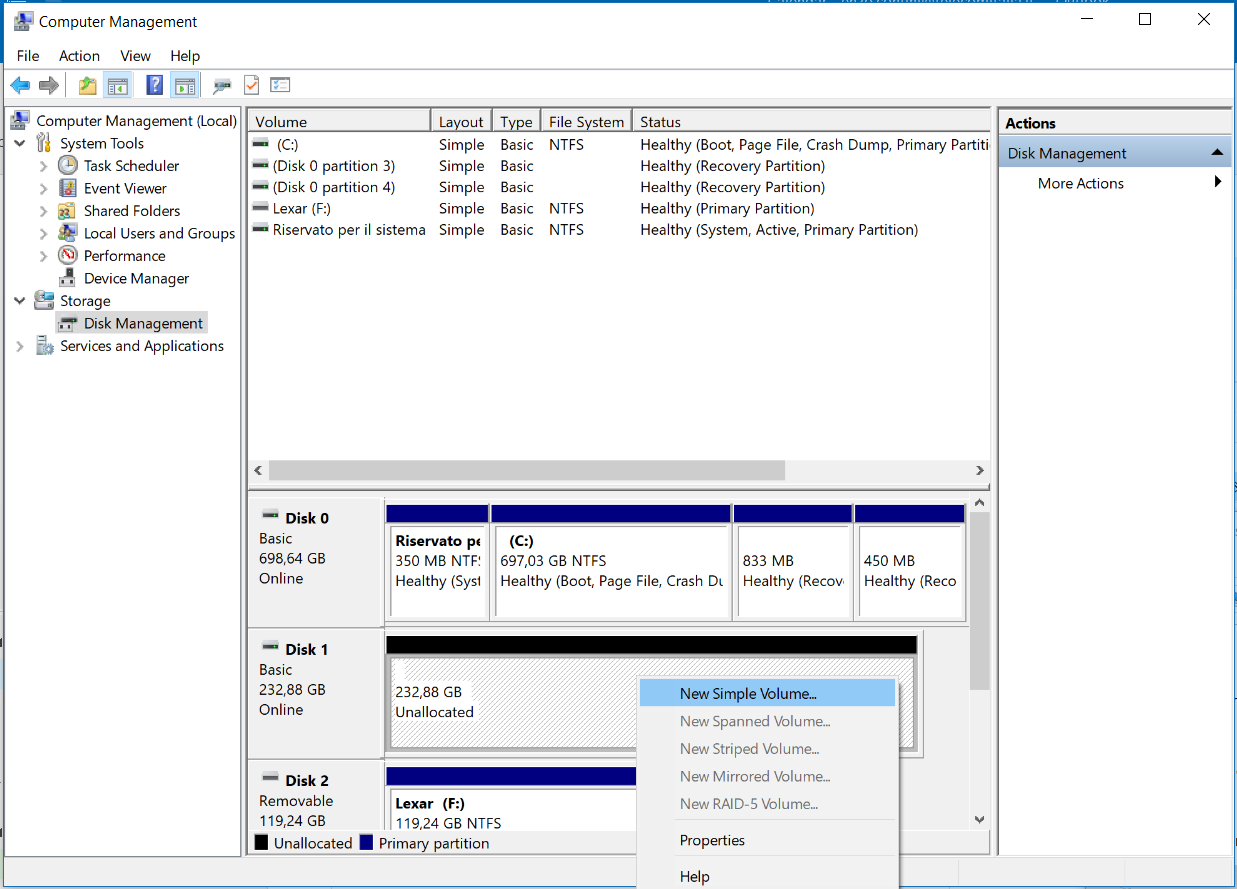
Gli screenshot mostrati nel seguito mostrano, step by step, come inoltrare telematicamente tale dichiarazione, una volta autenticatisi nel portale dell’Agenzia delle entrate con il proprio account.
Segui i passi che ti indico, perché anche qui, almeno nel caso di dichiarazione per decesso, ci si può imbattere negli immancabili ostacoli che potrebbero indurti a buttare la spugna ed optare per la modalità cartacea: telefonare al numero verde indicato (800938362) potrebbe poi non risultare di particolare aiuto se, come è successo a me, l’operatore (una volta presentatogli il problema riscontrato) ti consiglia lui stesso di optare per la classica modalità cartacea, dal momento che riceve un gran numero di telefonate di persone che hanno problemi con l’inoltro per via informatica!!
… e viene da chiederti: ma l’informatica non dovrebbe facilitare la burocrazia e rendere più agevole le procedure che il cittadino deve rispettare? Non è che, forse, l’implementazione non è stata adeguata al target degli utilizzatori e/o la logica pensata per quella procedura sia troppo complessa per risolvere la “semplice” richiesta che il cittadino deve inoltrare?
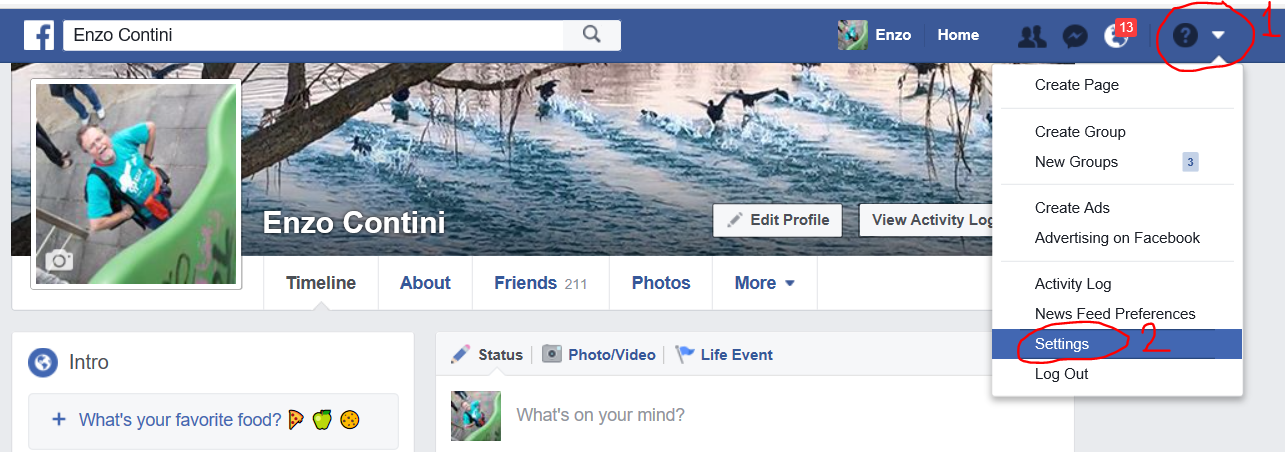
Per giungere alla pagina relativa all’inserimento informatico della dichiarazione, conviene ricercare nel menù, la sezione Cosa devi fare, procedere quindi in Richieste, istanze e interpelli ed infine selezionare Canone TV:
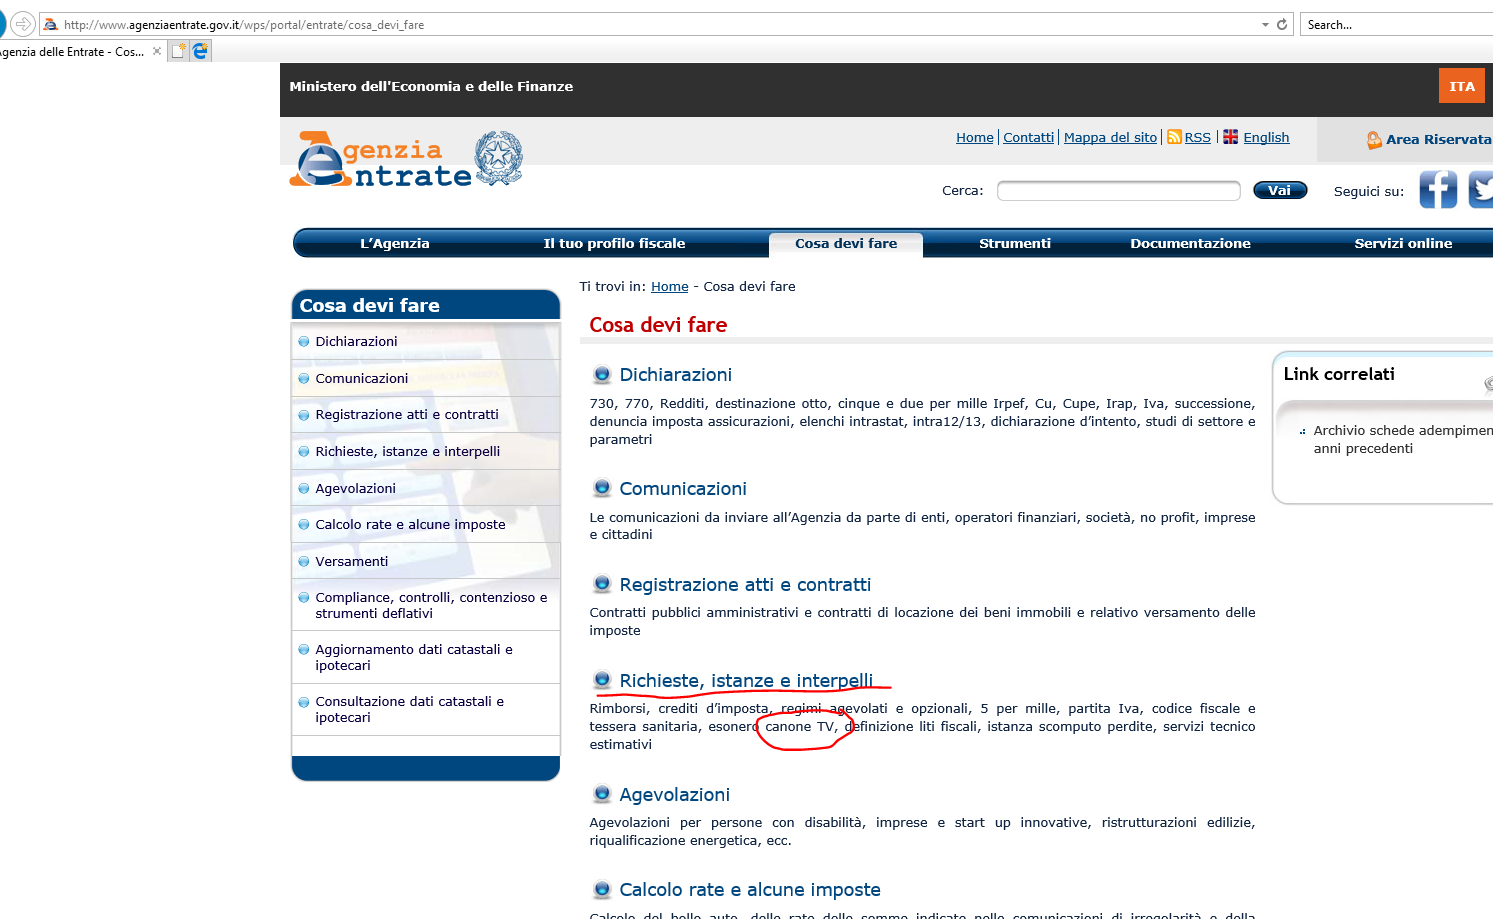
Come inoltrare la dichiarazione con la procedura informatica (1)

Come inoltrare la dichiarazione con la procedura informatica (2)

Come inoltrare la dichiarazione con la procedura informatica (3)
Si noti che, anche nel sito dell’Agenzia delle entrate, esiste un’apposita sezione che descrive gli Esempi di compilazione, i medesimi 19 presenti nel sito della RAI: come già evidenziato, è assai opportuno visionarli per comprendere come compilare correttamente tale dichiarazione nel caso specifico di interesse.
In particolare, nel seguito, mostro gli esempi 9 e 18 relativi al caso di decesso, in quanto nel seguito andrò a dettagliare la procedura in quel caso specifico che era quello di mio interesse e che quindi ho sperimentato direttamante, anche se la procedura non penso differisca molto negli altri casi.

Come inoltrare la dichiarazione con la procedura informatica (4)

Esempi per dichiarazione in caso di decesso (1)

Esempi per dichiarazione in caso di decesso (2)
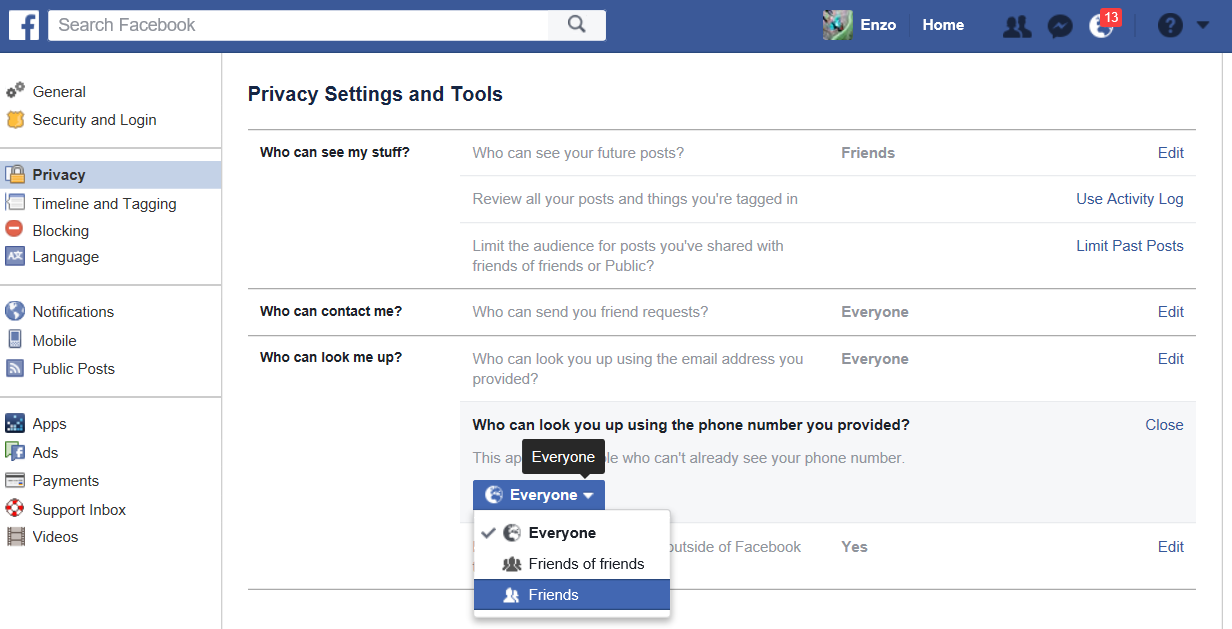
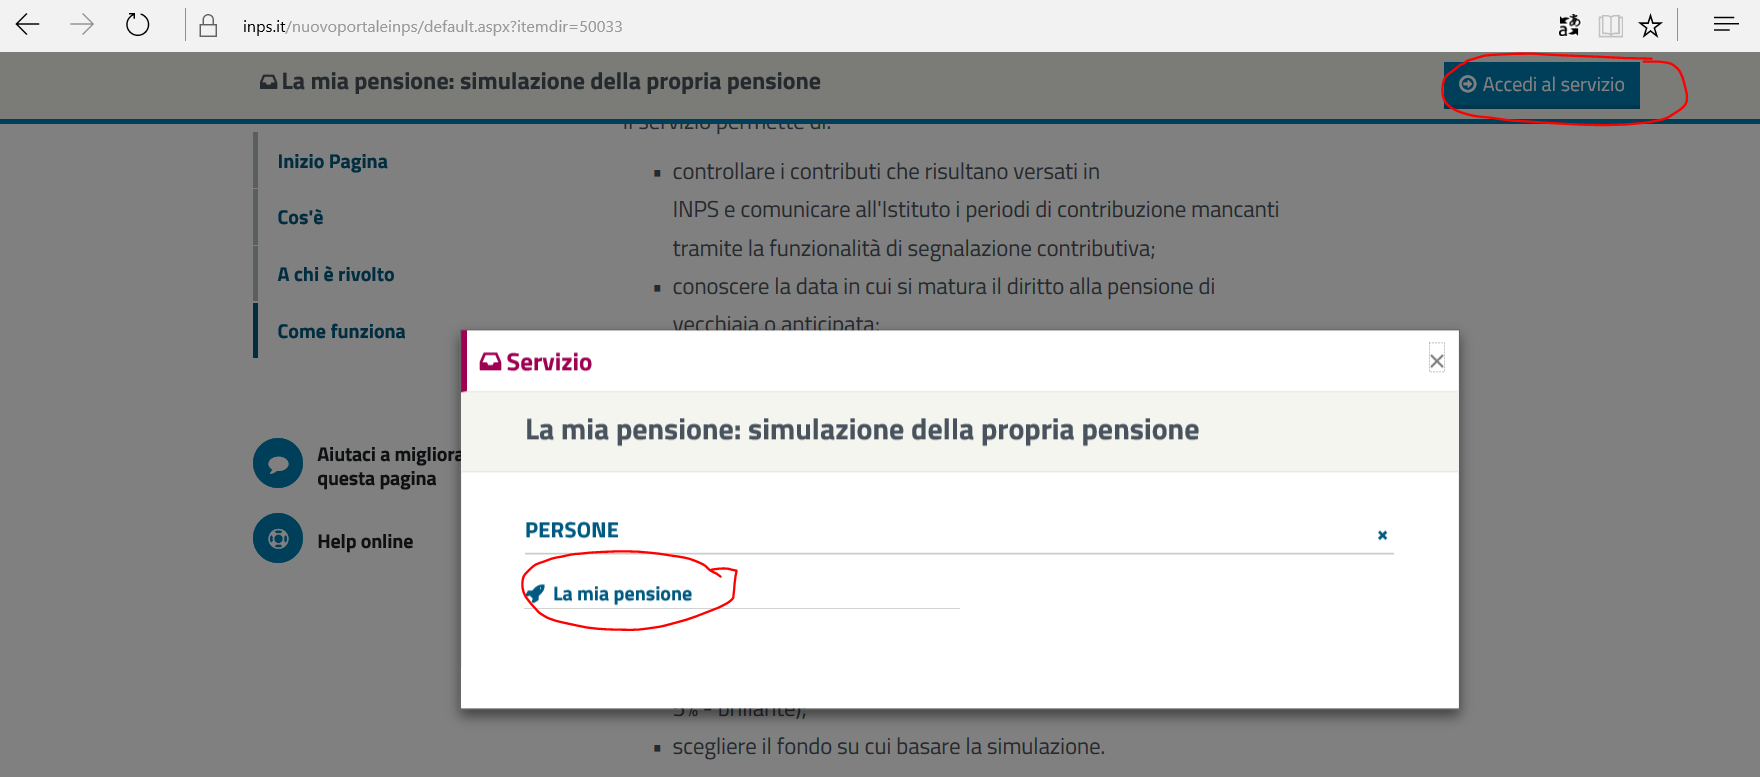
Una volta autenticati nel portale, e selezionata la voce del menù a destra Dichiarazione sostitutiva (invio online), si può accedere a tale servizio selezionando l’apposito bottone Accedi al servizio:

Accesso alla sezione di inoltro della dichiarazione sostitutiva (invio online) (1)
… oppure ci puoi arrivare anche per altra strada, ma forse in modo più complicato ;-(

Accesso alla sezione di inoltro della dichiarazione sostitutiva (invio online) (2)
Vediamo ora il wizard per l’inserimento dei dati e quindi l’inoltro informatizzato di quella autodichiarazione:
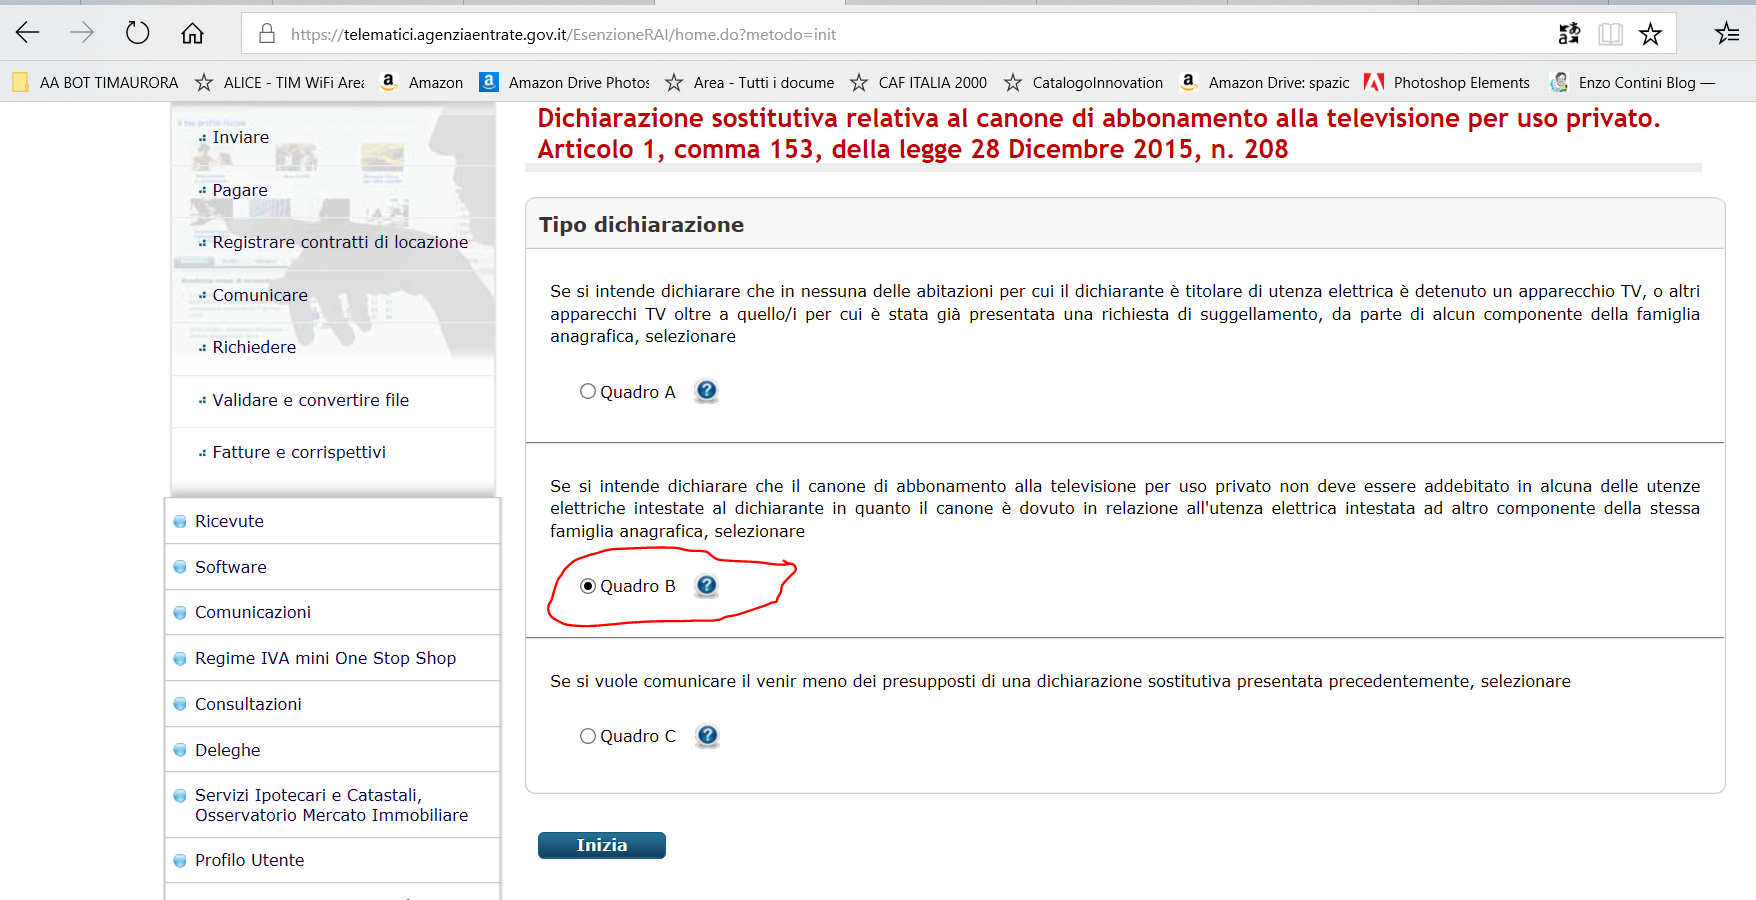
Wizard per l’inoltro dei dati della dichiarazione (passo 1)
Nel caso si debba compilare la dichiarazione in caso di decesso (in cui si deve compilare solo il Quadro B, come mostrato negli esempi relativi a quel caso), risulta essenziale selezionare Quadro B al passo 1 (e non procedere lasciando la selezione di default relativa al Quadro A)!! Diversamente si giunge, al passo successivo, comunque al form dei dati del dichiarante, ma quindi, anche indicando il codice fiscale del defunto, al passo successivo, relativo al Quadro A, viene richiesto necessariamente, per proseguire al passo successivo, di selezionare una delle due opzioni: diversamente salta fuori una finestra di popup bloccante. … ma nel caso di recessione in caso di decesso, nell’esempio di compilazione viene indicato chiaramente che non deve essere selezionato nulla in quel Quadro A!! Inutile, come già detto, chiedere delucidazioni al numero verde che si è nel mio caso limitato a consigliarti di usare la modalità cartacea, ricevendo lui stesso diverse telefonate di persone che non riescono ad operare e completare la procedura per via informatica ed quindi ipotizzando un malfunzionamento di quel sistema!
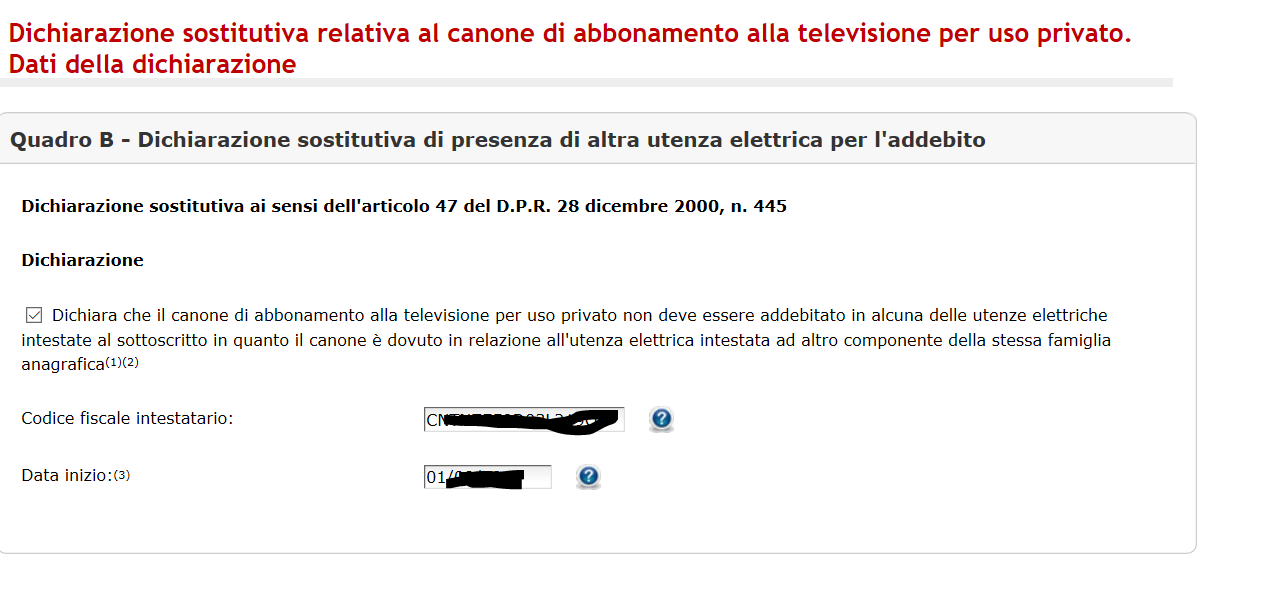
Basterebbe invece veramente poco inserire un check sul fatto che uno ha inserito o meno il codice fiscale del defunto ,per evitare questa problematica bloccante. Si noti che, nel secondo passaggio della procedura, il campo di inserimento del codice fiscale del defunto viene comunque, presentato come compilabile … e questo anche scegliendo il Quadro A (selezionato di default) … sebbene, nel caso in cui il Quadro A deve essere compilato, non rientri nella richiesta di cessazione per decesso!!
Comunque se si sceglie fin dall’inizio, nel passo 1, la compilazione del Quadro B, si riesce a completare la procedura, … ma viene proprio da chiedersi perché un modulo elettronico, che deve essere compilato da un cittadino generico, debba essere così mal congeniato!!

Wizard per l’inoltro dei dati della dichiarazione (passo 2)
Nel seguito viene appunto mostrato la popup bloccante che compare se, avendo iniziato il wizard lasciando al passo 1 impostata la scelta del Quadro A (come da default), non si è poi selezionata nel passo 3 nessuna delle checkbox presenti nel Quadro A (come da procedura di esempio nel caso di decesso).
(NOTA: anche se sono disegnate come checkbox, risultano funzionalmente implementate come radiobutton, non prevedendo la possibilità di scelta multipla)

Wizard per l’inoltro dei dati della dichiarazione (passo 3): se al passo 1 si è selezionato Quadro A, risulta obbligatorio selezionare almeno una delle checkbox per procedere, anche se uno al passo 2 si è indicato il codice fiscale del decaduto
Wizard per l’inoltro dei dati della dichiarazione (passo 3)
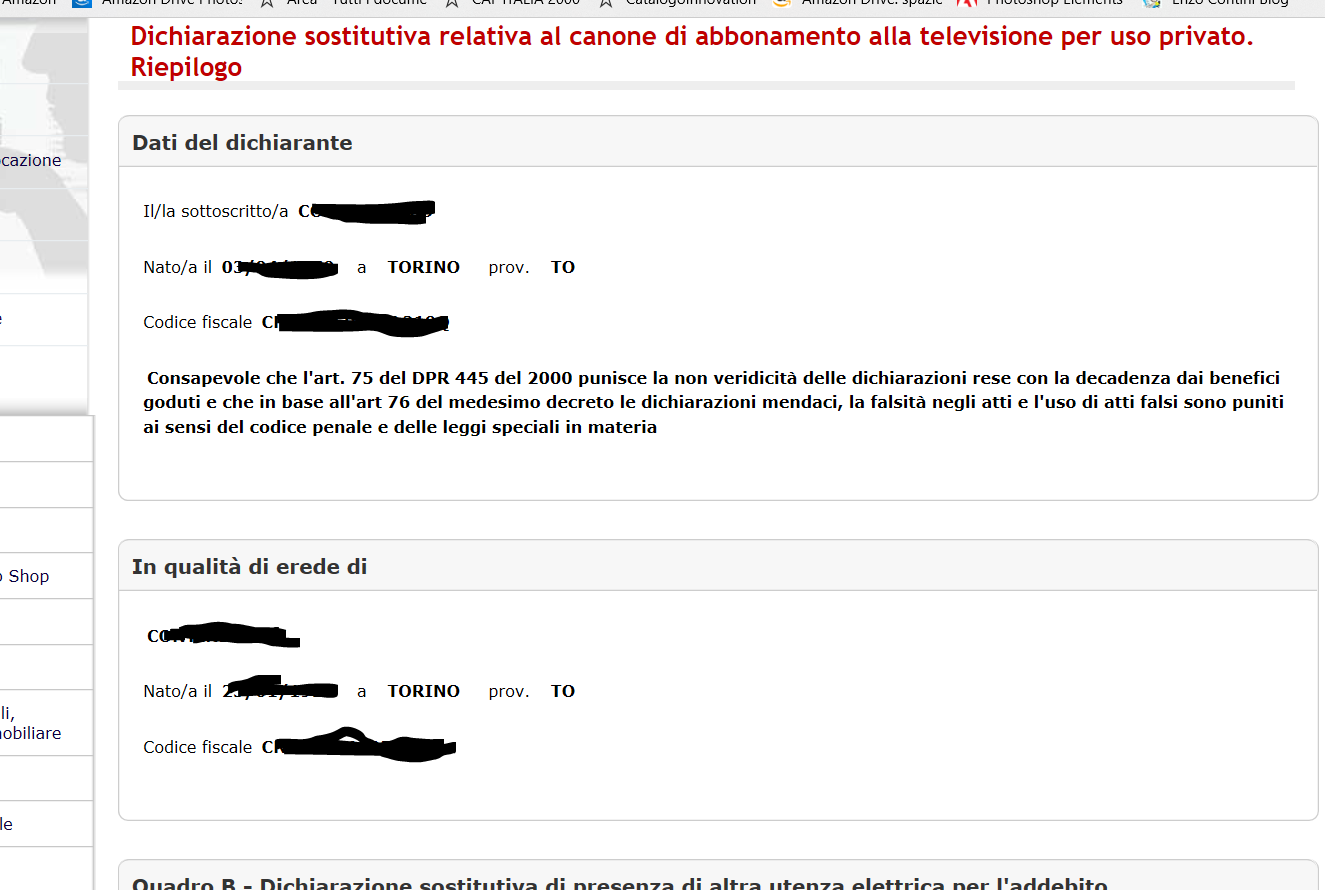
Wizard per l’inoltro dei dati della dichiarazione (passo 4)
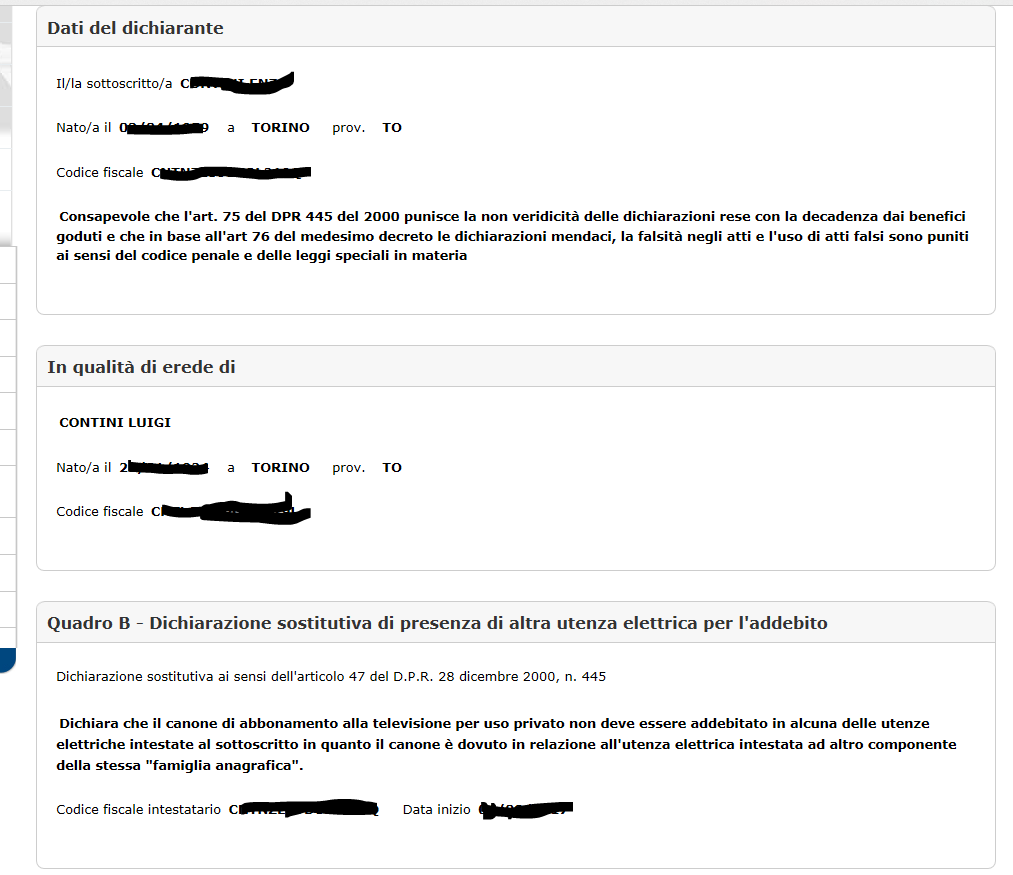
Wizard per l’inoltro dei dati della dichiarazione (passo 5)

Wizard per l’inoltro dei dati della dichiarazione (passo 6)
Concludo, infine, constatando che purtroppo le procedure per agevolare le incombenze del cittadino non siano ancora del tutto adeguate: speriamo migliorino nel tempo!
😦


 ========================================


 After the review is successful, in the App Dashboard under App Review, set the app to Public.


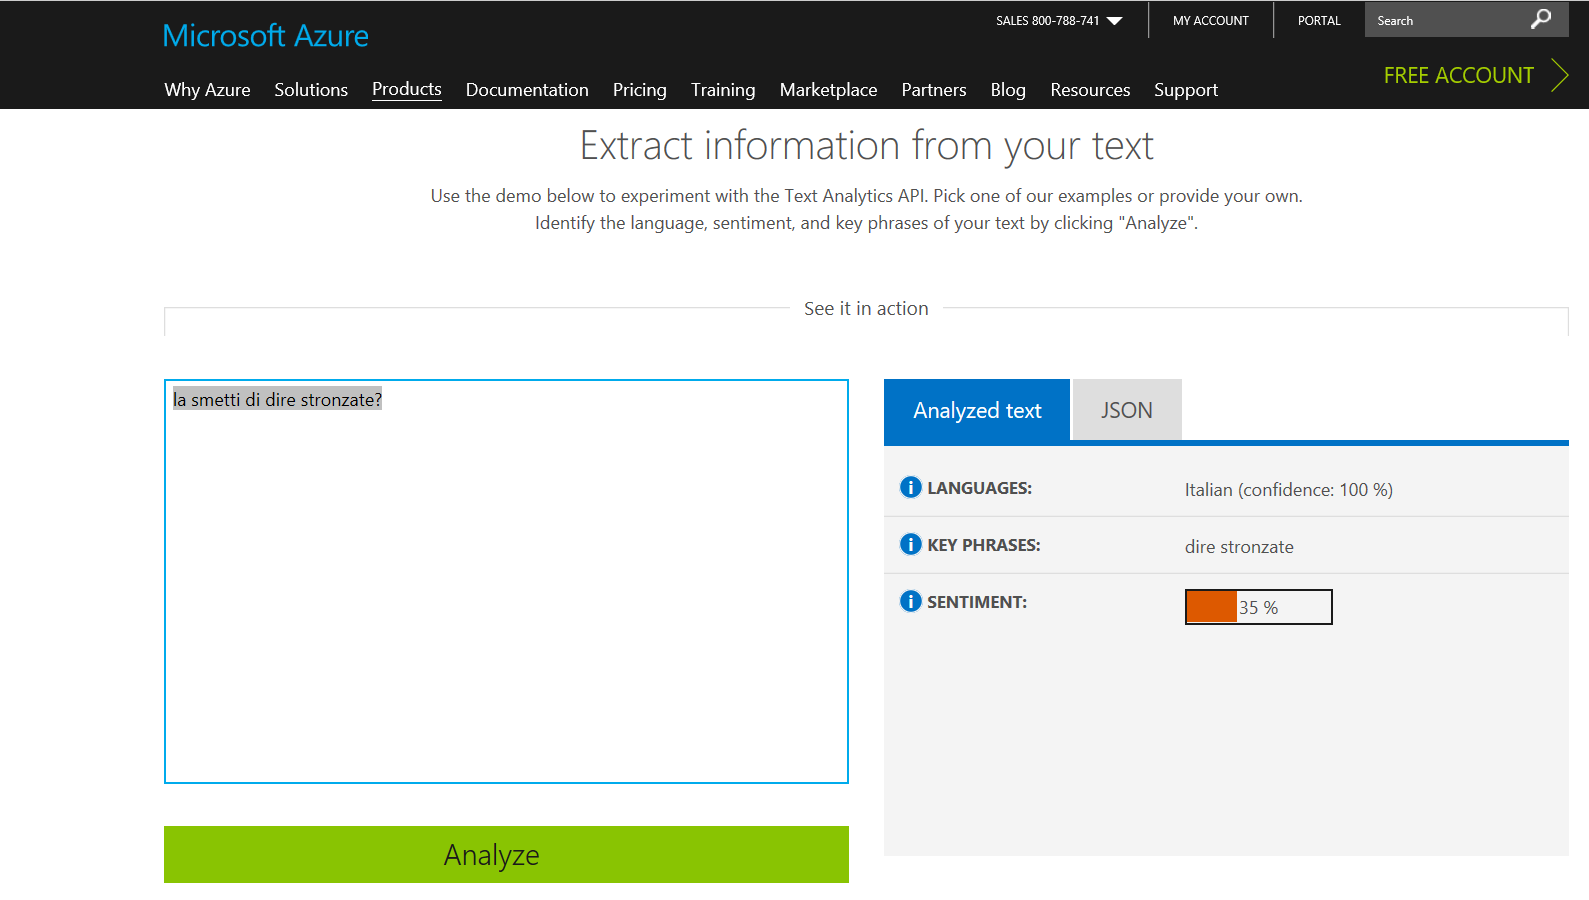
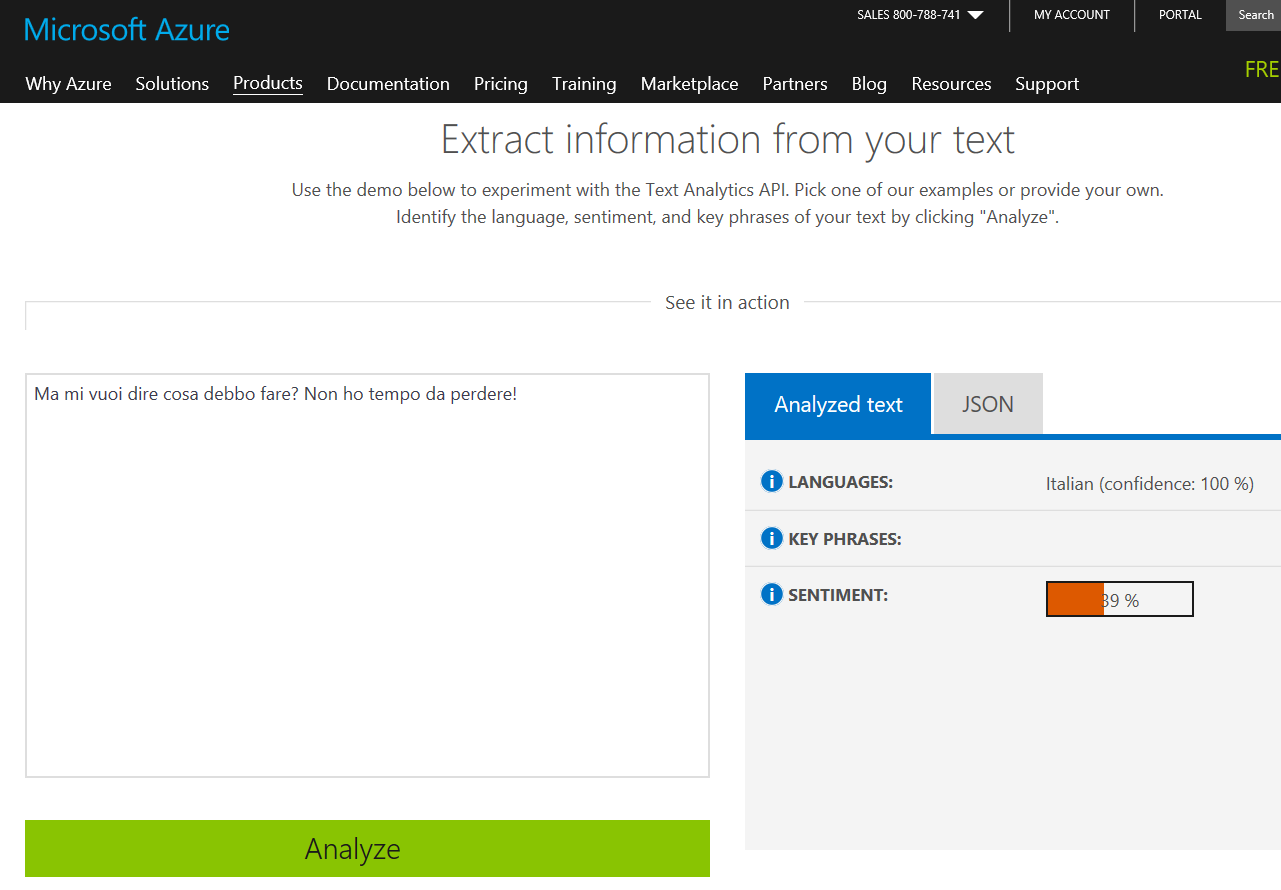

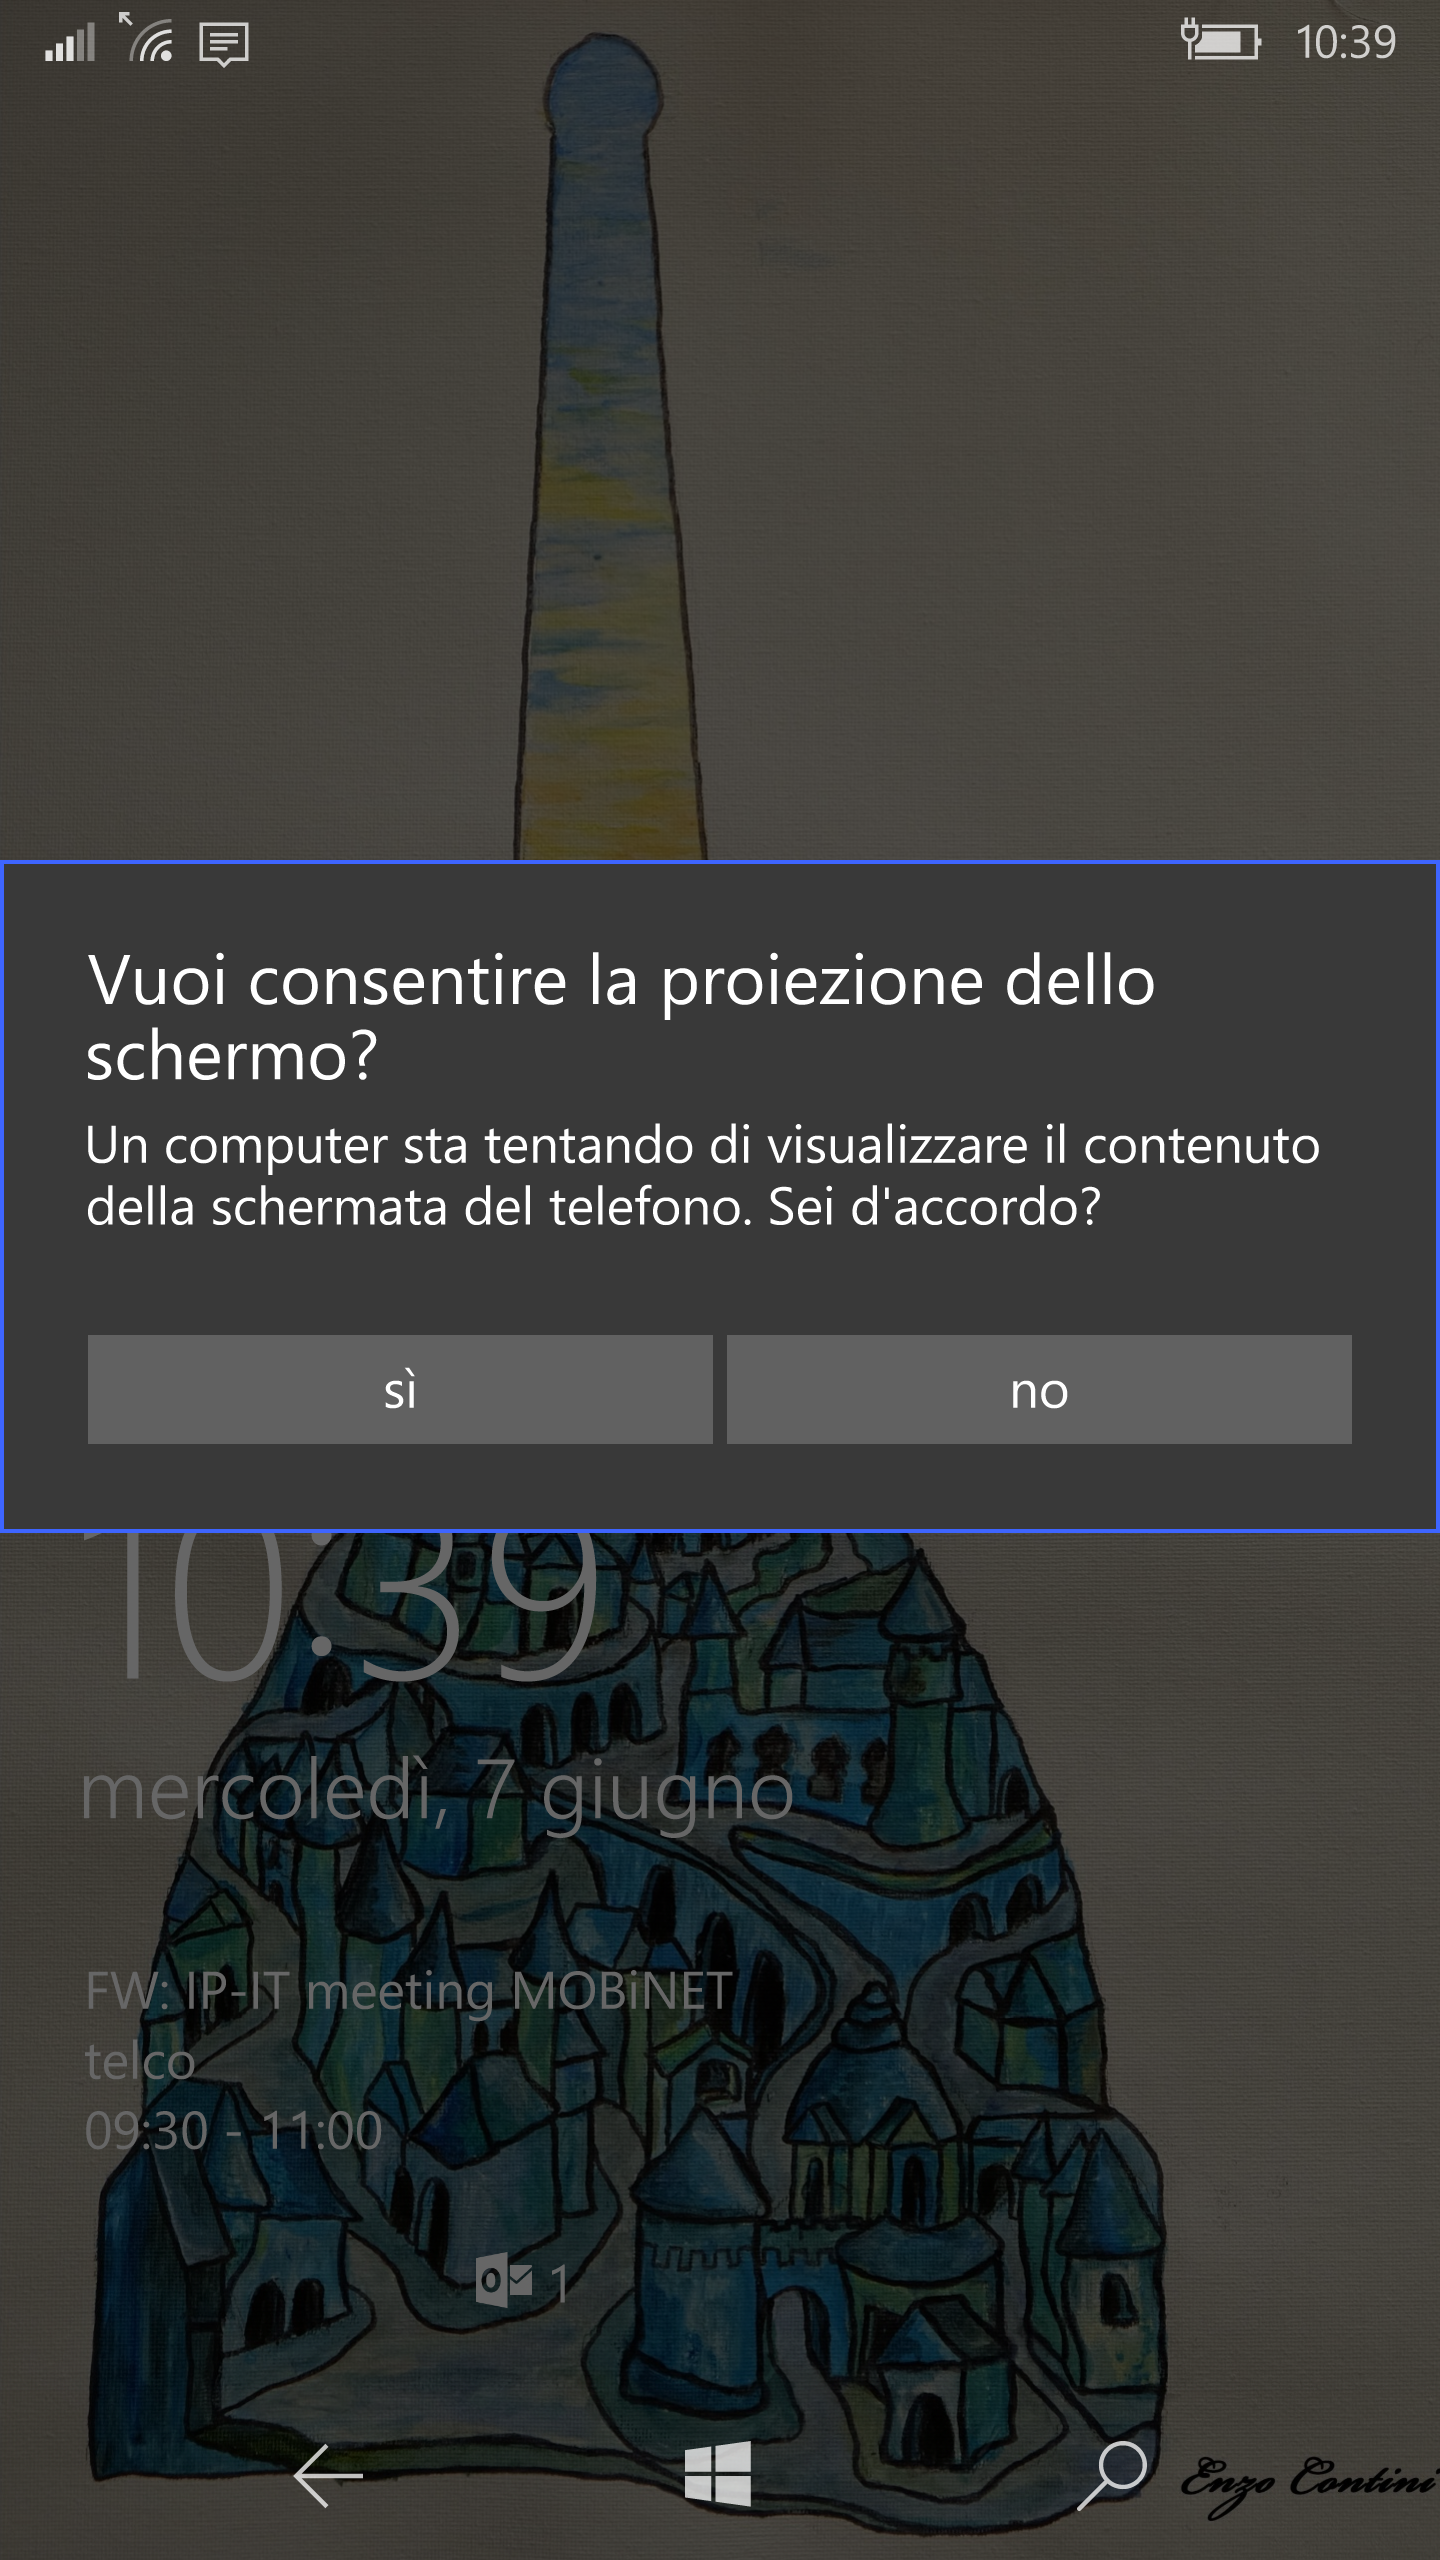
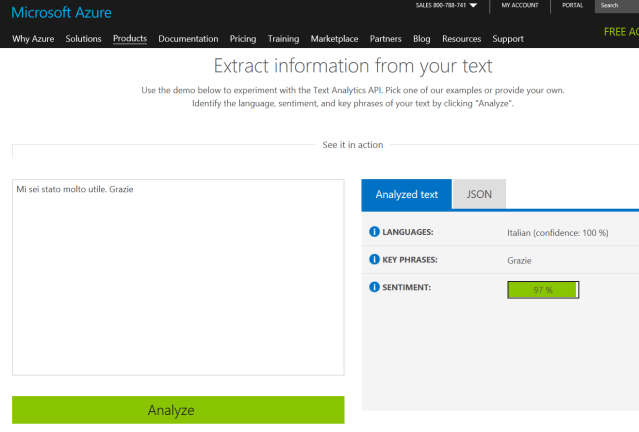 … even in difficult cases:


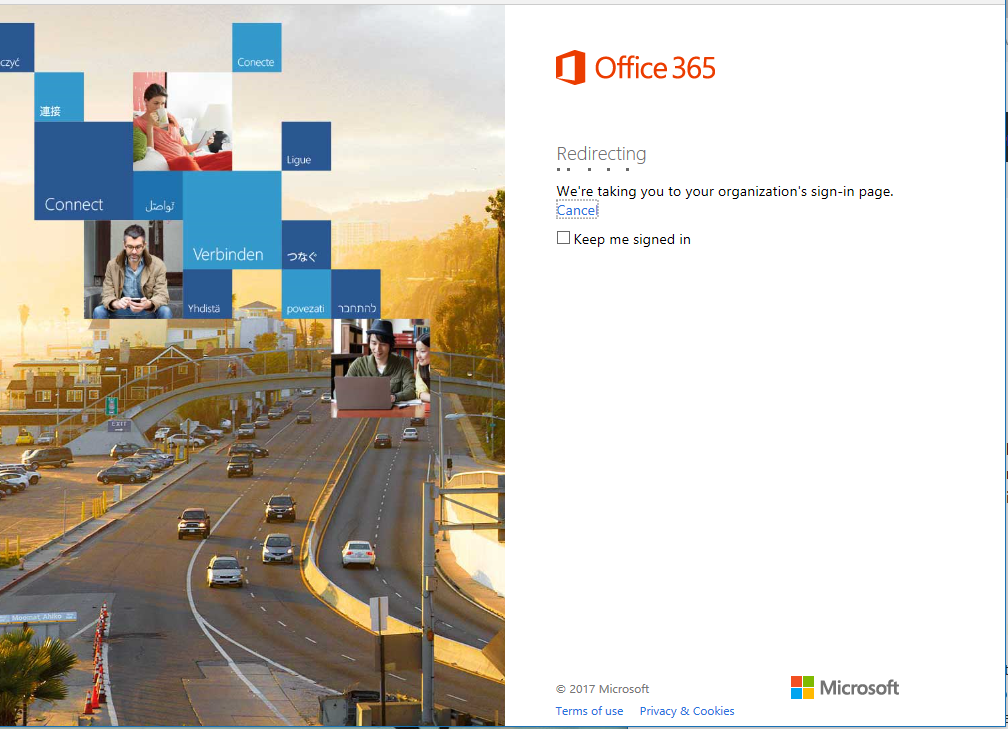
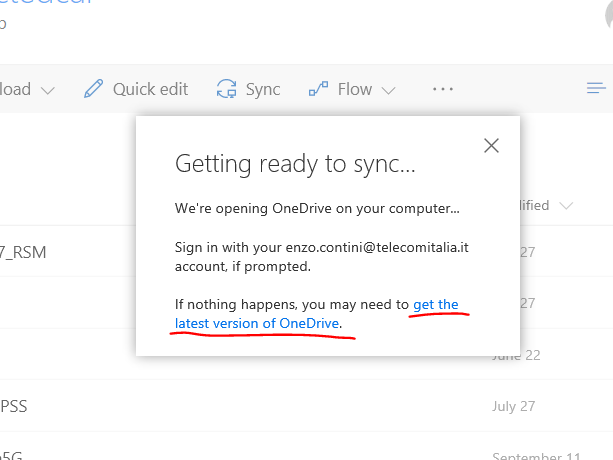
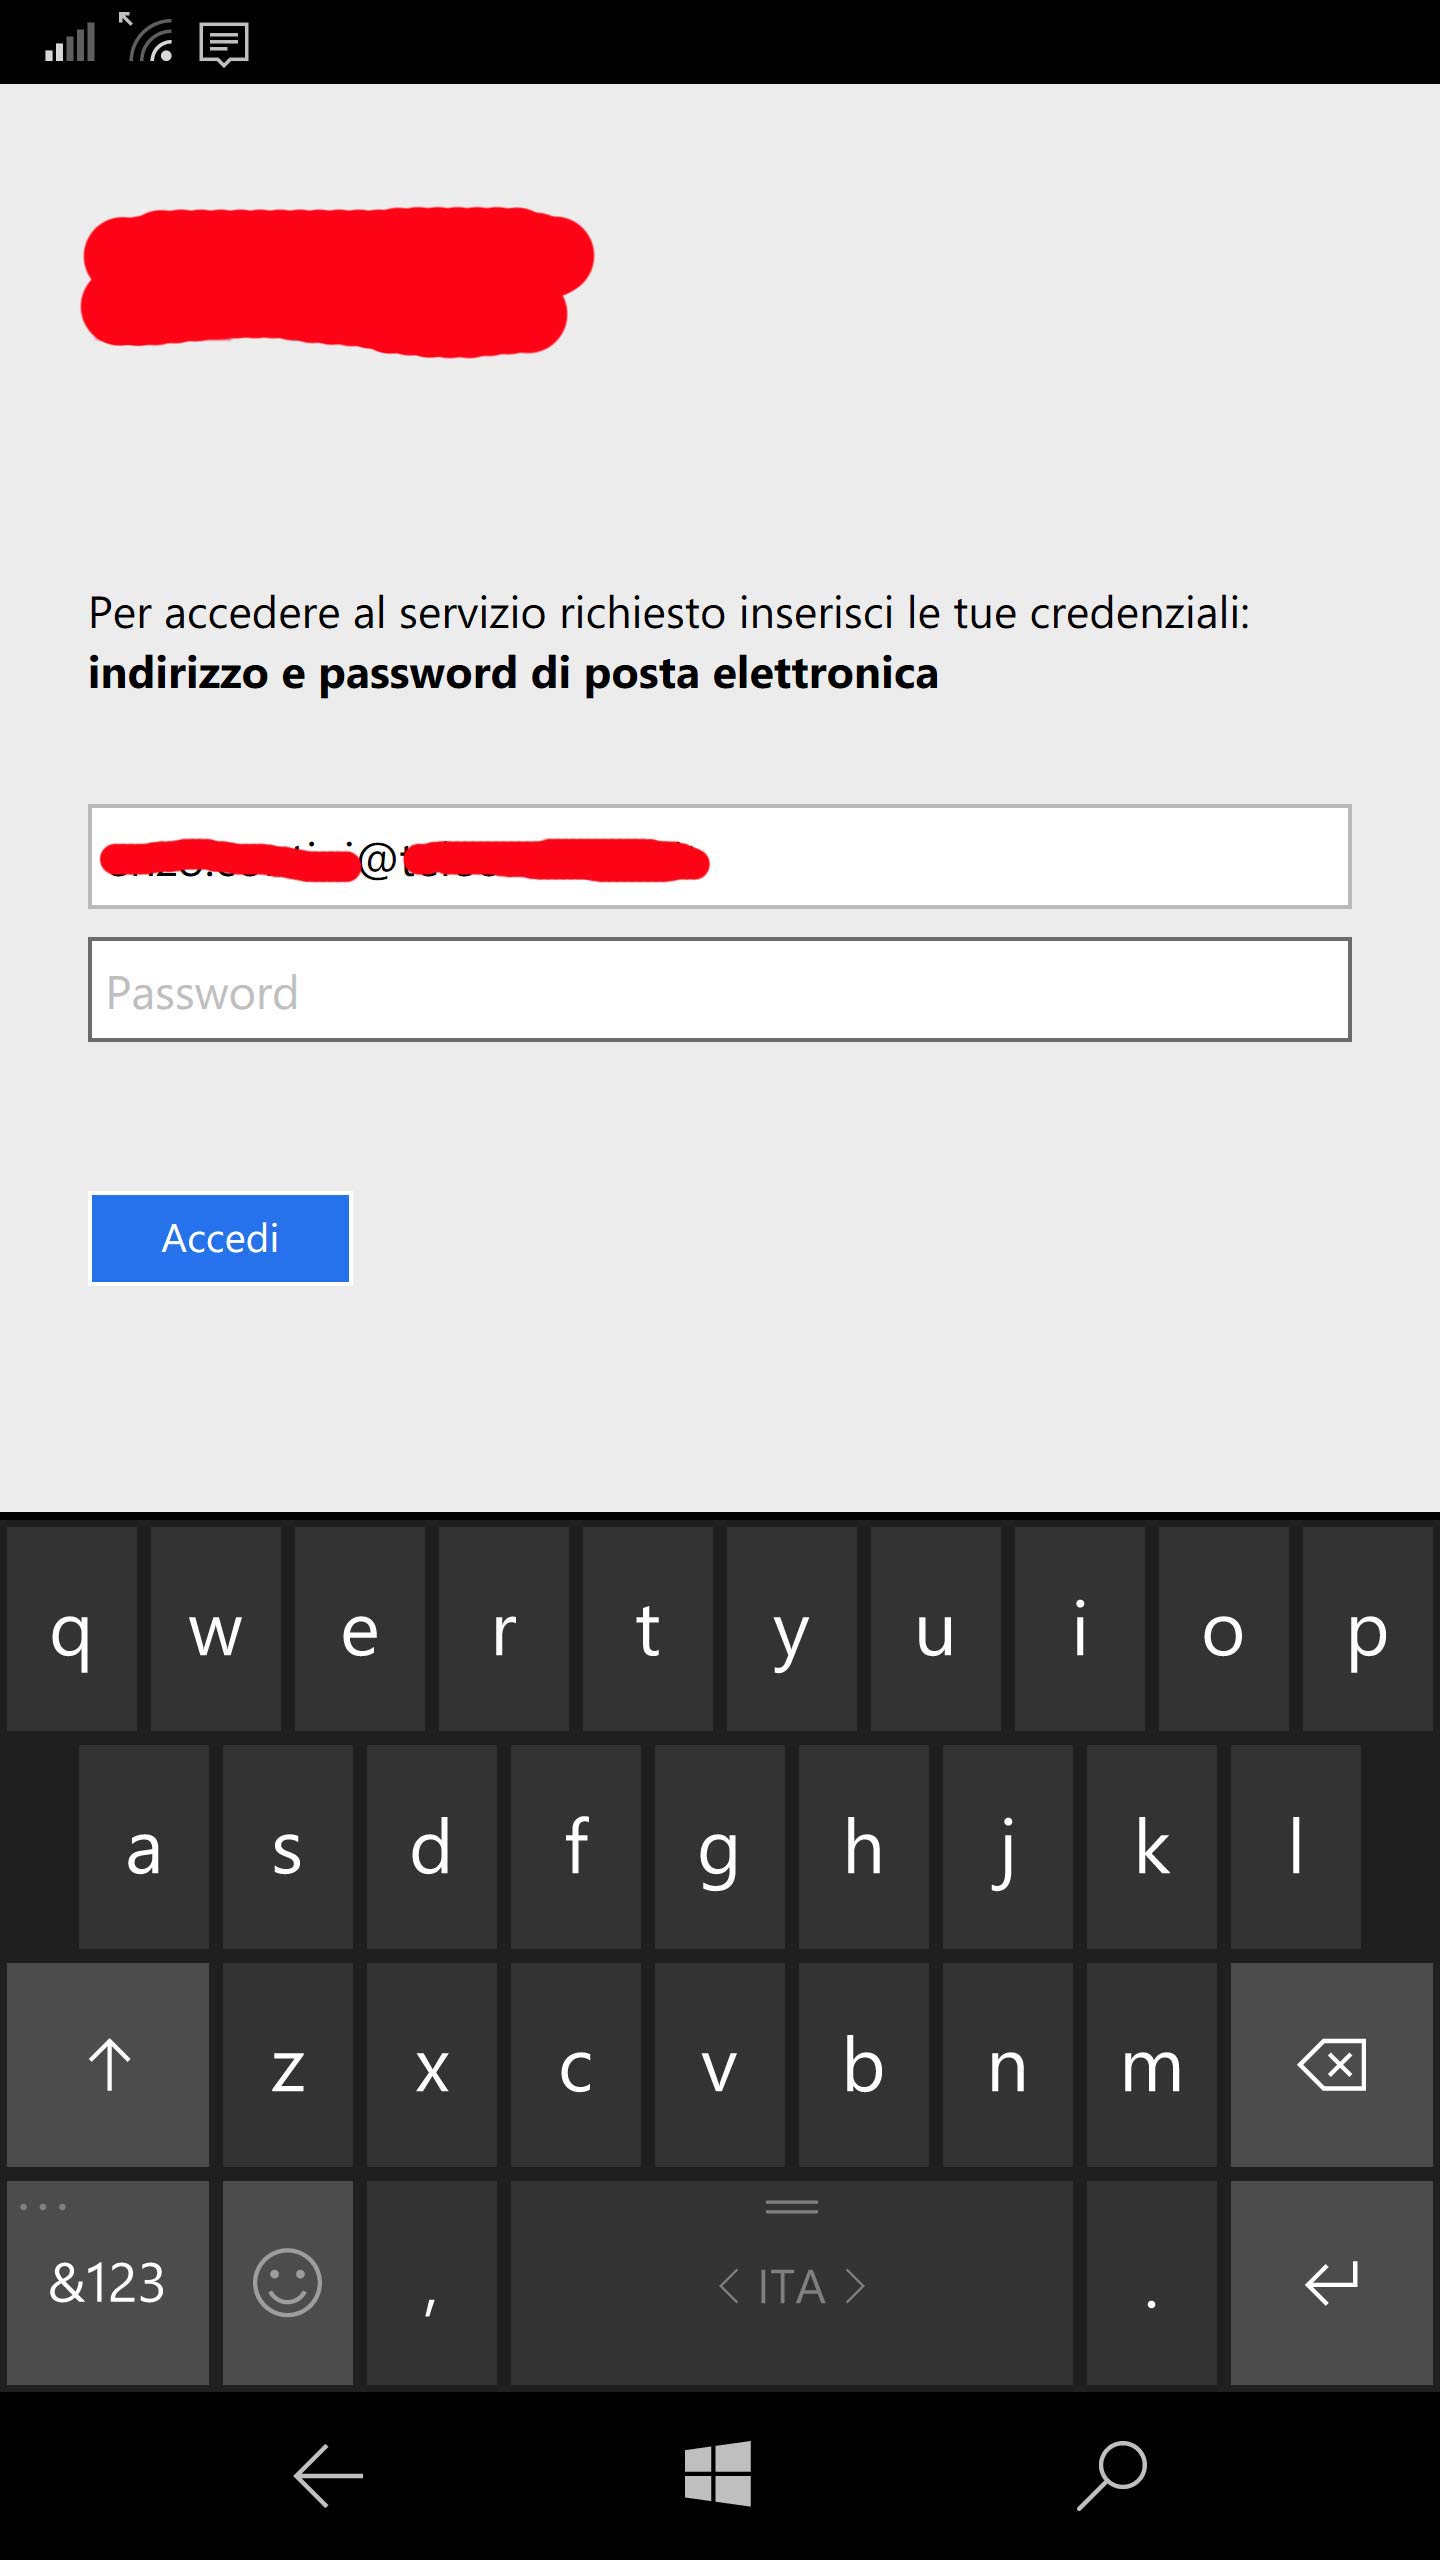
![Login with the account associated to your Company (<em>username</em>: your company email) [not with your private personal <em>Microsoft Account </em>]](https://enzocontini.blog/wp-content/uploads/2017/06/office1.png?w=640)


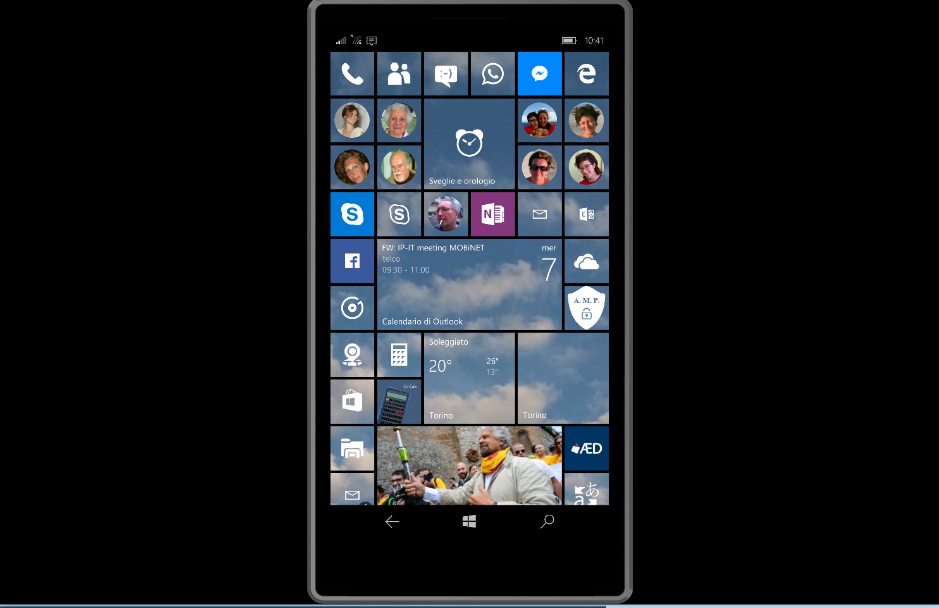
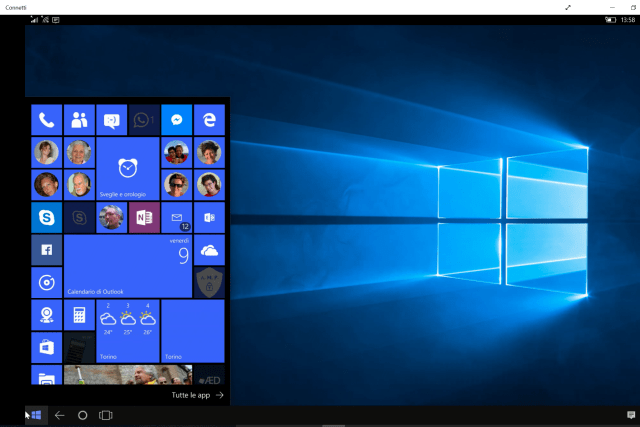 The result is nearly the same when using a Continuum connection, even thought the performance are not the same … but it should be a solution when some delay in the definition of the displayed image can be acceptable!